
Rated 5 out of 5 stars from 1 vote.
Spicy & Satisfying Red and Green Chili Chicken Enchiladas: Your Next Favorite Meal
By:
Julia Pacheco
These vibrant Red and Green Chili Chicken Enchiladas are a fiesta for your taste buds, bringing bold, saucy flavor and a festive twist to any meal. Perfect for a hearty family dinner or as a convenient make-ahead freezer meal, they are guaranteed to become a new favorite in your culinary repertoire.
30 mins
40 mins
1 hr 10 mins
8 servings
Pin Recipe
Comment
Print Recipe
Enchiladas are a beloved Mexican and Tex-Mex dish, and these Red and Green Chili Chicken Enchiladas take them to a whole new level of deliciousness. Combining tender shredded chicken with a creamy, spicy green chili mixture, and then smothering them in rich red enchilada sauce and plenty of cheese, this recipe offers a perfect balance of flavors and textures. Whether you’re planning a lively weeknight dinner, hosting a festive gathering, or looking for a fantastic make-ahead freezer meal option, these enchiladas are incredibly versatile, satisfying, and easy to prepare. The vibrant colors from both red and green chilis not only make this dish visually appealing but also hint at the depth of savory flavor packed into every mouthwatering bite.
Why These Red and Green Chili Enchiladas Will Be Your New Favorite
This recipe isn’t just another enchilada dish; it’s a culinary experience designed for convenience, incredible flavor, and satisfying a crowd. Here’s why these enchiladas stand out:
- Bold and Balanced Flavors: The thoughtful combination of both red and green chili sauces creates a complex, savory, and mildly spicy profile that is simply irresistible. It’s a flavor fiesta in every bite.
- Creamy & Comforting: With tangy sour cream mixed into the succulent chicken filling and a generous amount of shredded cheddar cheese baked until bubbly, these enchiladas are wonderfully rich, comforting, and deeply satisfying.
- Ideal for Meal Prep: This recipe is specifically designed to be freezer-friendly, allowing you to prepare it in advance and enjoy a homemade meal even on your busiest days. It’s an excellent strategy to save time, reduce stress, and ensure wholesome dinners are always within reach.
- Family-Friendly & Crowd-Pleasing: Enchiladas are a universal crowd-pleaser. You can easily adjust the spice level to suit everyone’s preference, making it a guaranteed hit with both adults and children alike.
- Highly Versatile: While tender chicken is the star here, you can easily adapt this recipe with other proteins or make it a vibrant vegetarian dish, catering to diverse dietary preferences.
Get ready to impress your family and friends with this outstanding recipe that brings the heart of Tex-Mex right to your dining table!
Essential Ingredients for Perfect Enchiladas
Gathering the right, high-quality ingredients is the crucial first step to creating these incredible enchiladas. Each component plays a vital role in building the layers of flavor that make this dish so special and memorable. Freshness and quality will elevate your final product.
- 3 large chicken breasts, cooked and finely shredded. For optimal results, cook chicken breasts by boiling, baking, or using an Instant Pot until they are incredibly tender and easy to shred. Aim for approximately 2-3 cups of shredded chicken to ensure a hearty filling.
- 4 oz can diced green chilis. These add a distinct, mild, and earthy chili flavor that enhances the overall profile without introducing excessive heat. Opt for a good quality brand to ensure the best taste and texture.
- ½ cup sour cream. Sour cream is essential for making the filling wonderfully creamy, rich, and moist, helping to bind all the ingredients together seamlessly. Both full-fat or light sour cream varieties will work equally well.
- 20 oz red enchilada sauce. For convenience, a good quality store-bought red enchilada sauce is perfectly acceptable, or you can craft a delicious homemade version if you have the time. This sauce forms the savory cornerstone of the enchilada’s rich and authentic flavor.
- 3 ½ cups shredded cheddar cheese. Cheddar cheese offers a classic, sharp, and tangy flavor that melts beautifully, creating a gooey, irresistible topping. A blend of cheddar and Monterey Jack, or a readily available Mexican cheese blend, would also be a delicious alternative.
- 1 package flour tortillas or corn tortillas. The choice between flour and corn tortillas is largely a matter of personal preference. Flour tortillas are typically softer, more pliable, and easier to roll without breaking. Corn tortillas, on the other hand, offer a more traditional and authentic flavor. If you opt for corn tortillas, briefly warming them before assembly is highly recommended to prevent tearing.
Recommended Kitchen Equipment
Having the right kitchen tools on hand will significantly streamline the preparation process, making your enchilada-making experience smooth and enjoyable:
- Large Mixing Bowl: Essential for combining the chicken filling ingredients.
- Two 9×13 Inch Baking Tins: Aluminum foil tins are excellent for freezer meals, but glass baking dishes also work perfectly if you plan to bake immediately.
- Measuring Cups and Spoons: For accurate ingredient proportions.
- Large Spoon or Spatula: Ideal for mixing the filling and spooning it into tortillas.
- Aluminum Foil: Used for covering the enchiladas during baking and for freezing.
- Plastic Cling Wrap: Crucial for tightly sealing freezer meals to prevent freezer burn.
Step-by-Step Instructions: Crafting Your Enchiladas
Follow these detailed steps to create delicious Red and Green Chili Chicken Enchiladas that are perfect for any occasion. Pay close attention to these tips for optimal results, especially if you’re planning to prepare them as a convenient freezer meal.
-
Step 1: Prepare the Flavorful Filling. In a large mixing bowl, thoroughly combine the cooked and finely shredded chicken, the diced green chilis, the creamy sour cream, ½ cup of the robust red enchilada sauce, and ½ cup of the shredded cheddar cheese. Mix all these ingredients meticulously until they are uniformly combined. This crucial step ensures that every single bite of your enchilada is packed with consistent and balanced flavor.
-
Step 2: Prepare the Baking Dishes. Pour a thin, even layer of the remaining red enchilada sauce into the bottom of two 9×13 inch aluminum baking tins (or your preferred glass baking dishes). This important foundational step not only prevents the tortillas from sticking to the bottom during baking but also adds another delightful layer of chili flavor to the dish.
-
Step 3: Expertly Assemble the Enchiladas. Take one tortilla at a time. Place a generous couple of spoonfuls of the prepared chicken mixture onto the center of the tortilla. Carefully roll it up tightly, ensuring the filling is secure, and then place it seam-side down in the prepared baking tin. Repeat this precise process until all the delicious filling and tortillas are used, arranging them snugly in the tins to maximize space and ensure even cooking.
-
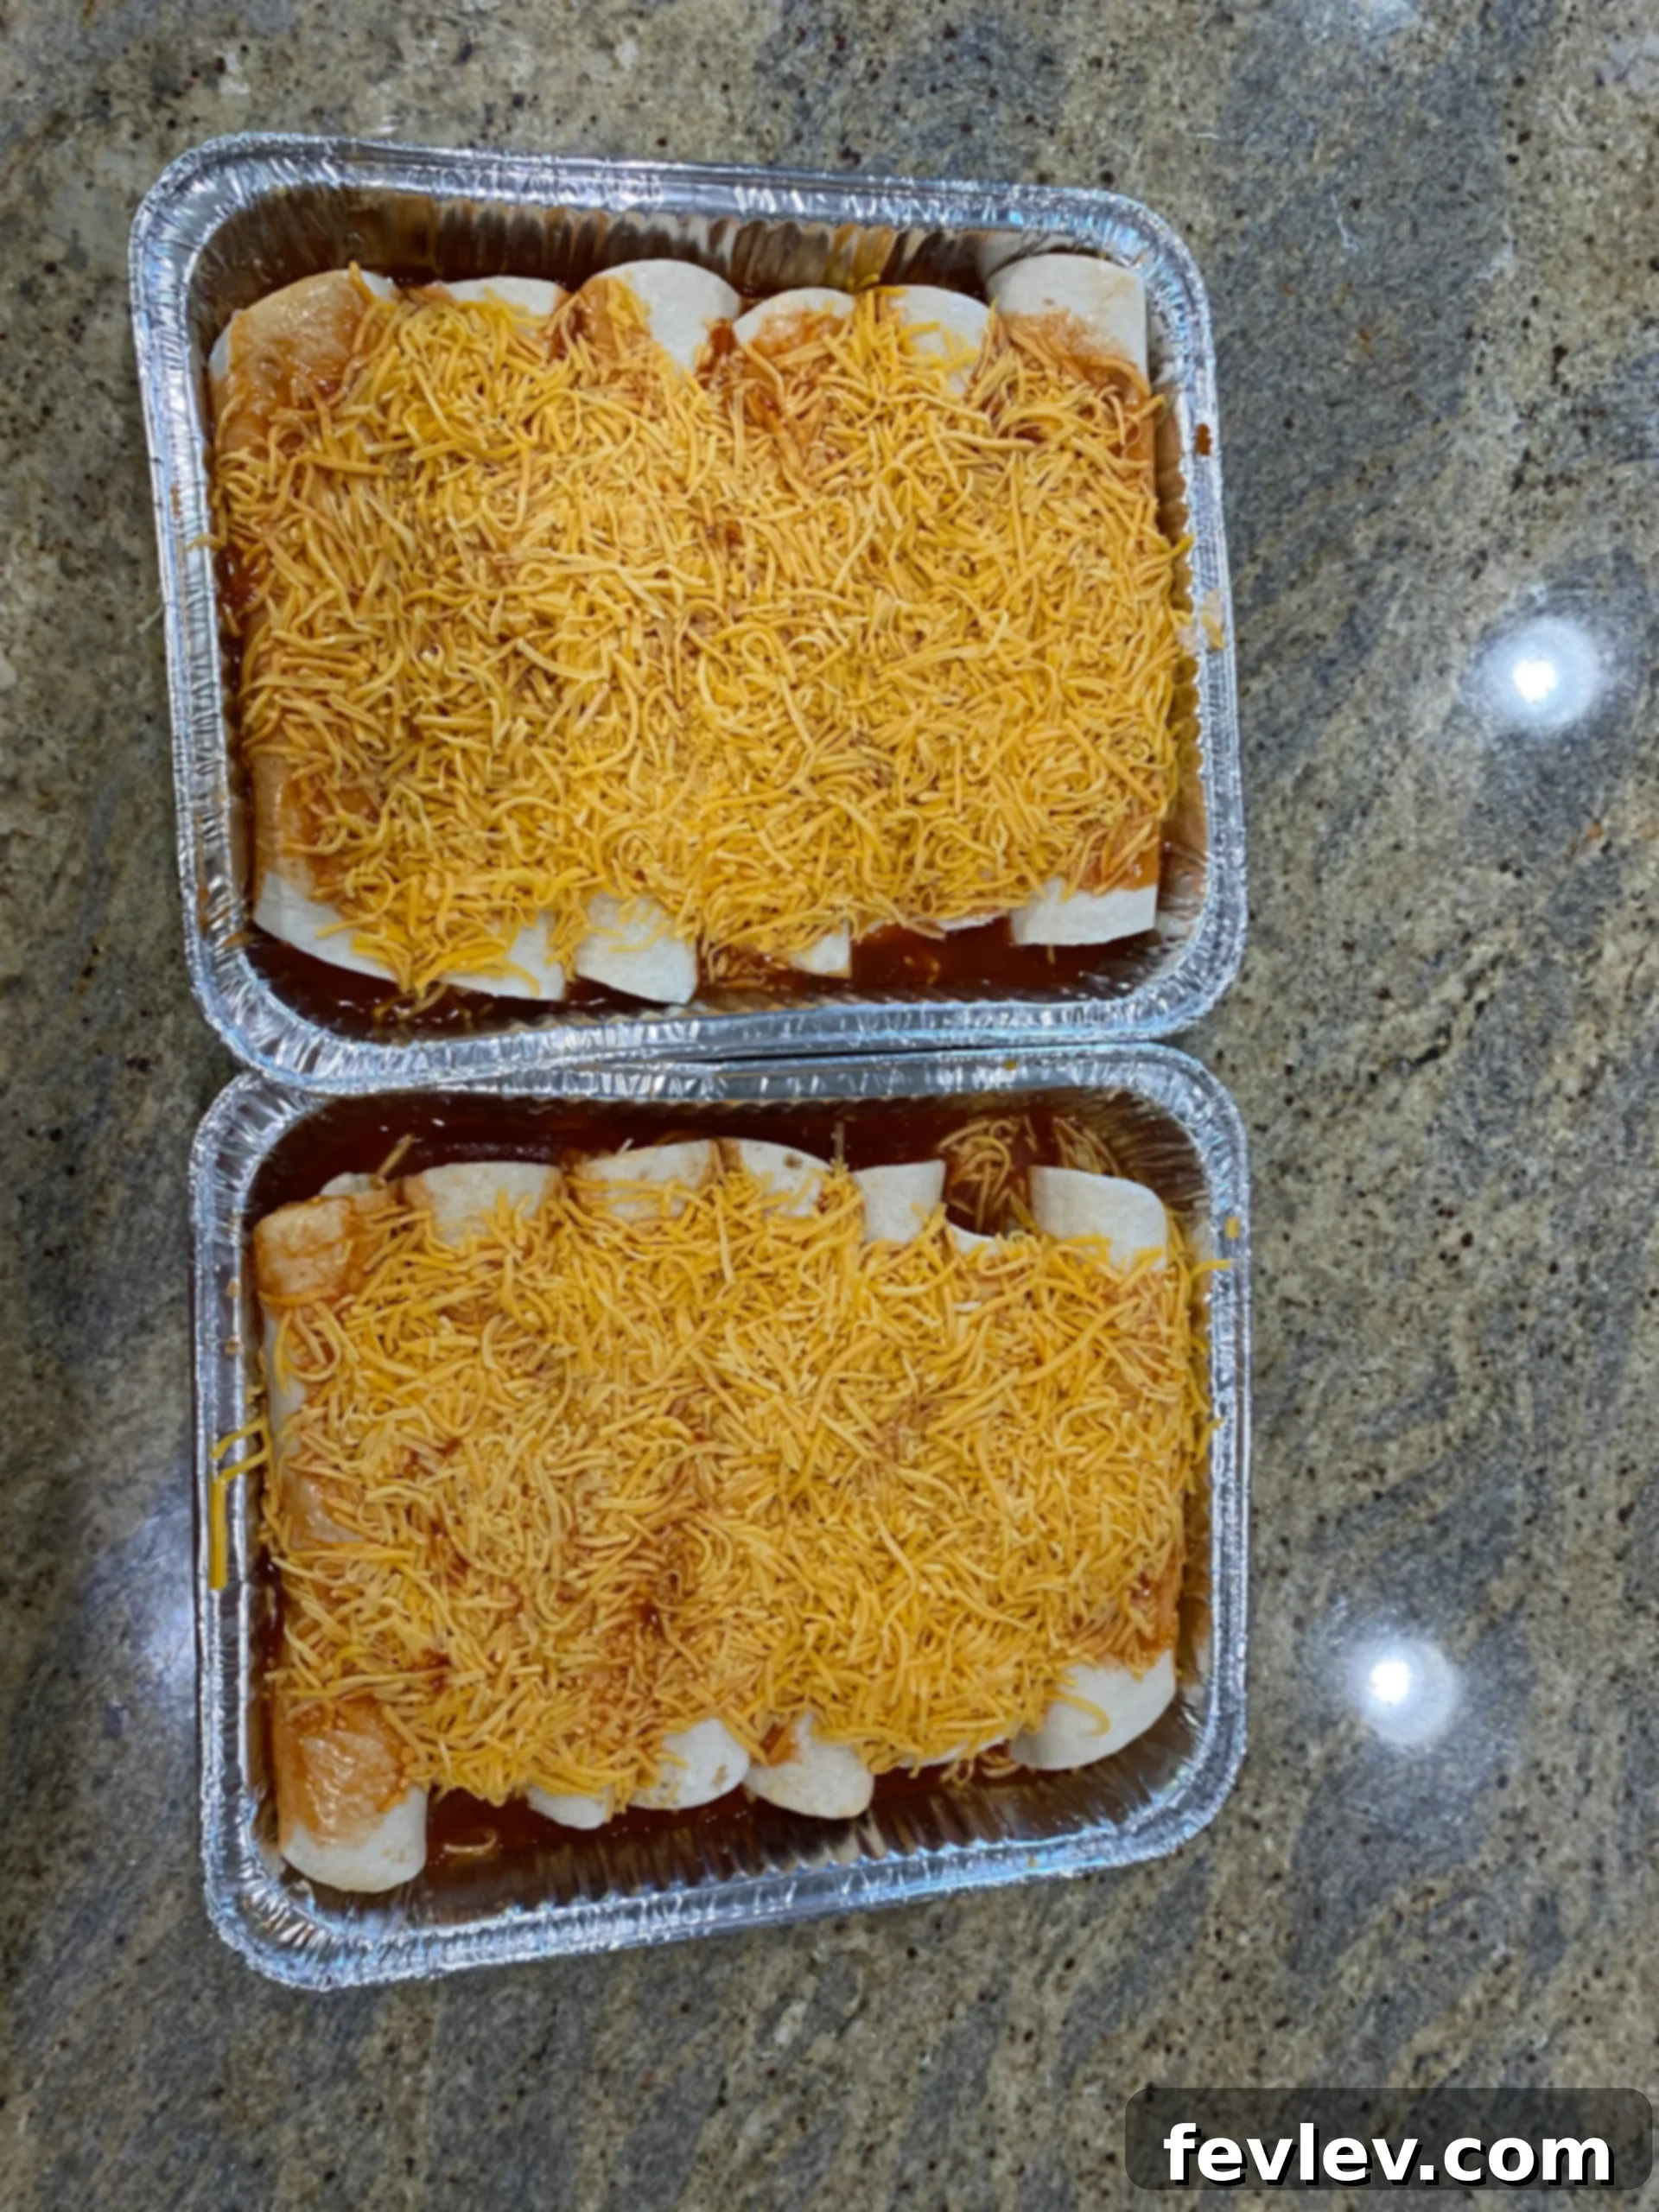
Step 4: Top with More Sauce and Cheese. Once all the enchiladas are neatly assembled and arranged in the tins, generously top them with the remaining red enchilada sauce. You have the flexibility to use as much or as little sauce as you desire, depending on your preferred level of sauciness. Finally, finish by sprinkling the remaining shredded cheese evenly and liberally over the top. Remember, the more cheese, the merrier!
-
Step 5: Freezer Meal Preparation (Optional but Recommended). If you are wisely preparing these as a convenient freezer meal, cover each baking tin tightly with a layer of sturdy plastic cling wrap, taking care to press it down to eliminate any air pockets. Follow this with a second, robust layer of aluminum foil for extra protection against freezer burn. This double-layer method ensures your enchiladas remain fresh and flavorful. Crucially, don’t forget to label each tin clearly with the date it was made, the recipe name (“Red and Green Chili Chicken Enchiladas”), and the precise cooking instructions for effortless reference when you’re ready to bake them.
-
Step 6: Bake to Perfection. Preheat your oven to a consistent 350°F (175°C). If baking immediately, cover the tin securely with aluminum foil. Bake for a foundational 35 minutes covered. After this initial baking, carefully remove the foil and continue to bake for an additional 5 minutes, or until the cheese is wonderfully bubbly, melted, and lightly golden brown on top. If you are baking from a frozen state, it is highly recommended to thaw the enchiladas completely in the refrigerator overnight before baking. Alternatively, if baking from frozen, add an additional 15-20 minutes to the covered baking time, ensuring they are heated through completely.
Making Enchiladas a Freezer Meal: Cook Once, Enjoy Multiple Times!
One of the most outstanding features of this Red and Green Chili Chicken Enchilada recipe is its incredible adaptability as a freezer meal. Preparing meals in advance can be an absolute lifesaver on busy weekdays, providing wholesome, homemade dinners with minimal effort and maximum flavor. Here’s a detailed guide to making the most of this fantastic make-ahead option:
The Advantages of Freezing Enchiladas:
- Unmatched Convenience: Enjoy a delicious, ready-to-bake meal whenever hunger strikes, without the stress of last-minute cooking.
- Significant Time Savings: Prepare a double batch during your cooking session, effectively saving valuable time and effort later in the week or month.
- Reduced Food Waste: Efficiently utilize all your ingredients, minimizing waste and making your grocery budget go further.
Detailed Freezing Instructions:
- Follow steps 1-4 of the main instructions precisely, assembling the enchiladas completely in oven-safe, freezer-safe baking dishes (aluminum tins are particularly ideal for this purpose).
- Ensure the assembled enchiladas are completely cool before proceeding with the wrapping process.
- Cover the dish with a tight, unbroken layer of plastic cling wrap, making sure to press it down firmly to eliminate any air pockets that could lead to freezer burn.
- Wrap a second, protective layer of heavy-duty aluminum foil tightly around the entire dish. This double layer provides superior protection against freezer burn and helps preserve the fresh flavors and textures.
- Clearly label the foil with the recipe name, the exact date it was prepared, and concise baking instructions for easy identification and future use.
- Freeze for up to 3 months for optimal taste and quality.
Cooking from Frozen (Thawing Recommended):
- For the absolute best results and most even heating, it is highly recommended to thaw the enchiladas in the refrigerator overnight before baking.
- If you choose to bake directly from frozen, first remove the plastic cling wrap (but keep the aluminum foil cover intact). Place the frozen enchiladas in a cold oven, then set your oven to preheat to 350°F (175°C).
- Bake covered with foil for approximately 50-60 minutes, or until the enchiladas are thoroughly heated through to the center.
- Finally, remove the foil and continue to bake for an additional 10-15 minutes until the cheese is beautifully melted, bubbly, and slightly golden.
Crucial Reminder: Always remember to remove all plastic cling wrap before placing any dish in the oven! Aluminum foil is oven-safe, but plastic will melt and can be harmful.
Delightful Serving Suggestions for Your Enchiladas
While these Red and Green Chili Chicken Enchiladas are undoubtedly a satisfying meal on their own, they pair wonderfully with a variety of classic side dishes to complete your Tex-Mex feast and enhance the overall dining experience:
- Authentic Mexican Rice: A perennial classic pairing that perfectly complements the rich flavors of the enchiladas.
- Creamy Refried Beans: Hearty and comforting refried beans add a wonderfully smooth and filling touch to your plate.
- Fresh Green Salad: A simple, crisp green salad tossed with a light lime vinaigrette can offer a refreshing contrast and cut through the richness of the enchiladas.
- Customizable Toppings Bar: Elevate the experience by offering a variety of fresh toppings such as extra sour cream, homemade guacamole, vibrant salsa, fresh pico de gallo, fragrant fresh cilantro, or thinly sliced jalapeños for a customizable and interactive meal.
- Sweet Corn on the Cob: Sweet corn, whether grilled, boiled, or simply served fresh, provides a delightful and refreshing side.
Creative Recipe Variations to Explore
Don’t hesitate to get creative and personalize this recipe to suit your taste preferences! Here are a few exciting ideas to customize your Red and Green Chili Chicken Enchiladas:
- Alternate Proteins: Easily substitute the shredded chicken with succulent shredded beef (carnitas), seasoned ground beef, or even tender shredded pork. For a delicious vegetarian alternative, use a hearty mix of black beans, sweet corn, and sautéed bell peppers.
- Diverse Cheese Blends: Experiment with different cheeses! Monterey Jack, Colby Jack, or a spicy Pepper Jack cheese can add an extra kick and different texture. A blend of multiple cheeses always works wonderfully.
- Sauce Experimentation: If you prefer a single chili flavor profile, use only red or only green enchilada sauce. For an added smoky depth and a bit more heat, consider whisking in a touch of chipotle in adobo sauce.
- Adjusting Spice Levels: To increase the heat, you can incorporate a small amount of finely diced fresh jalapeños or serrano peppers directly into the chicken filling. A pinch of cayenne pepper or a dash of your favorite hot sauce can also boost the spice level. Fresh or pickled jalapeños as a topping also provide a nice zing.
- Low-Carb Alternatives: For those following a low-carb diet, consider using almond flour tortillas, or skip the tortillas entirely and serve the flavorful chicken filling baked inside bell pepper halves or as a delicious enchilada casserole.
Recipe Video: Watch How to Master These Enchiladas!
Visual learners, rejoice! See the full process of creating these delicious Red and Green Chili Chicken Enchiladas in action. This helpful video demonstrates how easily these savory enchiladas come together, providing clear guidance, including invaluable tips for efficient meal prepping and successful freezing.
Important Notes for Enchilada Success
- Remove Plastic Before Baking: This is critical! Always remember to remove any plastic cling wrap from your baking dishes before placing them in a hot oven. Aluminum foil is oven-safe, but plastic will melt.
- Perfectly Shredded Chicken: For the most tender and easily shredded chicken, ensure it is cooked until it is very tender. A fork should effortlessly pull the meat apart. This texture is ideal for the enchilada filling.
- Warming Corn Tortillas: If you choose to use corn tortillas, it’s highly recommended to warm them slightly in a microwave for a few seconds or on a dry skillet before you begin filling and rolling. This process makes them much more pliable and significantly helps to prevent them from cracking and tearing during assembly.
Nutrition Information (Approximate)
Understanding the estimated nutritional content of your meal can assist you in making informed dietary choices. Here’s an approximate breakdown per serving:
Calories: 466kcal |
Carbohydrates: 26g |
Protein: 34g |
Fat: 25g |
Saturated Fat: 12g |
Polyunsaturated Fat: 2g |
Monounsaturated Fat: 6g |
Trans Fat: 0.01g |
Cholesterol: 112mg |
Sodium: 1357mg |
Potassium: 430mg |
Fiber: 3g |
Sugar: 7g |
Vitamin A: 1101IU |
Vitamin C: 7mg |
Calcium: 425mg |
Iron: 2mg
Disclaimer: This nutrition information is automatically calculated based on the provided ingredients and should only be used as an approximation. Individual nutritional values may vary based on exact ingredient brands, preparation methods, and serving sizes.
Frequently Asked Questions (FAQs) About These Enchiladas
- Can I prepare these Red and Green Chili Chicken Enchiladas ahead of time?
- Absolutely! This recipe is exceptionally well-suited for meal prepping. You can assemble them completely and then freeze them for up to 3 months. For the best reheating results, remember to thaw them overnight in the refrigerator before baking.
- What type of tortillas should I use for this recipe?
- Both flour and corn tortillas work wonderfully. Flour tortillas tend to be softer, more pliable, and generally easier to roll without tearing. If you prefer the authentic taste of corn tortillas, a brief warming session (in a microwave or on a dry skillet) before filling will make them more flexible and prevent cracking.
- How can I increase the spiciness of these enchiladas?
- To add more heat, you have several options. You can finely dice and include fresh jalapeños or serrano peppers directly into the chicken filling. A small pinch of cayenne pepper or a dash of your favorite hot sauce can also be mixed into the filling or sauce. For a topping, sliced fresh jalapeños or a fiery salsa will definitely bring the heat.
- Can I substitute other types of cheese?
- Yes, absolutely! Feel free to get creative with your cheese choices. Monterey Jack, Colby Jack, a spicy Pepper Jack cheese, or even a sharp white cheddar would all make delicious alternatives or excellent additions to the cheddar cheese. A good Mexican cheese blend is also a fantastic choice.
Final Thoughts: Your Culinary Journey with Enchiladas
These Red and Green Chili Chicken Enchiladas are more than just a meal; they’re an invitation to gather, share, and truly savor the rich, comforting, and vibrant flavors of Tex-Mex cuisine. With their striking colors, savory shredded chicken filling, and abundant melted cheese, they are undoubtedly destined to become a cherished and frequently requested recipe in your household. Whether you prepare them fresh for an immediate, celebratory feast or cleverly stash them in the freezer for a future busy evening, these enchiladas promise a deeply satisfying, flavorful, and incredibly convenient dining experience. Don’t be shy – dive into the preparation, embrace the delicious aromas, and savor every single mouthwatering bite!
Tried this recipe?
Let us know how it was!