
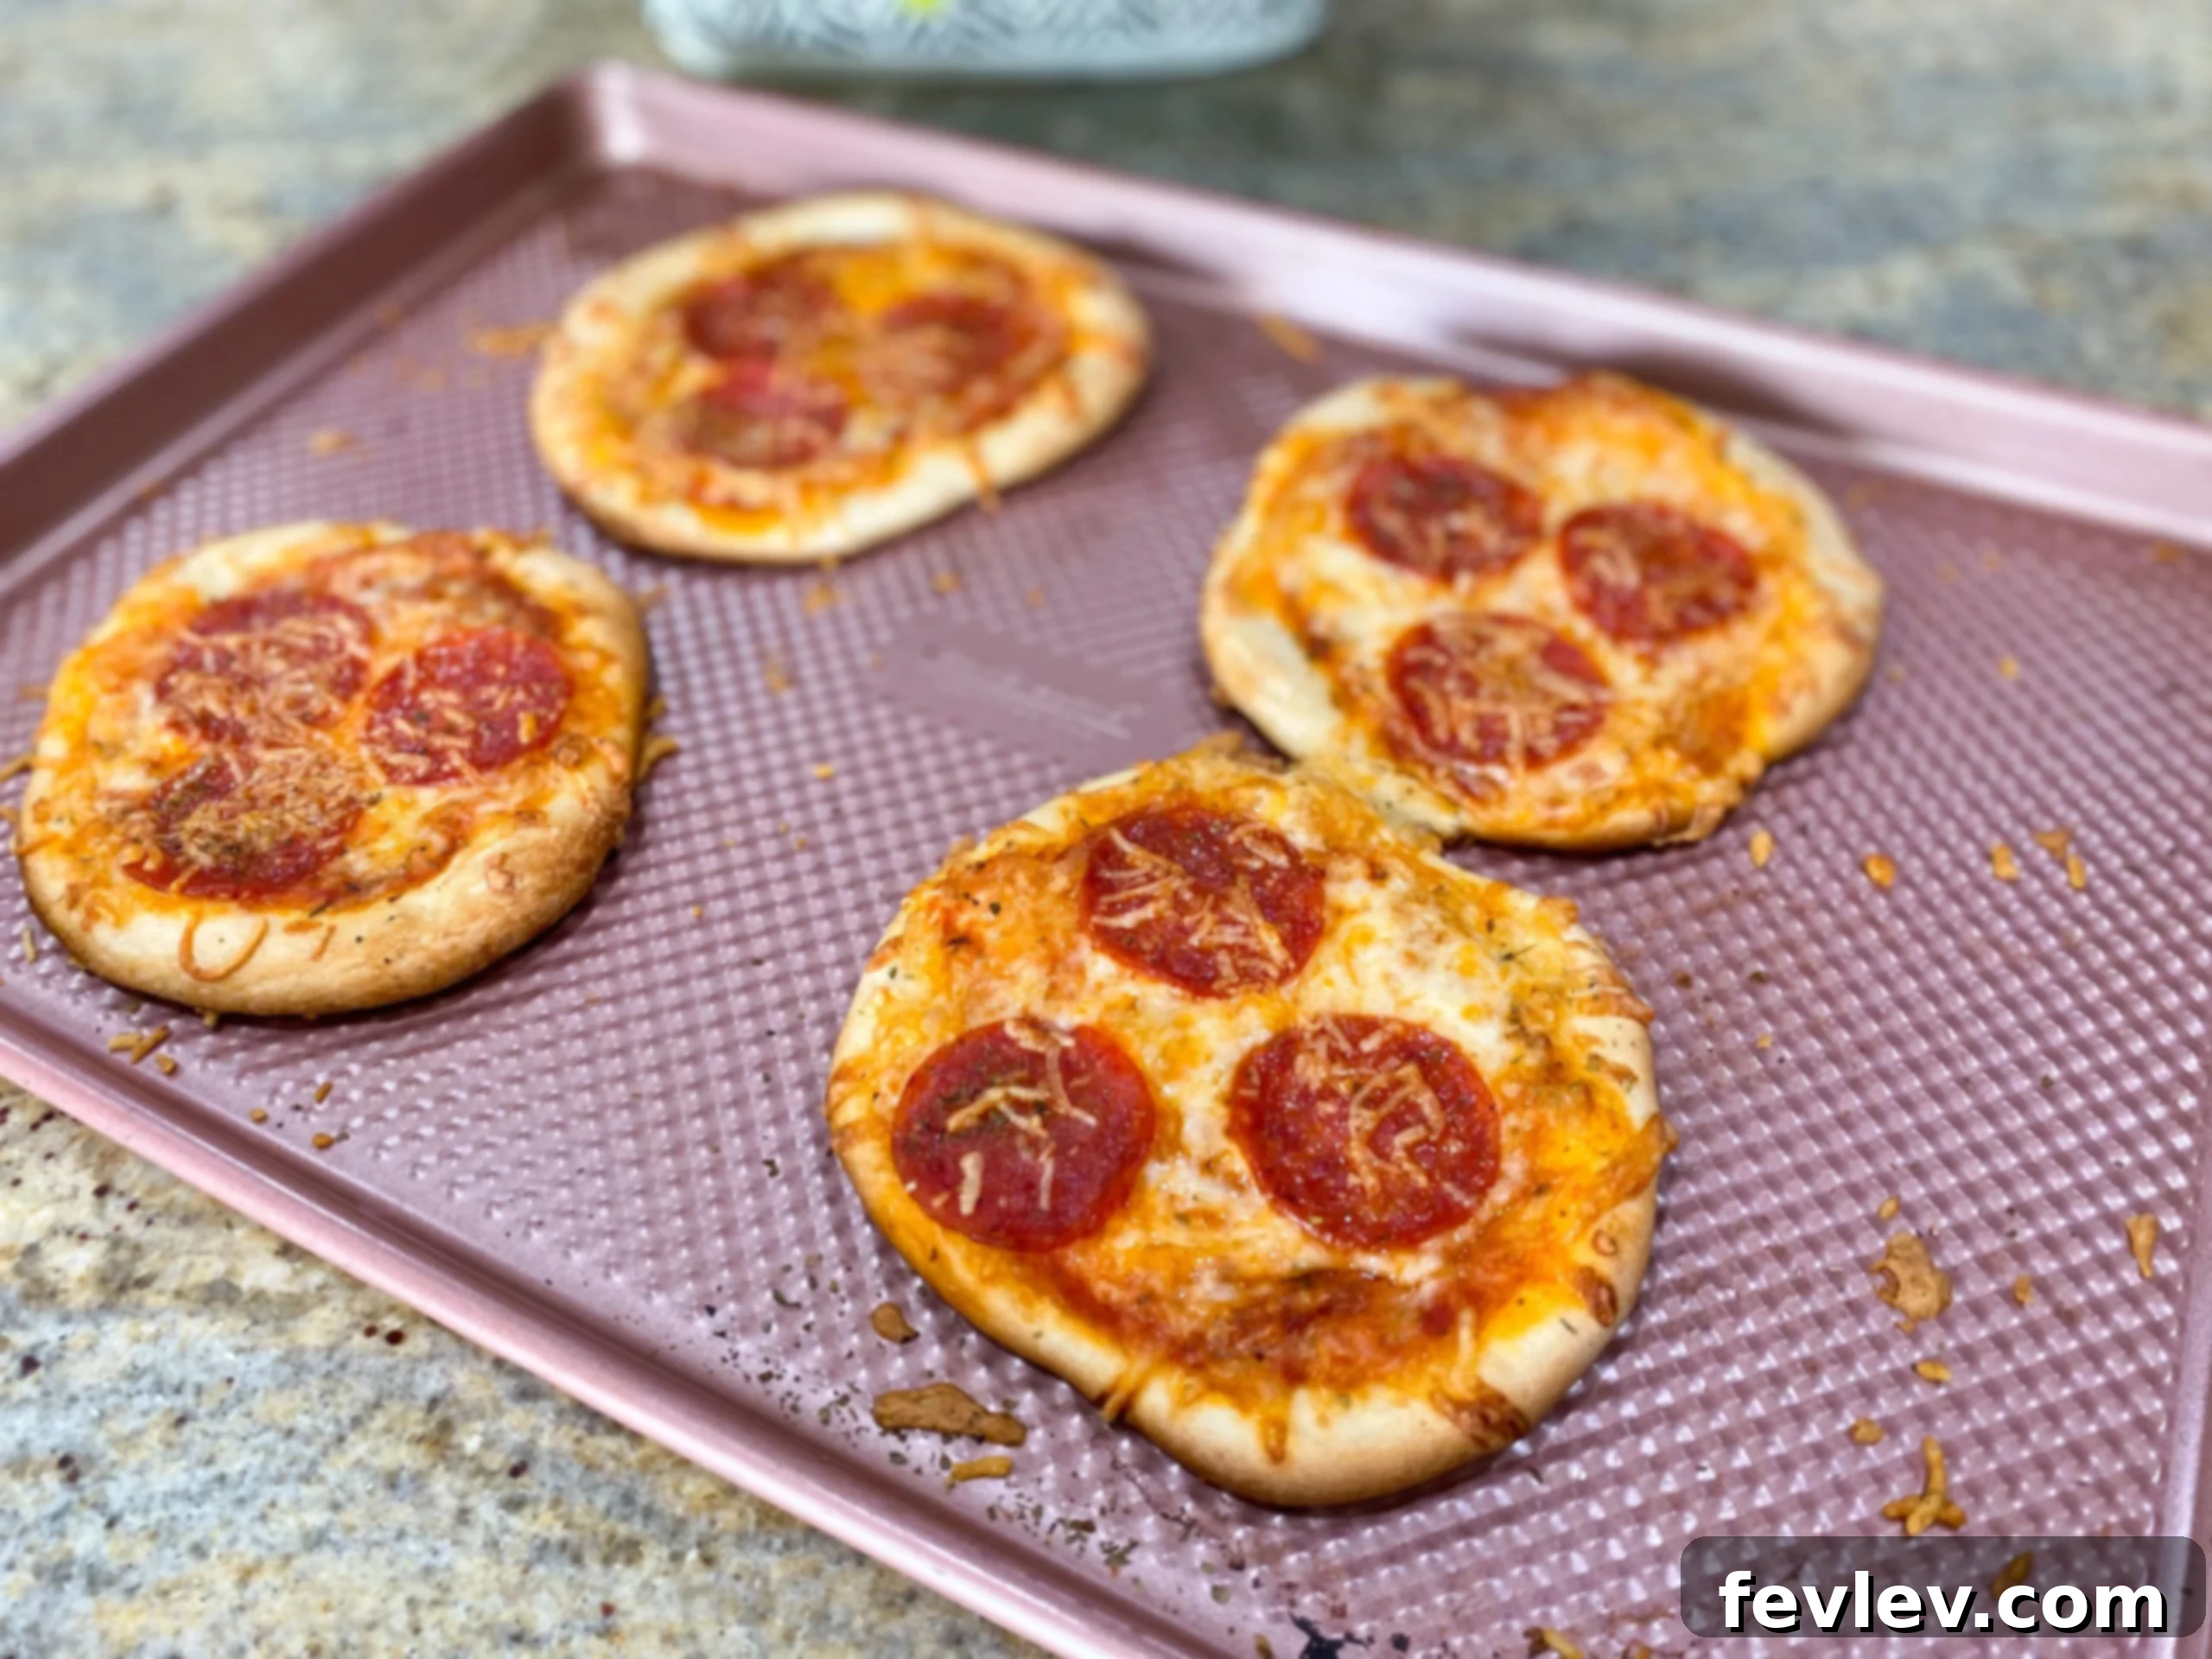
Effortless Personal Pizzas: The Ultimate Roll Dough Recipe
Julia Pacheco
Revolutionize your family pizza night with these incredibly quick and customizable personal pizzas, crafted using simple roll dough. This recipe ensures everyone gets to create their ideal pizza masterpiece, making dinner both fun and delicious!
6 mins
9 mins
15 mins
4 servings
Pin Recipe
Comment
Print Recipe
In the bustling rhythm of modern life, finding quick, satisfying, and enjoyable dinner options can be a challenge. That’s where homemade personal pizzas come to the rescue! This ingenious recipe, featuring the humble yet versatile roll dough, transforms ordinary weeknights into exciting culinary adventures. Forget lengthy rising times and complicated crust recipes; we’re embracing convenience without compromising on flavor or the joy of crafting your own meal. With just a handful of ingredients and minimal effort, you can have piping hot, personalized pizzas ready in mere minutes.
Why Choose Roll Dough for Your Personal Pizzas?
The secret to this recipe’s lightning-fast preparation lies in its brilliant use of frozen dinner roll dough. Often overlooked beyond its traditional role as a side for meals, this pre-made dough is an absolute game-changer for quick pizzas. It thaws quickly, is easy to work with, and bakes up into a delightfully soft yet slightly crisp crust that perfectly complements your favorite toppings. Using roll dough eliminates the need for mixing, kneading, and waiting for yeast to activate, drastically cutting down on your prep time. It’s an ideal solution for busy parents, students, or anyone craving a homemade pizza fix without the fuss.
Furthermore, frozen dinner rolls are readily available in most grocery stores, making them an accessible base for spontaneous pizza cravings. They provide a consistent texture and flavor, ensuring your personal pizzas turn out perfectly every time. This method is not just about speed; it’s about smart cooking, leveraging convenience products to create impressive results.
The Magic of Customization: Endless Topping Possibilities
One of the greatest joys of personal pizzas is the freedom to customize. Each family member can become their own pizzaiolo, choosing exactly what goes on their individual pie. This is particularly fantastic for families with diverse tastes or dietary preferences. While our recipe features classic pepperoni, consider this a starting point for culinary exploration. Here are just a few ideas to spark your creativity:
- Vegetarian Delights: Sliced bell peppers, onions, mushrooms, black olives, cherry tomatoes, spinach, or jalapeños. Don’t forget a sprinkle of fresh basil after baking!
- Meat Lover’s Dream: Cooked sausage, crumbled bacon, ham, grilled chicken, or even leftover shredded beef.
- Cheese Varieties: Beyond mozzarella and parmesan, experiment with provolone, cheddar, feta, goat cheese, or a gourmet blend.
- Sauce Sensations: Try a white garlic sauce, pesto, BBQ sauce, or a spicy marinara to change things up.
- Gourmet Touches: Caramelized onions, sun-dried tomatoes, artichoke hearts, pineapple (yes, pineapple!), or a drizzle of balsamic glaze post-bake.
Encourage everyone to get involved in the topping selection and assembly. It’s a wonderful way to teach children about cooking and healthy eating in a fun, interactive environment.
Ingredients
- 4 Rhodes yeast dinner rolls, thawed
- 5 tbs pizza sauce
- 1 cup mozzarella cheese, shredded
- 4 tbs parmesan cheese, grated
- 1 tsp Italian seasoning
- 12 pepperonis, sliced (or your preferred toppings)
Instructions
- Preheat your oven to 450 degrees Fahrenheit (232°C). This high temperature is key to achieving a beautifully crisp crust quickly.
- Prepare your workspace: Lightly spray your countertop or a clean, flat surface with non-stick cooking spray. Take each thawed roll dough ball and, one at a time, roll it out into a circle approximately 5 inches in diameter. Aim for an even thickness to ensure uniform baking.
- Assemble your pizzas: Spray a large sheet pan with non-stick spray to prevent sticking and ensure easy cleanup. Carefully place each rolled dough circle onto the prepared sheet pan. Spread about 1 tablespoon of your favorite pizza sauce evenly over each dough circle, leaving a small border for the crust. Sprinkle a generous amount of mozzarella cheese over the sauce, then arrange the pepperoni slices (or your chosen toppings) on top of the cheese. Finish by sprinkling with parmesan cheese and a dash of Italian seasoning for an authentic flavor boost.
- Bake to perfection: Transfer the sheet pan to your preheated oven. Bake for 8-11 minutes, or until the pizza crust is golden brown and the cheese is melted and bubbly with a slight golden hue. Cooking times may vary depending on your oven, so keep an eye on them.
- Serve and enjoy: Carefully remove the pizzas from the oven. Let them cool for a minute or two before slicing and serving. Get ready to savor your homemade personal pizza creations!
Video Tutorial
Watch the video above for a visual guide on how to transform frozen dinner rolls into these delightful personal pizzas and discover even more creative ways to use this versatile dough!
Nutrition Information
Calories: 257kcal |
Carbohydrates: 22g |
Protein: 13g |
Fat: 13g |
Saturated Fat: 6g |
Polyunsaturated Fat: 1g |
Monounsaturated Fat: 5g |
Trans Fat: 0.1g |
Cholesterol: 31mg |
Sodium: 665mg |
Potassium: 154mg |
Fiber: 2g |
Sugar: 2g |
Vitamin A: 318IU |
Vitamin C: 1mg |
Calcium: 288mg |
Iron: 2mg
Nutrition information is automatically calculated and should be used as an approximation only. Actual values may vary based on specific ingredients and preparation methods.
Pro Tips for Perfect Personal Pizzas Every Time
- Thaw Dough Properly: Ensure your dinner rolls are fully thawed but still cool. This makes them easier to roll out without becoming too sticky. You can thaw them in the refrigerator overnight or at room temperature for a few hours.
- Don’t Overload: While customization is fun, resist the urge to pile on too many toppings. Too much weight can make the crust soggy and prevent even cooking. A thin layer of sauce and moderate toppings work best.
- Pre-cook Meats: If you’re using raw sausage, bacon, or chicken, make sure to cook it thoroughly before adding it to the pizza. This prevents undercooked meat and ensures the toppings are heated through in the short baking time.
- Crispier Crust: For an extra-crispy crust, you can pre-bake the rolled-out dough for 2-3 minutes before adding toppings. This helps to create a barrier against moisture from the sauce and toppings.
- Cheese First, Then Toppings: A thin layer of cheese directly on the sauce can act as a delicious glue, holding your toppings in place and preventing them from sliding off when sliced.
- Herb Power: Don’t underestimate the power of fresh herbs! A sprinkle of fresh basil, oregano, or a mix of Italian herbs after the pizza comes out of the oven can elevate the flavor significantly.
Beyond Pizza Night: Creative Ways to Enjoy Personal Pizzas
While perfect for a spontaneous dinner, these personal pizzas are also excellent for various other occasions:
- Kids’ Parties: Set up a “build-your-own-pizza” bar. It’s a fantastic, interactive activity that doubles as a meal.
- Quick Lunches: Make an extra pizza or two for quick and easy leftovers the next day. They reheat beautifully in a toaster oven or air fryer.
- Game Day Snacks: Cut the personal pizzas into smaller wedges or squares for appetizer-style servings that are easy to grab and enjoy.
- Meal Prep: You can partially bake the crusts, let them cool, and then freeze them. When ready to eat, simply add toppings and bake.
This recipe truly celebrates the versatility of simple ingredients and the joy of home cooking. It’s proof that you don’t need to spend hours in the kitchen to create something satisfying and memorable.
Tried this recipe?
Let us know how it was! Share your creations and tips in the comments below!