
Product links may contain affiliate links. As an Amazon Associate, I earn from qualifying purchases.
The Easiest No-Bake Ice Cream Sandwich Cake: Your New Go-To Dessert
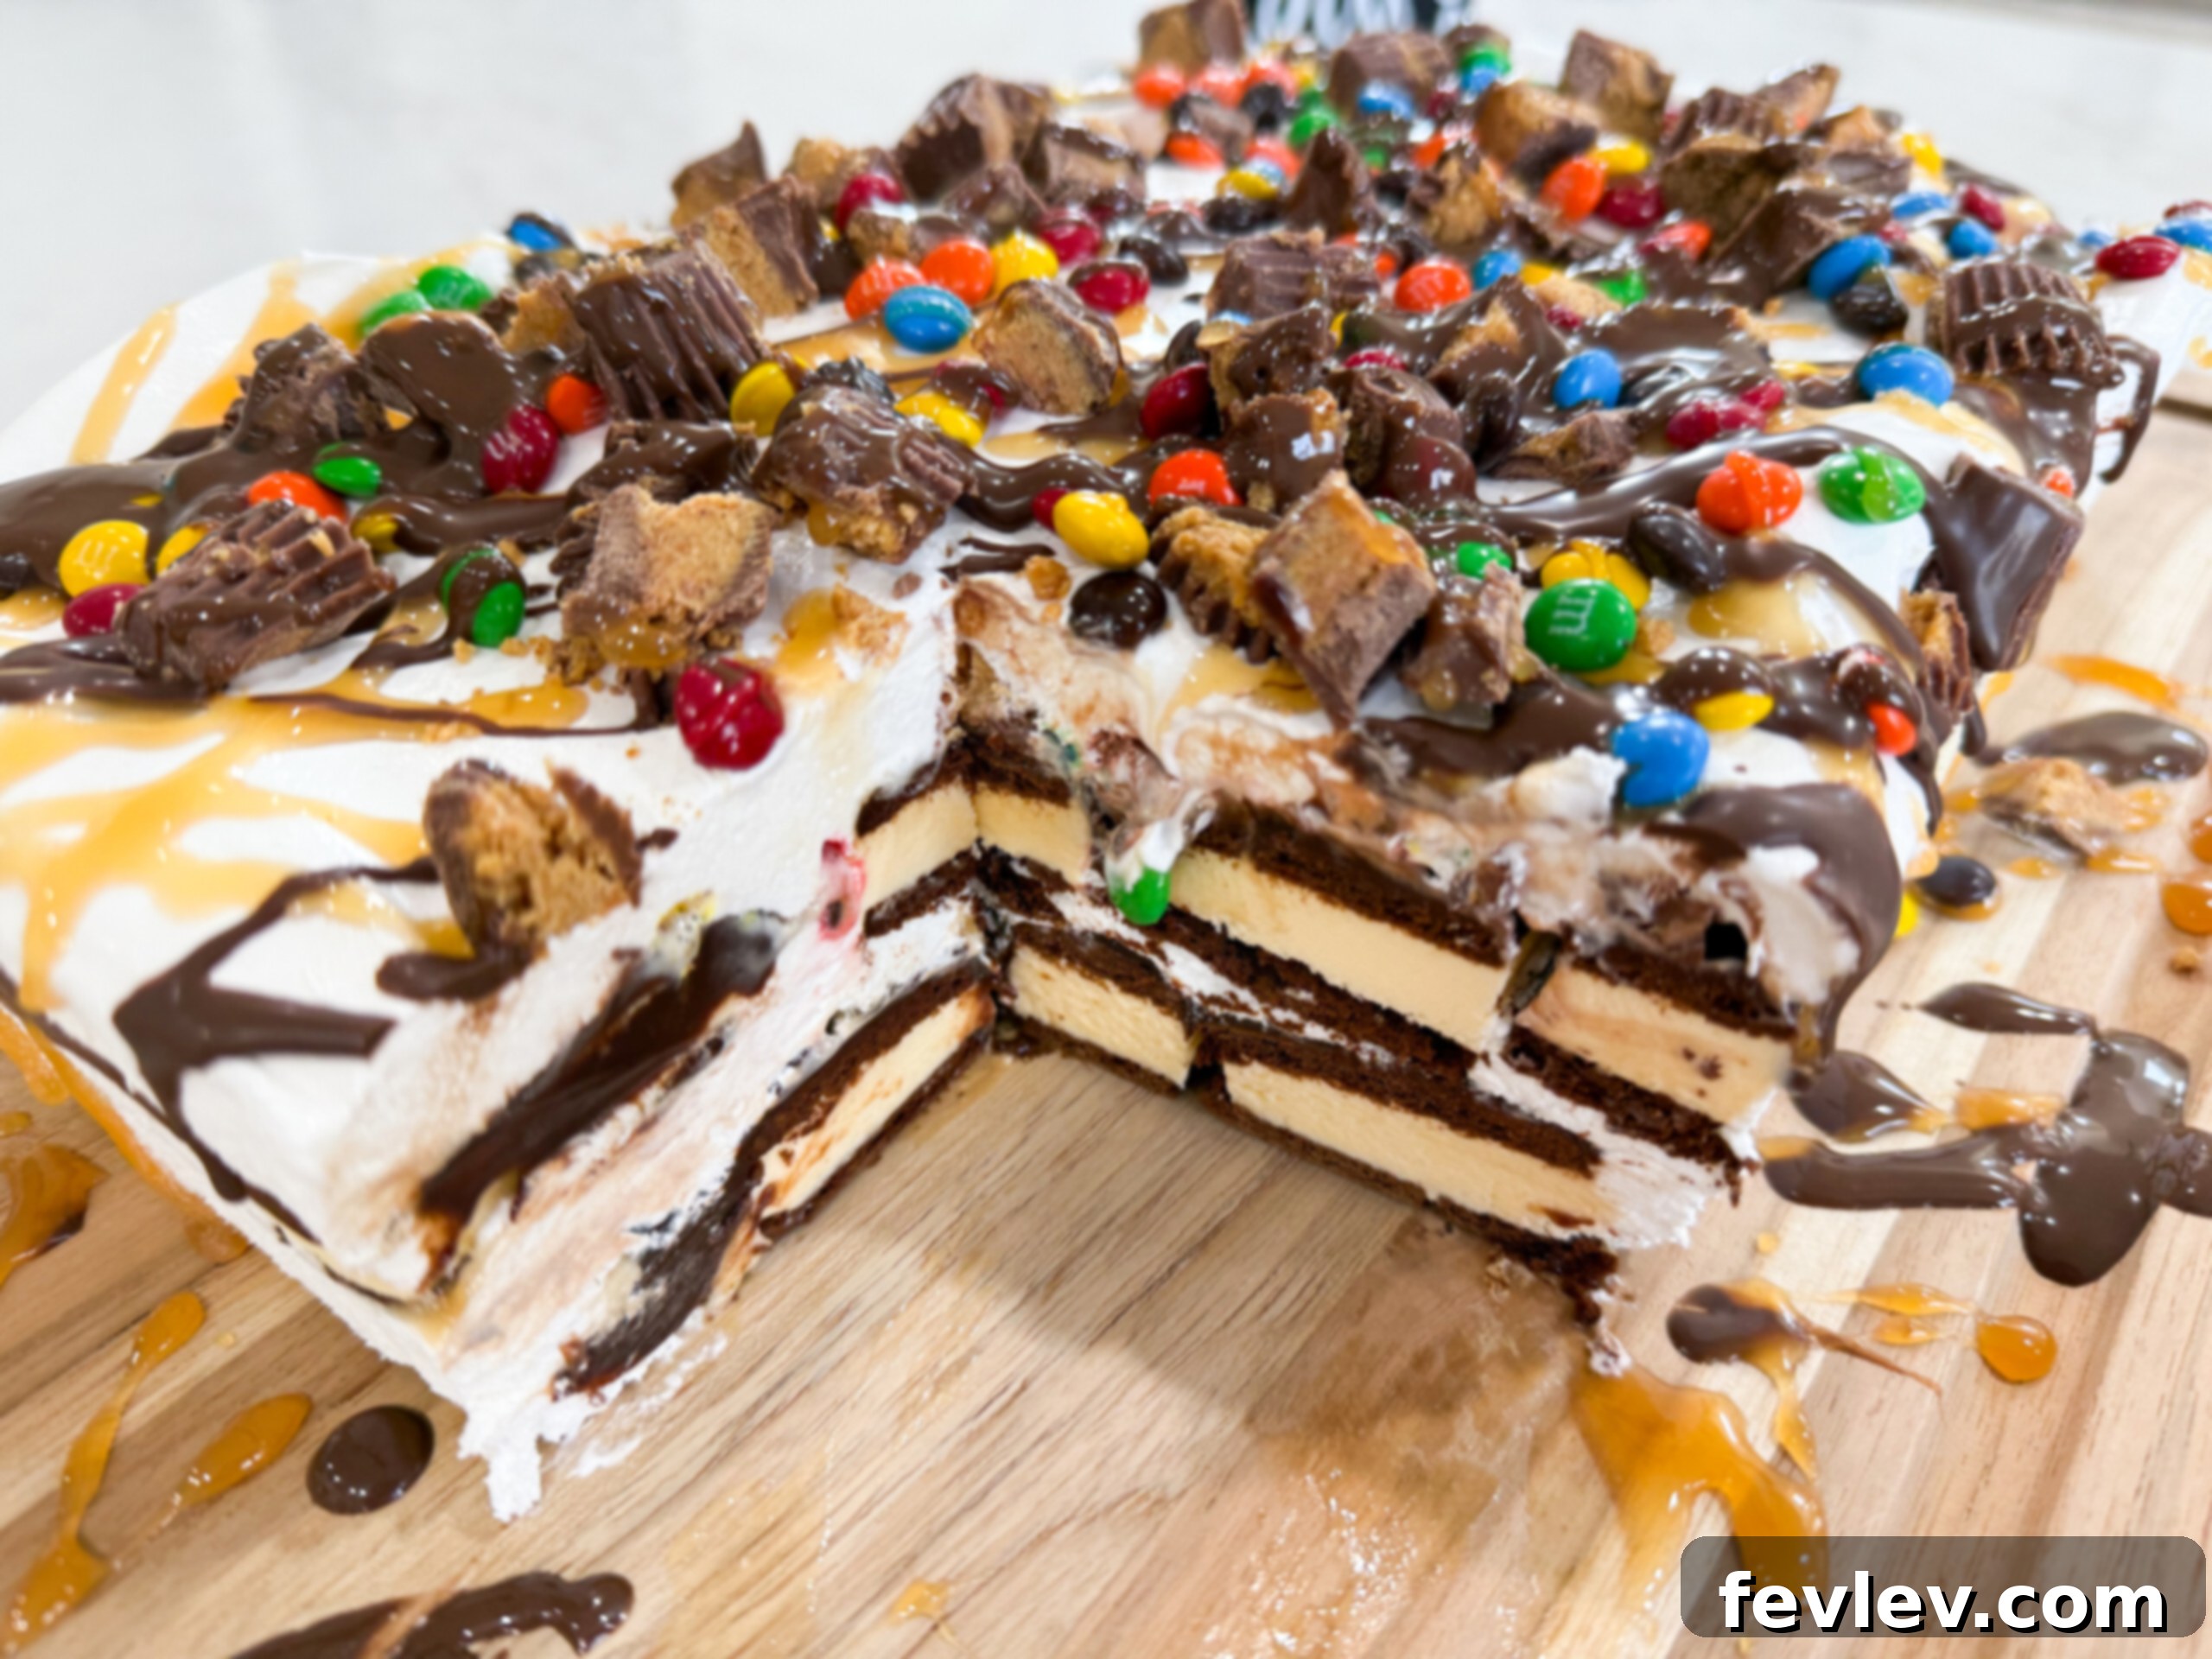
Are you on the hunt for a dessert recipe that’s incredibly simple to make, yet impressive enough for any occasion? Look no further! This delightful Ice Cream Sandwich Cake is the ultimate no-bake solution, transforming humble freezer-aisle staples into a luscious, layered masterpiece. Requiring minimal effort and just a few basic ingredients, this easy ice cream cake is guaranteed to be a hit with family and friends, making it an instant classic in your recipe repertoire.
The versatility of this ice cream sandwich cake recipe is truly remarkable. Whether you’re planning a lively birthday party and need a show-stopping birthday cake that’s quick to assemble, or simply seeking a refreshing treat to cool down on a hot summer day, this dessert fits the bill perfectly. Its creamy, chocolatey layers are a delightful indulgence that appeals to all ages, making it ideal for casual weeknight desserts or more festive celebrations.
Forget complicated baking steps or lengthy ingredient lists. This simple vanilla ice cream sandwiches dessert is designed for convenience without compromising on flavor. Serve it after any dinner recipe or at your next special gathering, and prepare for it to disappear quickly. Its irresistible combination of textures and tastes ensures it will be a huge hit every single time, earning you endless compliments!
Why This No-Bake Ice Cream Cake Will Be Your New Favorite
There are countless reasons to fall in love with this effortless Ice Cream Sandwich Cake. It’s more than just a dessert; it’s a recipe for stress-free entertaining and delightful family moments. Here’s why you’ll want to make it again and again:
- Unbelievably Easy: No oven required! This recipe is entirely no-bake, saving you time and effort in the kitchen.
- Minimal Ingredients: You only need a handful of readily available items, making your grocery shopping list short and simple.
- Quick Assembly: You can put this entire cake together in under 20 minutes, with the freezer doing most of the work.
- Customizable Fun: Easily adapt it to your taste with different ice cream sandwich flavors, hot fudge varieties, and a wide array of toppings.
- Guaranteed Crowd-Pleaser: The combination of creamy ice cream, rich fudge, and fluffy whipped topping is universally loved.
- Perfect for Any Occasion: From casual summer BBQs to festive birthday parties, it’s always a welcome sight.
- Kid-Friendly: It’s so easy that older children can even help with the layering!
Essential Ingredients for Your Ice Cream Sandwich Cake
The beauty of this recipe lies in its simplicity. With just a few staple ingredients, you can create a dessert that tastes incredibly decadent. Each component plays a crucial role in building the perfect layered ice cream cake.
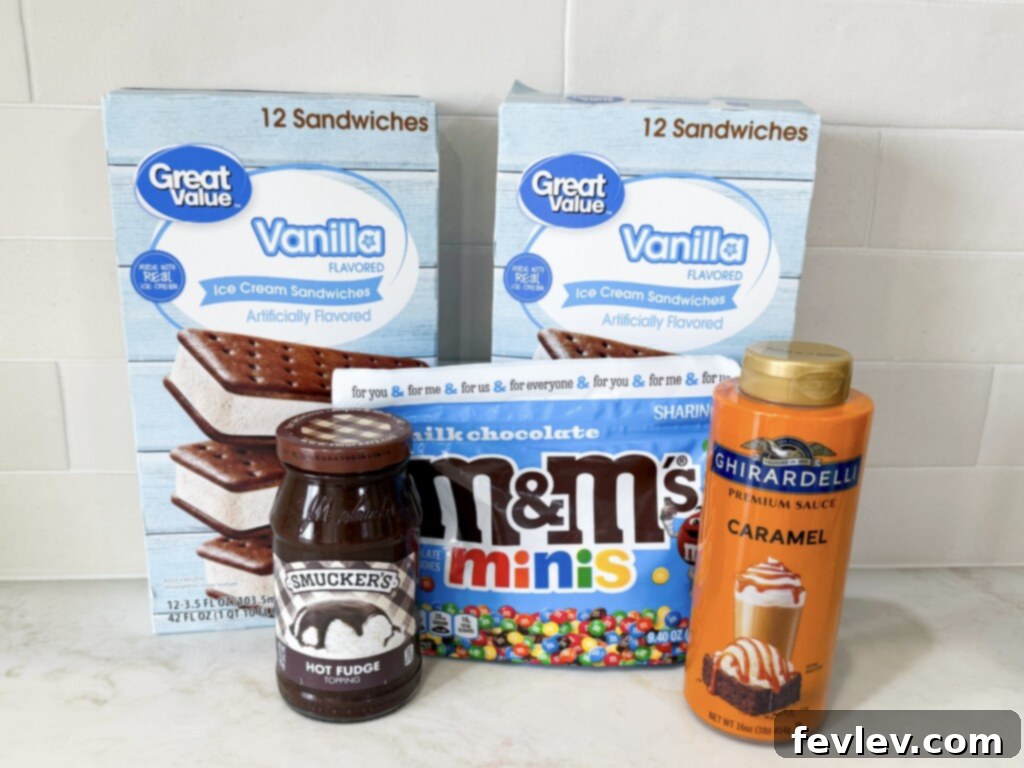
- Ice Cream Sandwiches: These are the foundation of our no-bake cake. You’ll need about 24 individually wrapped ice cream sandwiches. They are readily available in the freezer section of any grocery store. While classic vanilla is a popular and safe choice, don’t hesitate to experiment! Chocolate ice cream sandwiches will give a richer flavor, or you could even try seasonal flavors like mint chip or strawberry for a unique twist. Ensure they are thawed slightly (just enough to be pliable, not melted) for easier layering and trimming.
- Hot Fudge Topping: This creates the irresistible chocolatey layers within the cake. Use your favorite brand of hot fudge sauce – a 16 oz jar is usually sufficient. For easier spreading, especially over cold ice cream sandwiches, you can slightly warm the fudge in the microwave for 15-30 seconds. This will make it smoother and prevent it from cracking as you spread it.
- Frozen Whipped Topping: A creamy, fluffy layer is essential for balancing the richness of the fudge and ice cream. You’ll need one 16 oz container of frozen whipped topping, fully thawed. Brands like Cool Whip work perfectly here, offering stability and a light texture that holds up well in the freezer. Avoid using aerosol whipped cream, as it deflates quickly and won’t maintain its structure.
- Toppings (Optional, but Highly Recommended!): These add texture, color, and extra flavor, making the cake truly stand out.
- Mini M&M’s: A classic choice for a reason! They add a delightful crunch and a festive pop of color. About ½ cup should do the trick, but feel free to add more or less to your liking.
- Caramel Sauce: A drizzle of caramel sauce over the top introduces a buttery, sweet note that complements the chocolate and vanilla beautifully. This is entirely optional but adds a gourmet touch.
- (Check out the “Favorite Toppings” section below for even more creative ideas!)
Effortless Assembly: How to Make Your Ice Cream Sandwich Cake
Get ready to create a stunning dessert with minimal fuss! This step-by-step guide ensures your Ice Cream Sandwich Cake comes out perfectly layered and delicious every time. Remember to work swiftly to keep the ingredients chilled.
- Prepare Your Baking Dish: Start by lining a 9×13-inch baking dish with parchment paper. This is a crucial step for easy removal and slicing. Make sure the parchment paper overhangs significantly on the two longer sides (or all four sides) of the dish. This creates “handles” that you can use to lift the entire frozen cake out of the dish later.
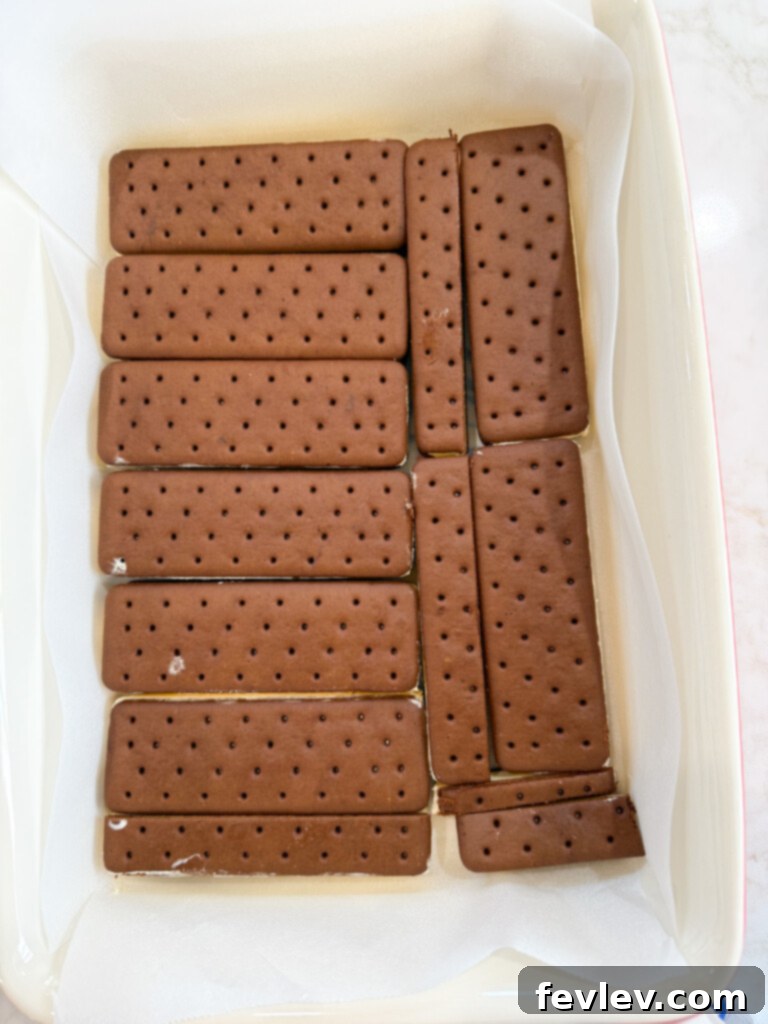
- Lay the First Layer of Ice Cream Sandwiches: Unwrap 12 of your ice cream sandwiches. Arrange them in a single, even layer at the bottom of the prepared baking dish. They should fit snugly. You might need to gently trim some of the sandwiches with a sharp knife to fill in any gaps or odd spaces along the edges, ensuring a complete and solid base.
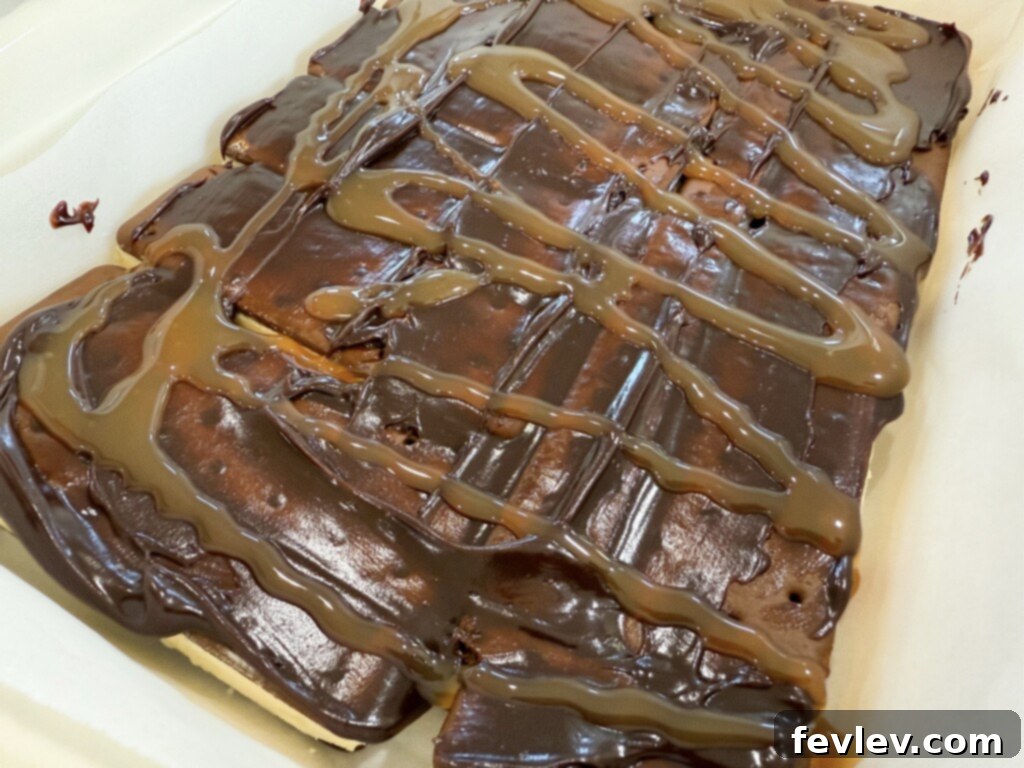
- Spread the First Hot Fudge Layer: Take half of your warmed (if needed) hot fudge topping and carefully spread it evenly over the layer of ice cream sandwiches. Ensure it covers the entire surface, reaching all the way to the edges. A rubber spatula or the back of a spoon works well for this. This creates a rich, gooey chocolate layer.
- Add the First Whipped Topping Layer: Now, gently spread half of the thawed whipped topping over the hot fudge layer. Work carefully to avoid mixing the layers too much. Aim for a smooth and even layer that covers the fudge completely.
- Repeat the Layers: It’s time to build the second, equally delicious layer! Place the remaining 12 unwrapped ice cream sandwiches over the whipped topping, again trimming as necessary to fit. Follow this with the remaining hot fudge sauce, spreading it uniformly, and then top with the rest of the thawed whipped topping, creating a smooth and inviting top surface for your cake.
- Freeze to Firm Up: Once all layers are assembled, place the baking dish into the freezer. Freeze the dessert for a minimum of 2 hours, but preferably 3-4 hours, or even overnight. This crucial freezing time allows all the layers to firm up and meld together, making the cake stable and easy to slice cleanly.
- Apply Final Toppings (Before Serving): When your cake is thoroughly frozen and you’re ready to serve, remove it from the freezer. Liberally sprinkle mini M&M’s over the whipped topping. If desired, drizzle with a generous amount of caramel sauce for an extra touch of sweetness and visual appeal.
- Slice and Serve: Using the parchment paper overhang, carefully lift the entire cake out of the baking dish and place it onto a sturdy cutting board. This step makes slicing incredibly easy and mess-free. Use a sharp knife (dipped in hot water for cleaner cuts, if desired) to slice into individual portions. Serve immediately and watch as this delightful frozen dessert disappears!
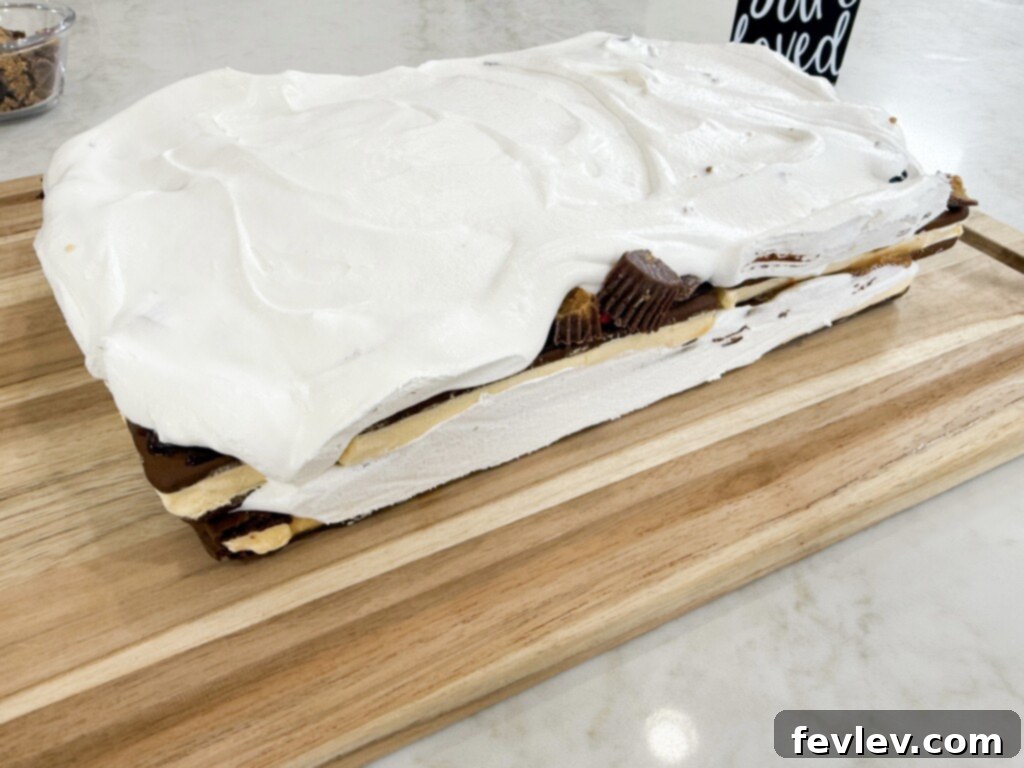
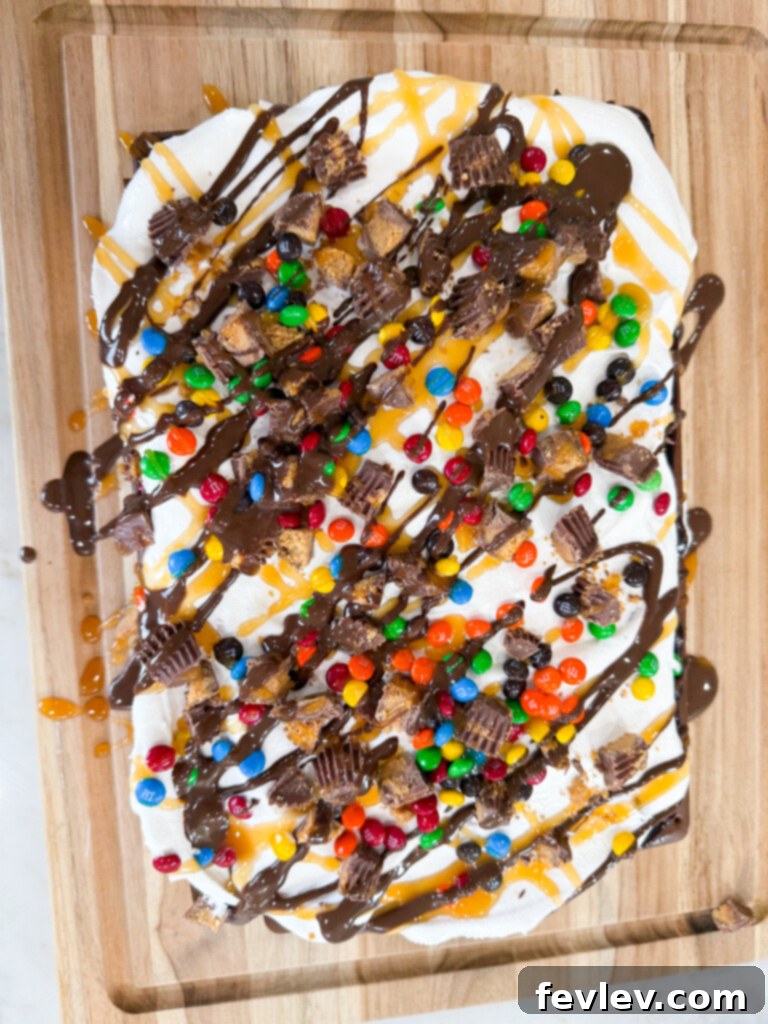
Storing Your Delicious Ice Cream Sandwich Cake for Best Results
One of the many benefits of this no-bake ice cream cake is how well it stores, allowing you to prepare it in advance for parties or enjoy leftovers throughout the week. Proper storage is key to maintaining its perfect texture and flavor.
After assembling the cake and allowing it to freeze for the initial 2 hours (or longer), ensure it is tightly covered. If your 9×13-inch baking dish comes with a lid, use it! Otherwise, wrap the top of the cake securely with at least one layer of plastic wrap (often called saran wrap). For extra protection against freezer burn, you can add a layer of aluminum foil over the plastic wrap. This tight seal prevents ice crystals from forming and keeps any freezer odors out.
Store the covered cake in the freezer. For optimal taste and texture, it is best enjoyed within 7 days of preparation. While it can last longer, its quality might start to diminish after about a week. When ready to serve, simply remove it from the freezer, add any fresh toppings, slice, and enjoy!
Expert Tips and Tricks for Making a Delicious Ice Cream Sandwich Cake
Even though this recipe is incredibly simple, a few insider tips can help you create the absolute best Ice Cream Sandwich Cake possible. These insights will help you customize, optimize, and perfect your no-bake dessert.
Choosing the Perfect Ice Cream Sandwiches
While making homemade ice cream sandwiches offers a certain charm, for the sake of speed and simplicity, store-bought ice cream bars from the freezer aisle are your best friend here. Just remember the crucial step: always unwrap each sandwich completely from its plastic packaging before layering!
When it comes to flavor, you have options! Vanilla ice cream sandwiches are a classic for a reason, offering a sweet, creamy base that pairs wonderfully with chocolate fudge and whipped topping. If you’re a chocolate lover, using chocolate ice cream sandwiches will result in an even richer, more decadent cake. You could even get creative by using a combination of both or exploring other flavors like Neapolitan, mint chocolate chip, or even cookies and cream for a truly unique and personalized dessert. Consider seasonal offerings too – pumpkin spice ice cream sandwiches could make a fun fall treat!
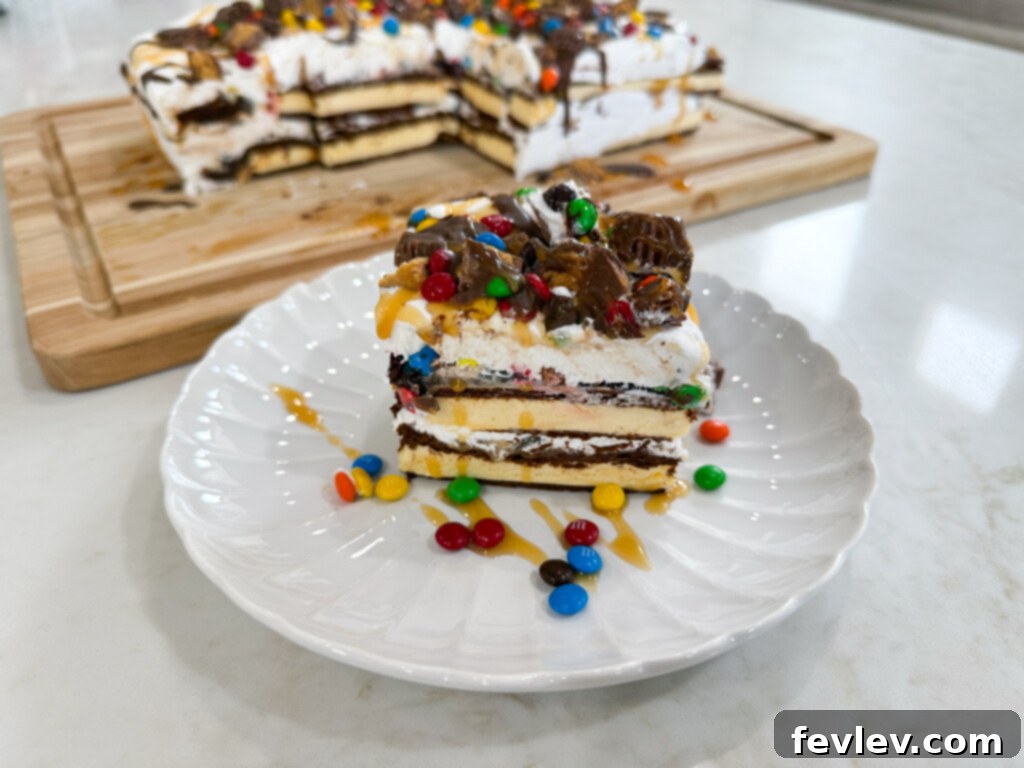
Favorite Toppings to Make the Perfect Dessert Stand Out
The toppings are your opportunity to truly customize and elevate this delicious ice cream sandwich cake. Don’t feel limited to just M&M’s and caramel! Think about contrasting textures and complementary flavors. Here are some fantastic ideas to get your creative juices flowing:
- Caramel Syrup: A classic for a reason, adding a rich, buttery sweetness.
- Chocolate Chips (Mini Chocolate Chips): These melt slightly into the whipped topping, creating delightful pockets of chocolate.
- Chocolate Syrup: An extra drizzle for serious chocolate aficionados.
- Crushed Oreo Cookies: A fantastic way to add both crunch and a popular cookie flavor.
- Waffle Cones Broken into Pieces: Provides a unique crispy texture and a hint of a familiar ice cream parlor taste.
- Reese’s Pieces or Crushed Peanut Butter Cups: Ideal for peanut butter lovers, introducing a wonderful salty-sweet dynamic.
- Chopped Nuts: Almonds, pecans, walnuts, or peanuts add a satisfying crunch and nutty flavor.
- Toasted Coconut Flakes: For a tropical twist and a lovely aroma.
- Rainbow Sprinkles: Especially fun for birthday celebrations or kid-friendly events.
- Gummy Bears or Worms: For a playful, chewy element that kids adore.
- Fresh Berries: Strawberries, raspberries, or blueberries can add a refreshing tartness and beautiful color, especially in summer.
- Marshmallow Fluff or Mini Marshmallows: For a s’mores-like experience.
Can I Use Homemade Whipped Cream for This Recipe?
While using a store-bought frozen whipped topping (like Cool Whip) is recommended for its inherent stability and convenience, you certainly can use homemade whipped cream! If you opt for homemade, there’s a key tip to ensure you get the best, most stable results, especially for a frozen dessert:
Instead of granulated sugar, I highly suggest using **powdered sugar (also known as confectioners’ sugar)** when whipping your heavy cream. Powdered sugar contains a small amount of cornstarch, which acts as a natural stabilizer. This helps the whipped cream maintain its volume and structure for longer, preventing it from weeping or deflating, which is particularly important when it’s going into a frozen cake. Use a stand mixer with a whisk attachment or an electric hand mixer to whip the cold heavy cream and powdered sugar together until stiff peaks form. This will give you a rich, airy, and wonderfully stable whipped layer that holds up beautifully in your Ice Cream Sandwich Cake.
Frequently Asked Questions About Ice Cream Sandwich Cake
- Q: How many ice cream sandwiches do I need for this recipe?
- A: This recipe typically calls for 24 standard-sized ice cream sandwiches, which forms two layers of 12 sandwiches each in a 9×13-inch baking dish. If your sandwiches are a different size, you may need to adjust the quantity slightly.
- Q: Can I use different flavors of hot fudge or other sauces?
- A: Absolutely! While hot fudge is classic, you could experiment with caramel sauce, chocolate syrup, or even a peanut butter sauce for different flavor profiles. Just ensure the consistency is suitable for spreading.
- Q: What if my hot fudge is too thick to spread?
- A: Gently warm it in the microwave for 15-30 seconds until it reaches a more pourable, spreadable consistency. Be careful not to overheat it, as it could melt the ice cream too quickly.
- Q: Can I make individual ice cream sandwich cakes?
- A: Yes! Instead of a large baking dish, you could use individual ramekins or small loaf pans. Layer a single ice cream sandwich (perhaps cut in half), a spoonful of fudge, a dollop of whipped topping, and repeat. Freeze and serve as mini desserts.
- Q: How long does the cake need to freeze?
- A: A minimum of 2 hours is recommended to ensure the layers set. However, for a firmer, easier-to-slice cake, 3-4 hours or even overnight is ideal. The longer it freezes, the less messy it will be to cut.
Conclusion: Your New Favorite Easy Dessert
There you have it – the ultimate guide to creating the easiest, most delicious No-Bake Ice Cream Sandwich Cake! This recipe proves that you don’t need to be a gourmet chef or spend hours in the kitchen to whip up a truly spectacular dessert. With its simple ingredients, quick assembly, and incredible versatility, it’s destined to become a staple for every celebration, family dinner, or spontaneous sweet craving.
So, go ahead, gather your ingredients, follow these straightforward steps, and get ready to impress everyone with this delightful frozen treat. It’s cool, creamy, chocolatey, and endlessly customizable – everything you could want in a dessert. We’re confident this Ice Cream Sandwich Cake will bring smiles and satisfaction to all who taste it!
Ice Cream Sandwich Cake
By: Julia Pacheco
Make the best Ice Cream Sandwich Cake recipe with only a handful of simple ingredients to make the most refreshing ice cream cake.
Summary
- Prep Time: 20 minutes
- Total Time: 3 hours 20 minutes
- Yields: 12 servings
Equipment
- 9×13 baking dish
Ingredients
- 24 ice cream sandwiches
- 16 oz hot fudge topping
- 16 oz frozen whipped topping, thawed
- ½ cup mini M&M’s
- Optional: caramel sauce for drizzling on the top at the end
Instructions
- Line a 9×13 baking dish with parchment paper, ensuring the paper hangs over the edges for easy cake removal once frozen.
- Unwrap 12 ice cream sandwiches and arrange them in a single layer at the bottom of the dish. Trim some if necessary to fill edges.
- Spread half of the hot fudge topping evenly over the ice cream sandwiches.
- Add half of the thawed whipped topping over the fudge layer, spreading smoothly.
- Repeat the layers: add the remaining ice cream sandwiches, then top with the remaining fudge and whipped topping.
- Freeze the dessert for at least 2 hours (or longer for best results).
- Just before serving, sprinkle mini M&M’s over the whipped topping. Drizzle with caramel sauce if desired.
- Use the parchment paper overhang to pull the entire cake out of the baking dish, then slice and serve immediately.
Nutrition Information (Approximate)
Calories: 592kcal | Carbohydrates: 90g | Protein: 9g | Fat: 23g | Saturated Fat: 10g | Polyunsaturated Fat: 3g | Monounsaturated Fat: 6g | Trans Fat: 0.02g | Cholesterol: 32mg | Sodium: 344mg | Potassium: 307mg | Fiber: 1g | Sugar: 54g | Vitamin A: 398IU | Vitamin C: 0.1mg | Calcium: 167mg | Iron: 1mg
Nutrition information is automatically calculated and should only be used as an approximation.
Discover More No-Bake Dessert Recipes
If you loved the ease and deliciousness of this Ice Cream Sandwich Cake, you’re in for a treat! Explore these other fantastic no-bake dessert recipes that are just as simple to prepare and equally delightful:
- Strawberry Pretzel Dessert: A perfect blend of sweet and salty, with a creamy filling and fresh berries.
- No Bake S’mores Bars: All the campfire fun without the fire, in an easy bar form.
- No-Bake Hershey’s Chocolate Pie: A rich, creamy chocolate pie that comes together in minutes.
- Easy No Bake Cheesecake: Achieve that classic cheesecake taste with absolutely no baking required.
Quick Links for Stress-Free Cooking and Family Meals
Making delicious food doesn’t have to be complicated. We’re here to help you simplify your kitchen routine and create memorable meals. Check out these helpful resources:
- Family meal plans: Organized, delicious, and easy-to-follow meal plans to streamline your week.
- Essential tools for the kitchen and more: Hand-picked kitchen gadgets and essentials to make cooking easier and more enjoyable.
- The best cookbook for family dinner recipes: A comprehensive collection of beloved recipes perfect for any family table.
- FREE budget meal plan: Delicious and affordable meal ideas designed to help you save money without sacrificing flavor.
- Watch our cooking videos: Visual, step-by-step guides to help you master new techniques and recipes with confidence.
We absolutely love seeing your culinary creations! If you give any of these recipes a try, be sure to tag us on Instagram @julia.pacheco.cooking and share how much you enjoyed them!