
Jump to Recipe
Product links may contain affiliate links. As an Amazon Associate, I earn from qualifying purchases.
Effortless Family Feasts: The Ultimate Baked Quesadillas Recipe
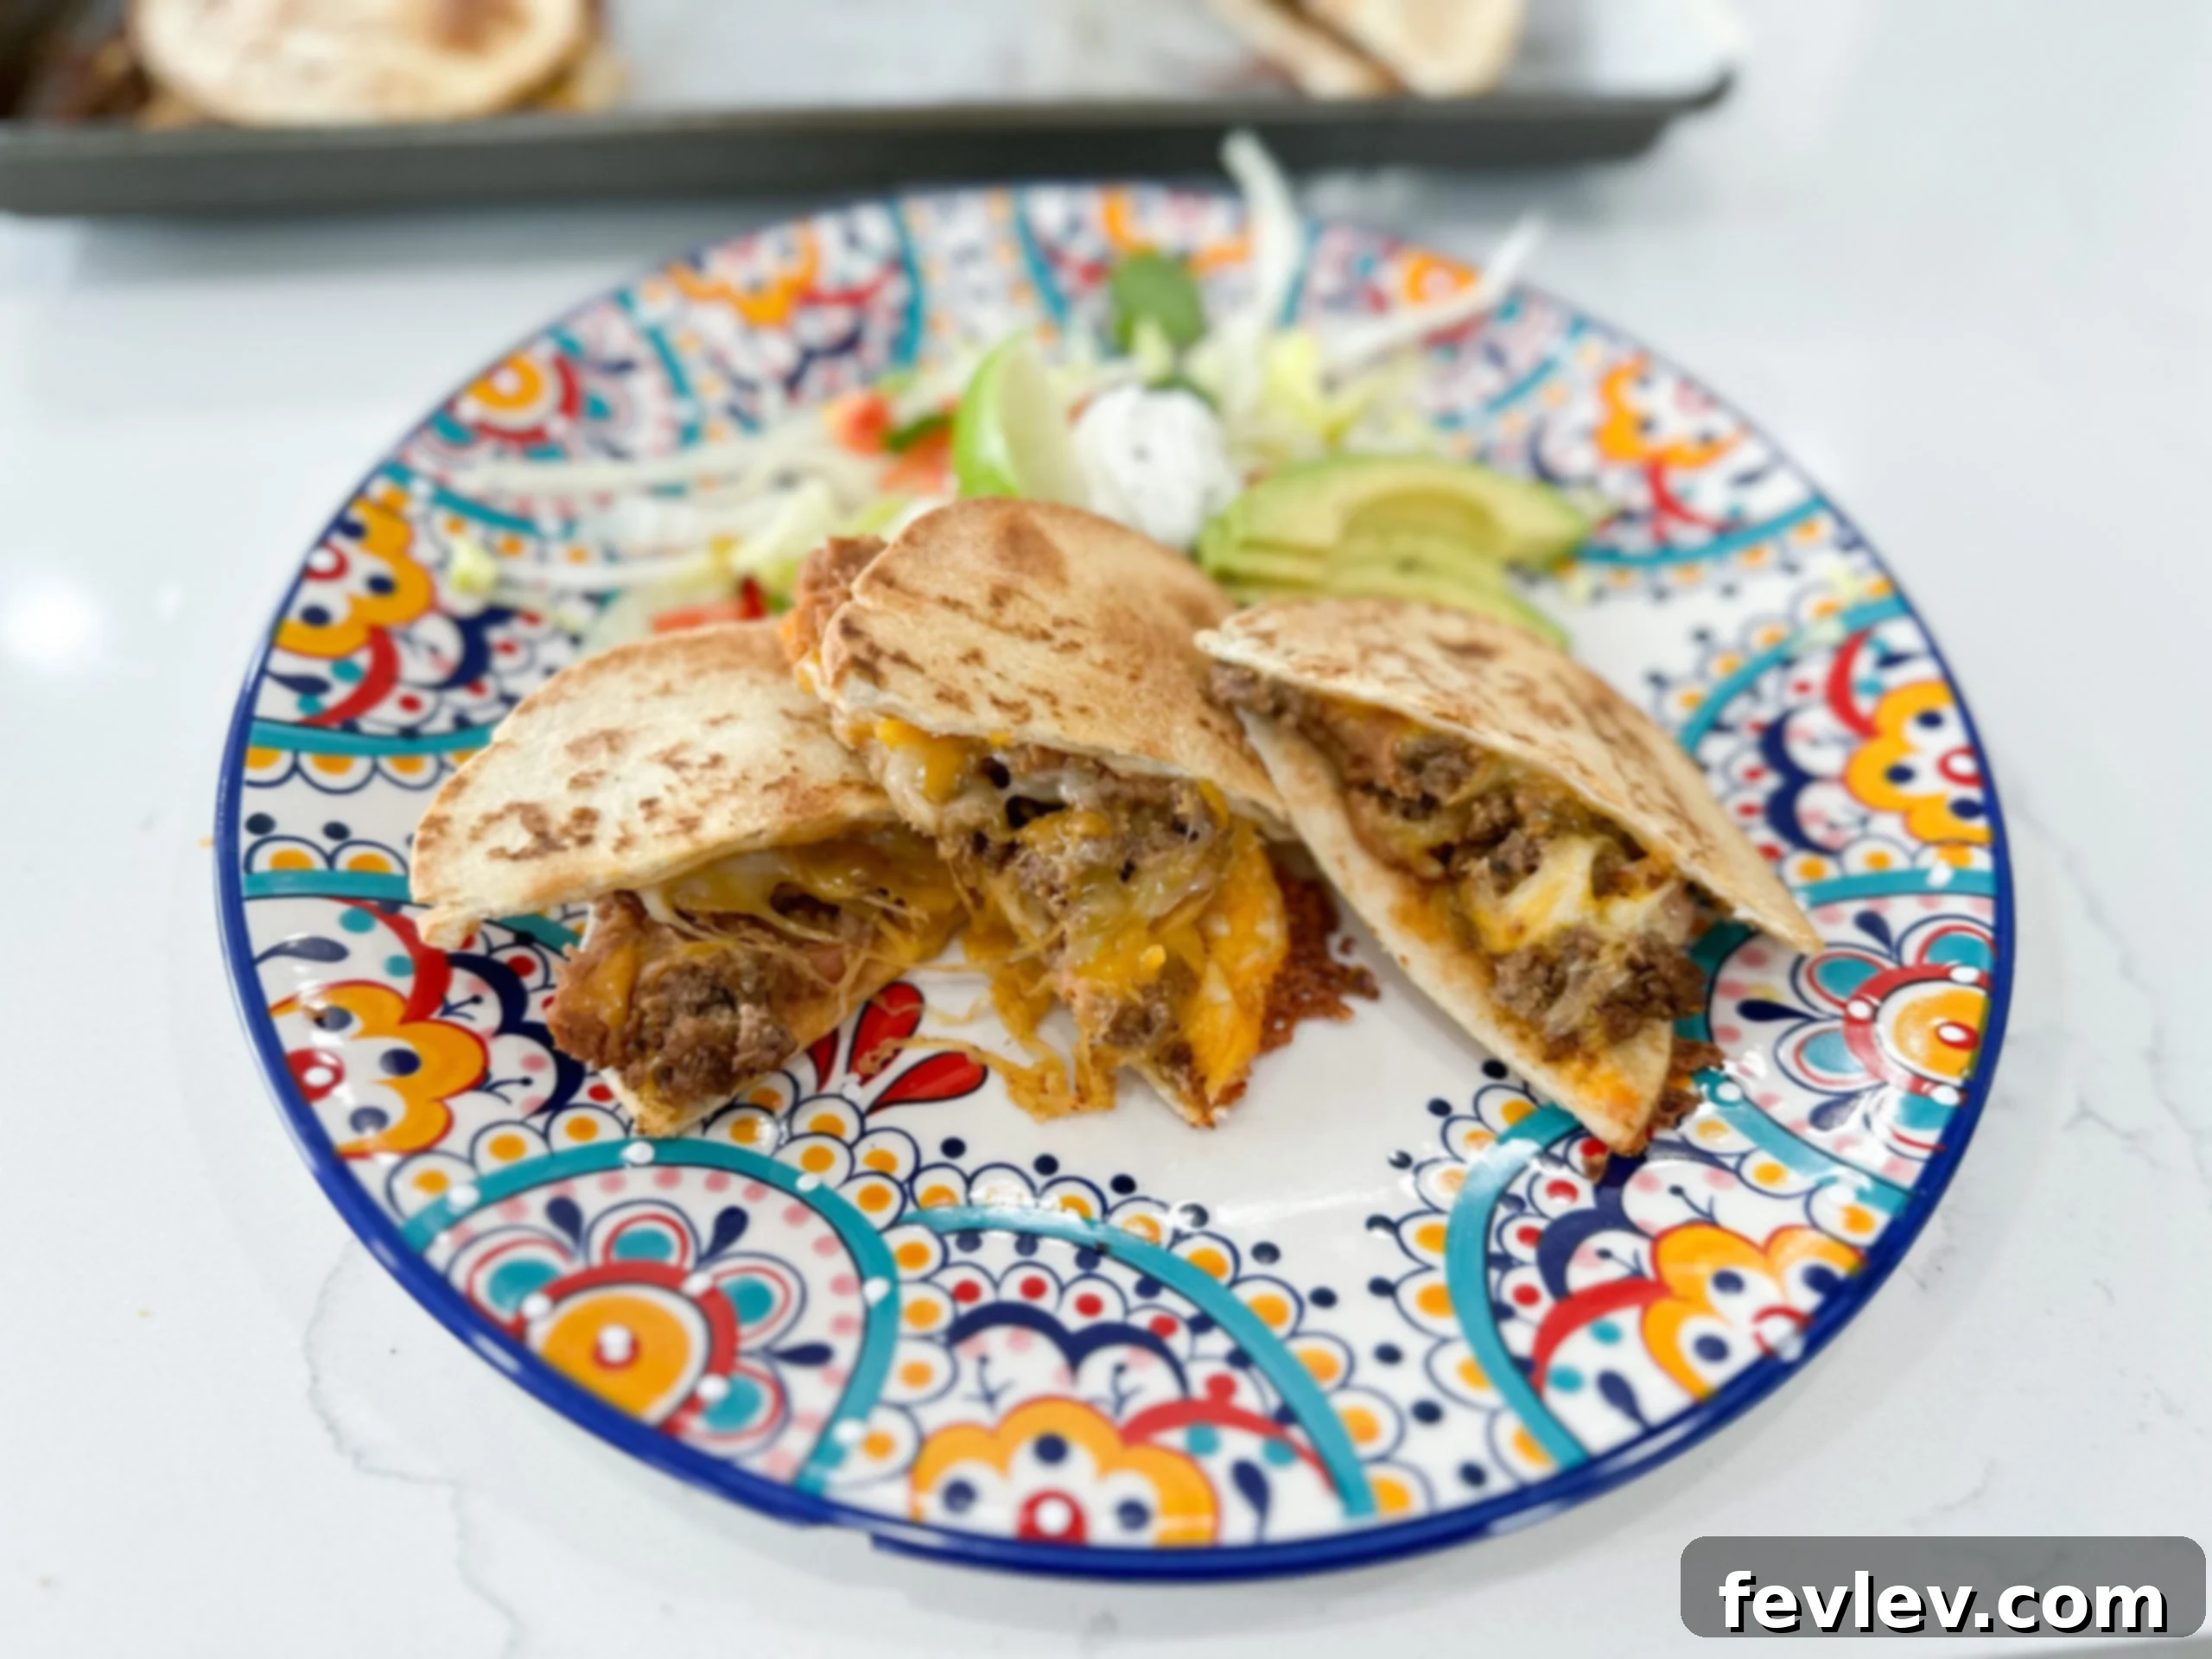
Are you constantly searching for quick, delicious, and low-stress dinner ideas that will satisfy the entire family? If so, you’re likely familiar with the dilemma of making quesadillas the traditional way. While beloved, standing over a hot stove, flipping tortillas one by one, can quickly turn into a time-consuming and messy affair, especially when trying to feed multiple hungry mouths at once. The struggle for who gets the first quesadilla, coupled with a growing stack of dirty pans, often detracts from the joy of this simple meal. That’s precisely why I developed this brilliant solution: **Baked Quesadillas**. This recipe revolutionizes quesadilla night by allowing you to prepare a whole batch simultaneously in the oven, ensuring everyone eats together and cleanup is an absolute breeze.
Imagine a dinner where golden, crispy tortillas encase a hearty filling of perfectly seasoned ground beef, creamy refried beans, and an abundance of rich, melty Colby Jack cheese, all achieved with minimal effort. These aren’t just any quesadillas; they’re packed with robust flavor and baked to perfection, delivering a satisfying crunch and a warm, gooey interior in every bite. This oven-baked method ensures consistent results and frees you from the stovetop, making it the ideal choice for busy weeknights, casual gatherings, or any time you want a truly delicious and hassle-free Mexican-inspired meal. Say goodbye to kitchen chaos and embrace the simplicity and deliciousness of batch-baked quesadillas!
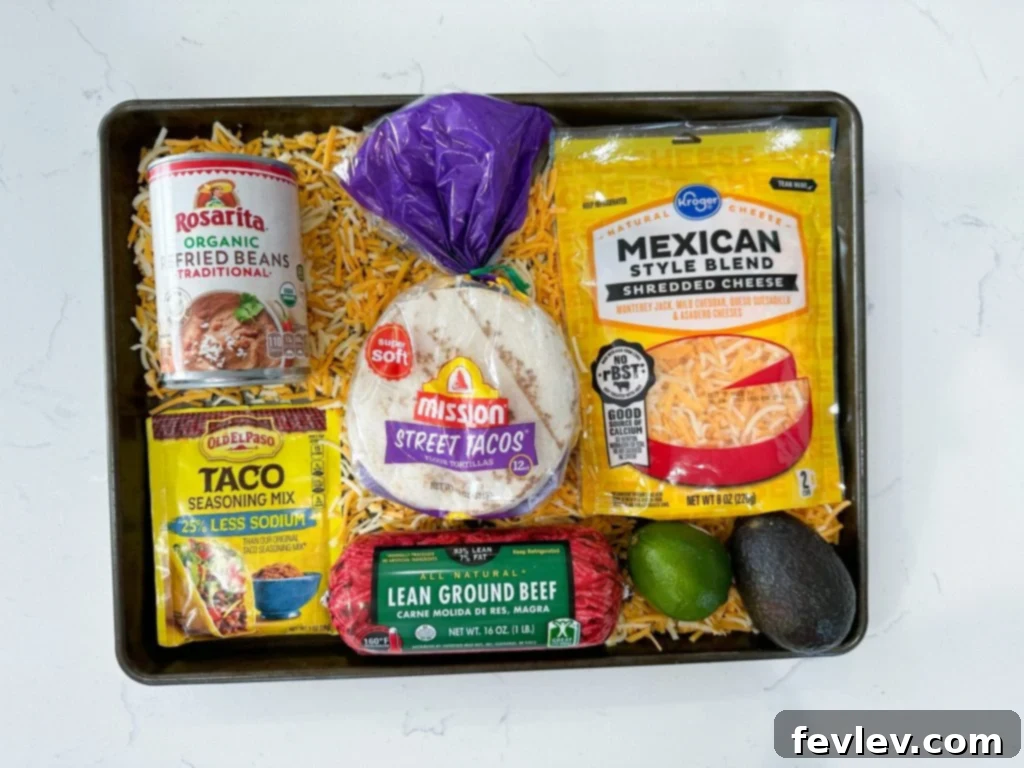
Essential Ingredients for Your Delicious Baked Quesadillas
These baked quesadillas are designed to be both incredibly hearty and bursting with rich, savory flavors. While many quesadilla recipes focus solely on cheese, I find that incorporating seasoned meat and creamy refried beans transforms them into a truly satisfying and complete meal. The thoughtful combination of these ingredients creates a textural and flavorful experience that will leave your family asking for more. Most of these items are pantry staples, making this a convenient recipe to prepare on short notice.
- Ground Beef (1 lb): I typically opt for a lean ground beef to minimize excess grease, but any ground beef works well. This forms the flavorful core of our quesadillas. For a lighter alternative or to suit dietary preferences, ground turkey or chicken can be easily substituted.
- Taco Seasoning (1 ½ tbsp): A quality taco seasoning is absolutely crucial for infusing that authentic, savory Mexican flavor into the beef. I always recommend keeping a large container of your preferred brand in the pantry; it’s a versatile staple for many quick meals. Alternatively, you can create your own blend with chili powder, cumin, paprika, garlic powder, and onion powder for a personalized touch.
- Water (⅓ cup): This small amount of water helps the taco seasoning dissolve and coat the ground beef evenly, creating a more cohesive and flavorful filling mixture.
- Refried Beans (16 oz can): Refried beans provide a wonderful creamy texture and depth of flavor, acting as a delicious binder for the other fillings. If you prefer, mashed black beans or pinto beans can be used for a slightly different, equally tasty result.
- Non-stick Spray: Essential for preparing your baking sheet. It ensures the tortillas don’t stick and contributes to that desirable golden, crispy exterior without adding excessive oil.
- Colby Jack Cheese (1 cup, shredded): This popular cheese blend melts beautifully, creating a wonderfully gooey and satisfying interior for your quesadillas. Feel free to experiment with other good melting cheeses like Monterey Jack, mild cheddar, or a pre-shredded Mexican blend for varied flavors.
- Small Flour Taco Tortillas (12 count): These tortillas are the perfect size for creating six individual, easily manageable quesadillas. Flour tortillas are preferred for their flexibility and how well they crisp in the oven. While corn tortillas can be used, their texture will be different, and they may require a slight adjustment in baking time.
- Optional Toppings: Elevate your quesadilla experience with a vibrant array of toppings! Consider shredded crisp lettuce, fresh homemade salsa or your favorite jarred variety, cool and tangy sour cream (or plain Greek yogurt for a healthier alternative), a sprinkle of fresh cilantro, and a squeeze of bright lime juice. These additions provide a fantastic contrast in flavor and texture.
Step-by-Step Guide: Crafting Your Perfect Baked Quesadillas
Making these oven-baked quesadillas is wonderfully simple, designed to deliver maximum flavor with minimal fuss. Follow these clear, easy-to-understand steps, and you’ll have a delicious, crowd-pleasing meal on the table in about 20 minutes!
- Prepare the Seasoned Ground Beef: In a large skillet, cook the ground beef over medium-high heat. Use a meat chopper or a wooden spoon to break the beef into fine crumbles as it browns. Once the meat is fully cooked and no longer pink, carefully drain any excess grease. This step is crucial for preventing your quesadillas from becoming overly greasy. Return the beef to the skillet, then add the taco seasoning and water. Stir thoroughly to combine, allowing the seasoning to coat the meat evenly. Continue cooking, stirring occasionally, until all the water has evaporated and the beef mixture is rich and aromatic. Set the seasoned beef aside.
- Preheat Oven and Prepare Baking Sheet: Preheat your oven to a hot 450°F (230°C). This high temperature is key to achieving that desirable crispy tortilla. Line a large, sturdy sheet pan with parchment paper. This vital step prevents sticking and makes cleanup incredibly easy. Lightly spray the parchment paper with non-stick cooking spray for an extra layer of non-stick assurance and to help the tortillas get extra crispy.
- Assemble Your Quesadilla Layers: Arrange six of the small flour tortillas evenly spaced on your prepared baking sheet. On each of these base tortillas, spread a generous layer of refried beans. Follow this with a portion of the seasoned ground beef, ensuring an even distribution. Finally, sprinkle a hearty amount of shredded Colby Jack cheese over the meat layer. Be mindful not to overfill, as this can lead to spillage during baking and make handling difficult. Carefully place a second flour tortilla on top of each filled tortilla, creating six complete quesadilla “sandwiches.”
- Bake to Golden Perfection: Gently transfer the baking sheet into your preheated oven. Bake for approximately 8-12 minutes. The exact baking time can vary depending on your oven, so keep a close watch. You’re looking for the tortillas to turn a beautiful golden brown and become slightly crispy, while the cheese inside should be wonderfully melted and gooey. For an extra crisp texture and a deeper golden color on both sides, you can carefully flip the quesadillas halfway through the baking process. If you desire a slightly charred or bubbly cheese top, you can briefly (for 1-2 minutes) place them under the broiler at the very end, but watch them diligently to prevent burning.
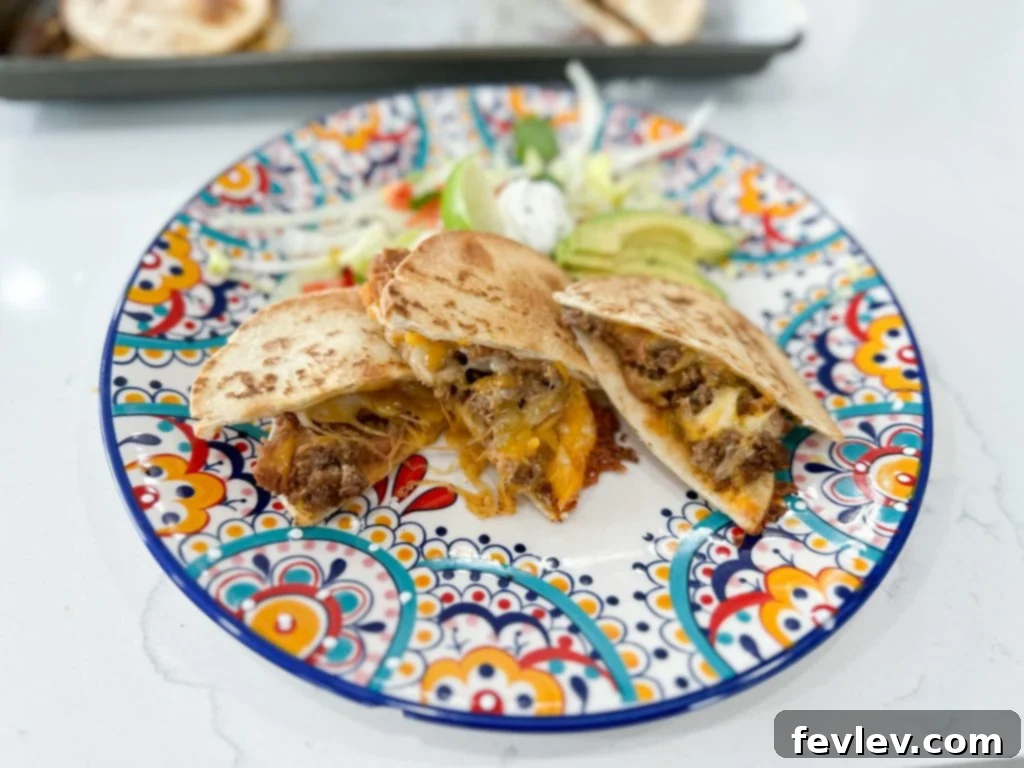
- Serve Immediately with Favorite Toppings: Once baked to your liking, remove the quesadillas from the oven. Allow them to cool for just a minute or two before carefully slicing each quesadilla into halves or quarters using a pizza cutter or a sharp knife. Serve them immediately while hot and fresh! Offer a selection of your favorite toppings such as cool shredded lettuce, vibrant salsa, creamy sour cream, a scattering of fresh cilantro, or a squeeze of zesty lime juice to enhance the flavors. These oven-baked quesadillas are sure to be a hit at your dinner table!
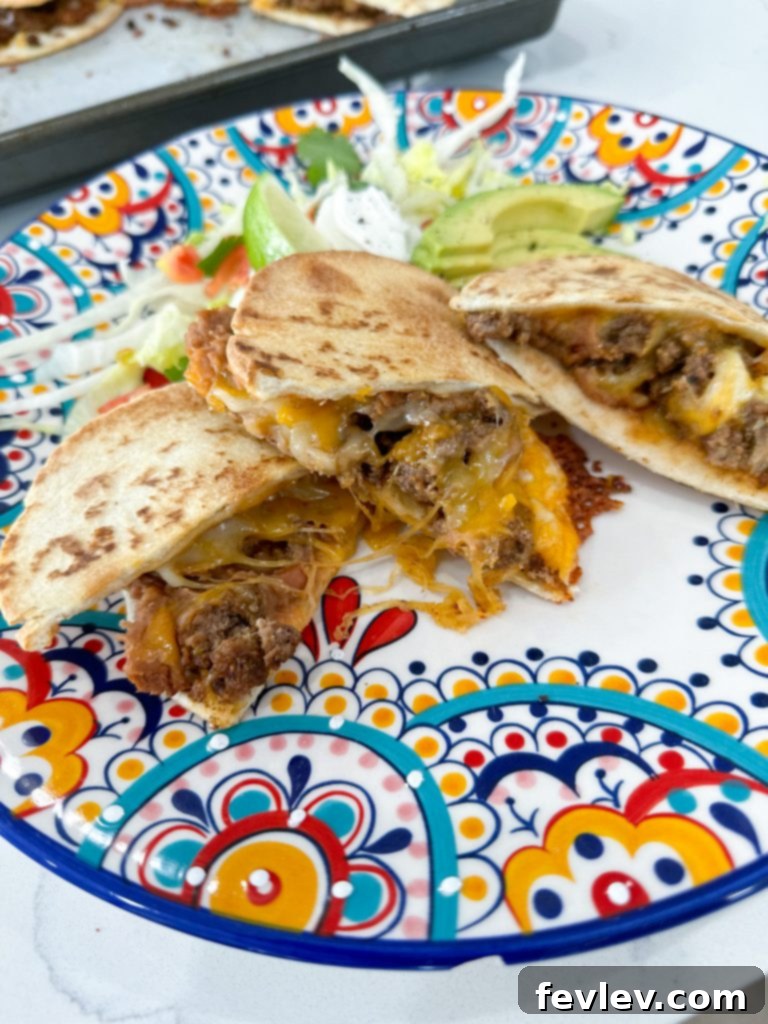
Why These Oven-Baked Quesadillas Will Become Your New Go-To Meal
Beyond the sheer deliciousness, there are several compelling reasons why this baked quesadilla recipe is a game-changer and will quickly become a cherished favorite in your kitchen, especially when compared to the traditional stovetop method.
- Unbeatable Convenience and Speed: The most significant advantage is the ability to cook an entire batch of quesadillas at once. This means no more standing over the stove for extended periods, flipping individual quesadillas. You can feed your whole family simultaneously, ensuring everyone enjoys their meal hot and fresh together.
- Significantly Less Cleanup: With just one sheet pan (expertly lined with parchment paper, I might add!), the amount of dishes you’ll have to wash is drastically reduced. Say goodbye to splattered stovetops and greasy skillets, making post-dinner cleanup quick and effortless.
- Perfect Consistency Every Time: Baking provides a consistent and even heat distribution, which translates into uniformly crispy, golden-brown tortillas and beautifully melted, gooey cheese from edge to edge. Every single quesadilla comes out perfectly, without the risk of burnt spots or undercooked centers that can sometimes happen on the stovetop.
- Mostly Hands-Off Cooking: Once your quesadillas are assembled and placed in the preheated oven, your hands are free for other tasks. Use this time to prepare fresh toppings, set the table, or simply take a moment to relax before dinner is served.
- Family-Friendly and Infinitely Customizable: This recipe is a guaranteed crowd-pleaser for all ages. Its versatility also means you can easily adapt the fillings to suit different dietary needs, preferences, or whatever ingredients you have on hand, making it a truly flexible and adaptable meal solution.
Customization and Creative Variations for Every Palate
One of the most exciting aspects of making quesadillas is their incredible versatility. While our ground beef and refried bean filling is a beloved classic, this recipe serves as a fantastic foundation for endless creativity. Don’t hesitate to experiment with different ingredients to tailor these baked quesadillas to your family’s unique tastes or whatever you have in your fridge.
- Protein Power-Ups: Instead of ground beef, consider using succulent shredded chicken (a fantastic way to use up leftover rotisserie chicken for extra speed), lean ground turkey, or even cooked and seasoned shrimp for a seafood twist. For those seeking a delicious vegetarian option, thoroughly seasoned black beans, pinto beans, or even lentils can serve as excellent, hearty meat substitutes.
- Cheese, Please! While Colby Jack is a superb melting cheese, don’t be shy about exploring other varieties. A mix of sharp cheddar and Monterey Jack will offer a bolder flavor, while pepper jack or a blend with diced jalapeños can introduce a delightful spicy kick. For a truly rich and authentic taste, try incorporating a touch of Oaxaca cheese or even a smoky provolone.
- Veggie Boost: Boost the nutritional value and flavor by adding your favorite vegetables to the filling. Sautéed bell peppers (any color!), sweet onions, corn kernels, or mild diced green chilies can be mixed in with the meat for extra texture and vitamins. Just ensure they are cooked down slightly to prevent releasing too much moisture during baking. Fresh spinach or finely chopped kale also wilt beautifully into the warm filling.
- Spice It Up or Tone It Down: If your family loves a bit of heat, consider adding a pinch of cayenne pepper, a dash of your favorite hot sauce directly to the meat mixture, or incorporating finely diced fresh or pickled jalapeños into the filling. For younger palates, mild taco seasoning or even just salt and pepper might be preferred.
- Beyond Taco Flavor: While taco seasoning is a classic for a reason, you can easily switch up the flavor profile. Experiment with chili powder, a robust cumin blend, a zesty fajita seasoning mix, or even a smoky chipotle spice blend for a different culinary experience.
Serving Suggestions and Perfect Pairings to Complete Your Meal
Baked quesadillas are undeniably delicious on their own, but they truly transform into a complete and unforgettable meal when served alongside thoughtful accompaniments and a vibrant array of toppings. Here are some ideas to help you create an impressive and flavorful spread:
- Classic Toppings Bar: Set up a topping station! Essential choices include thinly shredded crisp iceberg lettuce, freshly diced tomatoes, thinly sliced red onions for a sharp bite, and tangy pickled jalapeños. A generous dollop of cool sour cream or plain Greek yogurt is a must for balancing the rich flavors.
- Fresh Salsas and Creamy Guacamole: Offer a variety of salsas to cater to different tastes. A mild pico de gallo, a zesty salsa verde, a smoky chipotle salsa, or even a fruity mango salsa can add exciting dimensions. Freshly prepared guacamole or simply diced avocado provides a creamy, healthy, and incredibly satisfying counterpoint.
- The Zesty Finish: Always include fresh lime wedges. A squeeze of bright, acidic lime juice over warm quesadillas can instantly brighten all the flavors and add a refreshing finish.
- Hearty Side Dishes: Round out your meal with complementary side dishes. A fluffy side of Mexican rice, a light and refreshing green salad dressed with a vibrant cilantro-lime vinaigrette, or a colorful corn and black bean salad are excellent choices. For something truly authentic and comforting, serve them with a cup of savory charro beans.
- Perfect Beverages: Pair your quesadillas with an ice-cold agua fresca (like horchata or jamaica), your favorite Mexican sodas, or for adults, a crisp lager or a refreshing margarita.
Storage and Reheating Tips for Delicious Leftovers
One of the many benefits of these baked quesadillas is how well they store, making them perfect for meal prepping or enjoying quick and easy lunches throughout the week. Properly stored, they remain just as delicious as when they were first made.
- Refrigerator Storage: Allow any leftover quesadillas to cool down completely to room temperature before storing them. Place them in an airtight container or wrap them individually in plastic wrap or aluminum foil. They will stay fresh and tasty in the refrigerator for up to 3-4 days. Individual wrapping is particularly convenient for grab-and-go options.
- Freezing for Longer Term: For extended storage, quesadillas freeze beautifully. Once completely cooled, wrap each individual quesadilla tightly in plastic wrap, and then an additional layer of aluminum foil. Place the wrapped quesadillas into a freezer-safe bag or container, removing as much air as possible. They can be stored in the freezer for up to 2-3 months. To reheat from frozen, it’s best to thaw them in the refrigerator overnight before proceeding with reheating instructions.
- Reheating for Optimal Texture:
- Oven or Toaster Oven (Recommended): This method yields the best results for restoring crispiness. Preheat your oven or toaster oven to 350°F (175°C). Place the quesadillas directly on a baking sheet (you can line it with parchment paper for easier cleanup) and heat for 10-15 minutes, or until they are thoroughly heated through and the tortillas have regained their desired crispiness.
- Skillet (Good Alternative): For a quick reheat that maintains some crispness, place quesadillas in a dry, non-stick skillet over medium heat. Reheat for 3-5 minutes per side, or until warmed through and lightly re-crisped.
- Microwave (Quickest, but Soft): If speed is your top priority and maintaining a crispy texture isn’t essential, you can microwave quesadillas. Heat for 30-60 seconds, or until hot. Be aware that this method will result in softer tortillas.
Explore More Delicious Mexican-Inspired Dinners
As someone who hails from New Mexico, I was raised on the incredible, vibrant flavors of authentic Mexican food. This culinary heritage is a deep part of who I am, and it’s a passion I love to share. While I’ve had the pleasure of trying many restaurants since moving to Utah, I often find that nothing quite captures the comforting, robust, and nuanced tastes of the Mexican dishes I grew up with like a home-cooked meal. That’s why I take so much joy in perfecting and recreating these beloved recipes in my own kitchen. If you’ve loved the simplicity and flavor of these easy baked quesadillas, I am absolutely certain your family will enjoy these other Mexican-inspired dishes that have become cherished favorites in my home. Each recipe is designed to bring that wonderful, authentic taste of Mexico directly to your dinner table, making mealtime both exciting and effortless.
- Vegetarian Mexican Casserole: A delightful layered casserole brimming with colorful vegetables, wholesome beans, and savory cheese, offering a hearty and satisfying option perfect for a meatless Monday or anyone seeking a robust vegetarian meal. It’s incredibly flavorful and packed with goodness.
- Slow Cooker Shredded Chicken Tacos: This recipe is the epitome of convenience! Simply set it and forget it. You’ll come home to incredibly tender, juicy shredded chicken, perfectly infused with amazing spices, ready to be piled into warm tortillas for an effortlessly delicious taco night that practically cooks itself.
- Salsa Verde Chicken Casserole: A truly comforting and flavorful casserole featuring succulent pieces of chicken baked in a zesty and bright salsa verde sauce, generously topped with a blanket of melted cheese. It’s a harmonious blend of tangy, savory, and mildly spicy notes that is sure to please.

Baked Quesadillas
Julia Pacheco
5
15
20
4 servings
Pin Recipe
Comment
Print Recipe
Ingredients
- 1 lb Ground Beef
- 1 ½ tbsp Taco Seasoning
- ⅓ cup Water
- 16 oz Refried Beans
- Non-stick spray
- 1 cup Colby Jack Cheese, shredded
- 12 Small Flour Taco Tortillas (makes 6 quesadillas)
Instructions
-
Cook the ground beef in a skillet over medium-high heat, breaking it apart until fully browned. Drain any excess grease. Add the taco seasoning and water, stirring until the water has evaporated and the beef is well coated. Set aside.
-
Preheat your oven to 450°F (230°C). Line a large baking sheet with parchment paper and lightly spray it with non-stick cooking spray.
-
Arrange 6 flour tortillas on the prepared baking sheet. Evenly spread refried beans over each tortilla, then top with the seasoned taco meat and a generous sprinkle of shredded Colby Jack cheese. Place a second tortilla on top of each to form a quesadilla.
-
Bake for 8-12 minutes, or until the tortillas are golden brown and crispy, and the cheese is beautifully melted and bubbly. For extra crispiness, you can carefully flip them halfway through baking.
-
Remove from the oven, slice into halves or wedges, and serve immediately with your favorite toppings such as shredded lettuce, salsa, sour cream, and fresh cilantro. Enjoy!
Video
Nutrition
Calories: 771kcal
|
Carbohydrates: 58g
|
Protein: 39g
|
Fat: 40g
|
Saturated Fat: 18g
|
Polyunsaturated Fat: 3g
|
Monounsaturated Fat: 15g
|
Trans Fat: 1g
|
Cholesterol: 112mg
|
Sodium: 1666mg
|
Potassium: 461mg
|
Fiber: 8g
|
Sugar: 7g
|
Vitamin A: 510IU
|
Vitamin C: 0.4mg
|
Calcium: 416mg
|
Iron: 7mg
Nutrition information is automatically calculated, so should only be used as an approximation.
Tried this recipe?
Let us know how it was!