
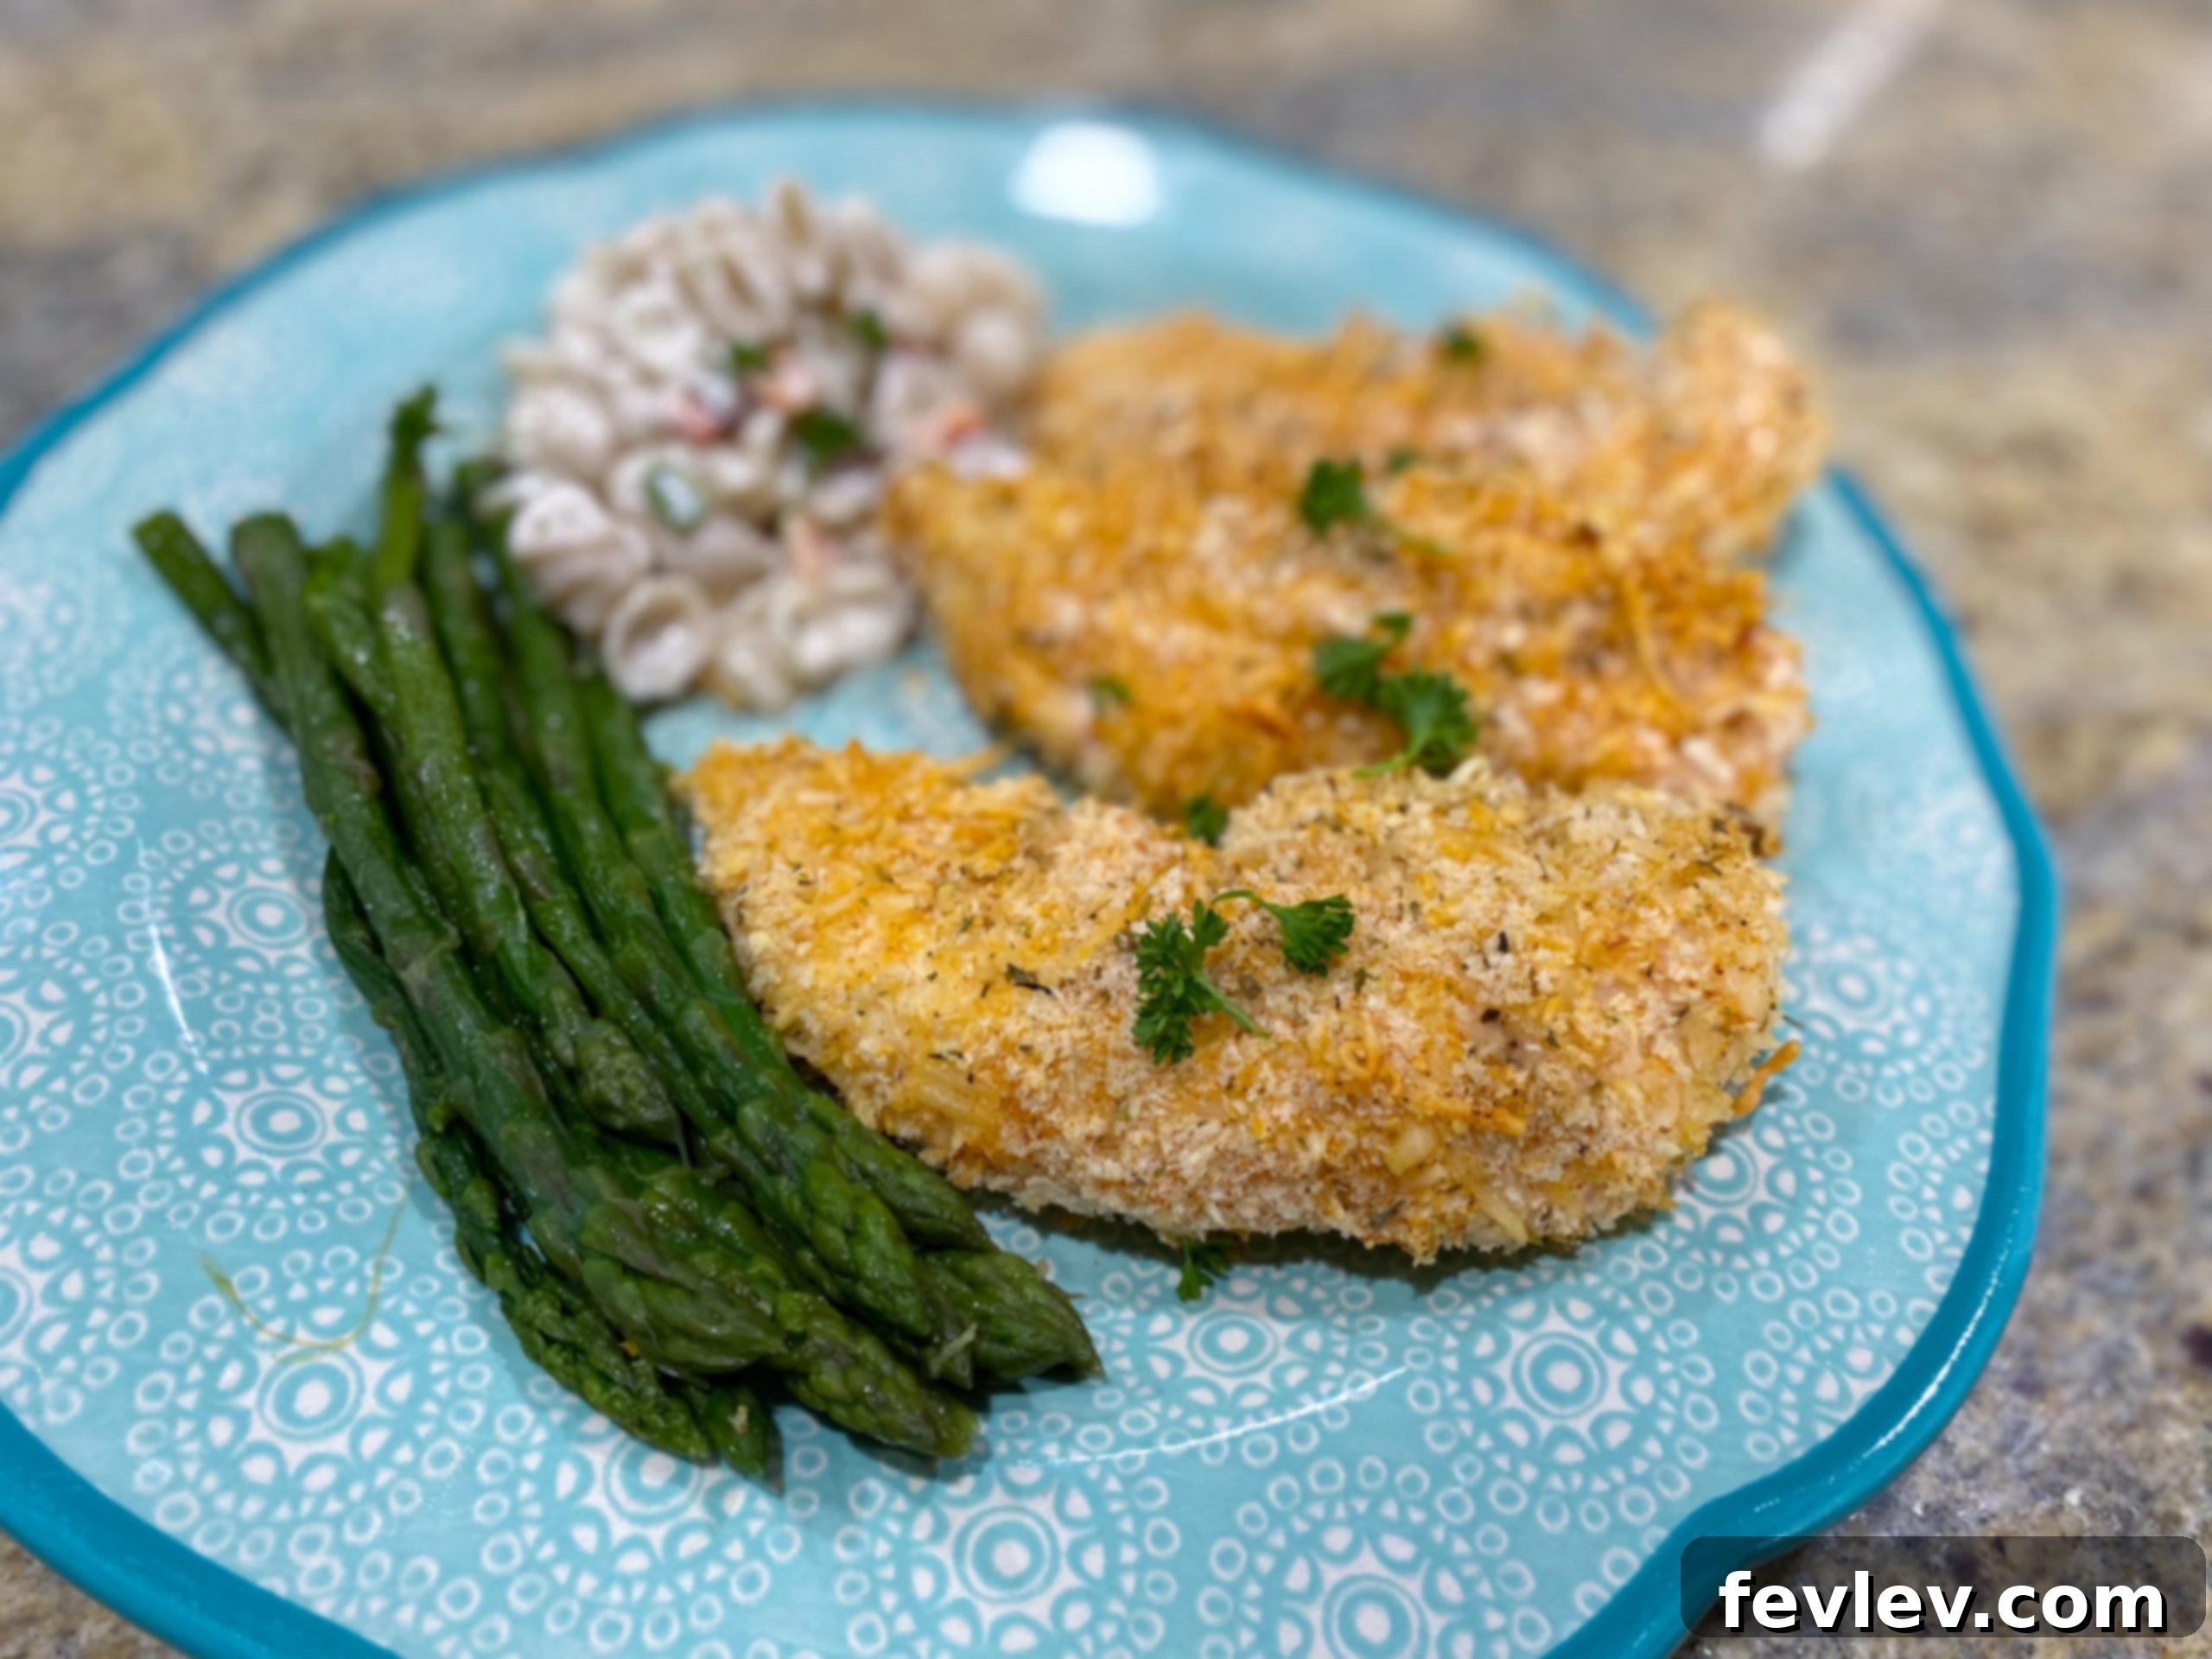
Ultra Crispy Baked Chicken Tenders: A Healthy & Flavorful Family Favorite

By: Julia Pacheco
(5 from 1 vote)
Indulge in the ultimate crispy chicken experience without the guilt of deep frying! These baked chicken tenders are masterfully seasoned and breaded to achieve an irresistible golden crunch on the outside, while remaining wonderfully juicy and tender on the inside. Crafted for ease and flavor, this recipe is a perfect solution for busy weeknights, a crowd-pleasing appetizer, or a healthy addition to your favorite salads and sandwiches. Prepare to transform your perception of baked chicken with this simple yet sensational dish!
Prep Time: 10 mins
Cook Time: 20 mins
Total Time: 30 mins
Servings: 4 servings
Leave a Comment
Print Recipe
Why You’ll Fall in Love with These Crispy Baked Chicken Tenders
Say goodbye to dry, uninspiring baked chicken! This recipe is engineered to deliver a truly exceptional culinary experience, proving that healthier choices don’t mean sacrificing flavor or texture. We’re talking about a symphony of crisp, golden breading enveloping succulent, perfectly cooked chicken—a delight for both your palate and your peace of mind.
A Healthier Indulgence for the Whole Family
One of the most compelling reasons to make these chicken tenders is their significantly improved health profile. By skillfully baking them, we sidestep the need for deep frying, dramatically cutting down on unhealthy fats and excess calories. This means you can savor every bite of this classic comfort food, confident that you’re serving a nutritious meal. It’s an excellent way to enjoy lean protein in a form everyone adores, fitting seamlessly into a balanced diet without compromising on taste.
Effortless Preparation for Busy Lives
Time is a precious commodity, and this recipe respects that. With a mere 10 minutes of hands-on preparation and a quick 20-minute bake, you can have a wholesome, homemade dinner on the table in under half an hour. It’s the ideal solution for weeknight dinners when time is short but the craving for something delicious and satisfying is strong. Plus, the simple steps make it a fantastic entry-level recipe for aspiring home cooks.
The Ultimate Kid-Friendly Meal
Chicken tenders hold a special place in the hearts of children everywhere, and these baked versions are no exception. Their appealing shape, satisfying crunch, and mild, savory flavor make them an instant hit with kids, even the notoriously picky eaters. Serve them with their favorite dipping sauces, and watch them disappear! This recipe provides a healthier, homemade alternative to fast-food options, giving you peace of mind about what your family is eating.
Remarkably Versatile for Any Occasion
Beyond being a fantastic standalone meal, these crispy baked chicken tenders are incredibly versatile. They’re perfect for packing into lunchboxes, adding a delightful crunch to fresh salads, or layering into wraps and sandwiches. Hosting a casual get-together? These tenders make an excellent appetizer that guests of all ages will flock to. Their adaptability means they can be tailored to countless meal scenarios, making them a staple in your culinary repertoire.
Essential Ingredients for Unforgettable Crispy Tenders
The magic of these tenders lies in a carefully selected list of ingredients that work together to create an explosion of flavor and texture. Here’s what you’ll need, with insights into each component’s role:
- ⅓ cup all-purpose flour: This forms the foundational layer, ensuring the egg wash adheres uniformly to the chicken for a consistent breading.
- 2 large eggs: Acting as the vital binder, whisked eggs create a sticky surface for the breadcrumbs, locking in moisture and flavor.
- 1 cup plain panko breadcrumbs: The undisputed champion of crispiness! Panko’s larger, airy flakes provide an unparalleled crunch that regular breadcrumbs simply can’t match.
- ⅔ cup Parmesan cheese: Adds a delicious nutty, salty depth to the crust and helps achieve that beautiful golden-brown color. Freshly grated Parmesan offers the best results.
- 1 tsp Italian seasoning: A classic blend of herbs like oregano, basil, thyme, and rosemary that infuses the chicken with aromatic, savory notes.
- 1 tsp paprika: Contributes a mild, sweet, peppery flavor and a lovely warm hue to the breading, enhancing its visual appeal.
- 1 tsp garlic powder: A staple seasoning that provides a robust, savory base, elevating the overall taste profile of the chicken.
- ½ tsp salt: Essential for seasoning the chicken from within and bringing out the best flavors of all the ingredients.
- ¼ tsp black pepper: A touch of freshly ground pepper adds a subtle warmth and balances the seasoning blend.
- 1 ½ – 2 lbs chicken tenderloins: The ideal cut for this recipe—naturally tender and perfectly sized. Alternatively, you can slice boneless, skinless chicken breasts into 1-inch wide strips.
Simple Steps to Achieving Crispy Perfection
Follow these detailed, easy-to-understand instructions to create baked chicken tenders that are consistently golden, crunchy, and irresistibly delicious:
- Preheat Oven and Prepare Baking Sheet: Begin by preheating your oven to a robust 425°F (220°C). This high temperature is paramount for achieving that desirable crisp exterior. Line a large baking sheet with parchment paper to prevent sticking and facilitate easy cleanup. For optimal crispiness on all sides, place an oven-safe wire rack on top of the parchment paper and lightly spray it with non-stick cooking spray. The rack allows hot air to circulate freely around the chicken, ensuring an even, all-around crunch.
- Set Up Your Breading Stations: Arrange three shallow bowls or dishes in a row to create an efficient breading assembly line. In the first bowl, pour the all-purpose flour. In the second bowl, crack the two large eggs and whisk them vigorously until the yolks and whites are thoroughly combined and smooth. In the third bowl, combine the plain panko breadcrumbs, grated Parmesan cheese, Italian seasoning, paprika, garlic powder, salt, and black pepper. Stir these dry ingredients together thoroughly with a fork or spoon to ensure an even distribution of flavors.
- Bread the Chicken Tenderloins: Take one chicken tenderloin at a time and meticulously coat it through the prepared stations. First, dredge the tenderloin entirely in the flour, shaking off any significant excess. This initial flour layer provides a dry, textured surface for the egg to cling to. Next, dip the floured chicken into the whisked egg wash, ensuring it is fully saturated. Allow any surplus egg to drip back into the bowl. Finally, transfer the chicken to the panko mixture. Press the panko firmly onto all sides of the tenderloin, ensuring a thick, even coating. The more panko adheres, the crispier your tenders will be. Place the fully breaded tenderloin onto the prepared wire rack on the baking sheet. Repeat this precise process for all remaining chicken pieces, making sure they are arranged in a single layer without touching each other. Overcrowding can lead to steaming, which diminishes crispiness.
- Bake Until Golden and Cooked Through: Carefully transfer the baking sheet with the breaded chicken tenders to your preheated oven. Bake for approximately 15-20 minutes. The cooking time may vary slightly depending on the thickness of your chicken and your oven’s calibration. The tenders should turn a beautiful golden brown and feel firm to the touch. To confirm doneness and ensure food safety, insert a meat thermometer into the thickest part of a chicken tender; it should register an internal temperature of 165°F (74°C). For even crispier results, you can flip the tenders halfway through the baking time, though this is often unnecessary if using a wire rack.
- Rest and Serve: Once the chicken tenders are perfectly cooked, remove them from the oven. Allow them to rest on the baking sheet or a clean plate for 3-5 minutes before serving. This crucial resting period allows the juices to redistribute throughout the chicken, resulting in maximum tenderness and flavor. Serve these glorious crispy baked chicken tenders hot with your preferred dipping sauces and side dishes. Enjoy every satisfying bite!
Pro Tips for Unbeatable Crispy Baked Chicken Tenders
Achieving restaurant-quality crispiness and flavor in your baked chicken tenders is entirely possible with a few expert tricks up your sleeve. Incorporate these tips for consistently perfect results:
- Always Pat the Chicken Dry: This step cannot be overstated. Before beginning the breading process, use paper towels to thoroughly pat down each chicken tenderloin. Removing excess moisture from the chicken’s surface is crucial for the flour and breadcrumbs to adhere properly, forming a truly crispy crust rather than a soggy one.
- Embrace the Panko Advantage: If you’re aiming for that signature crunch, Panko breadcrumbs are non-negotiable. Their unique, airy, and flaky texture ensures a much crispier result compared to traditional breadcrumbs, which can often lead to a denser, less appealing coating.
- The Magic of a Wire Rack: Baking your chicken tenders on a wire rack placed over a baking sheet is a game-changer. This simple elevation allows hot air to circulate freely around the entire surface of each tender, ensuring that both the top and bottom become equally golden and crispy. Without it, the bottom side might steam against the pan, becoming soft.
- Avoid Overcrowding the Pan: Give your chicken tenders plenty of room on the baking sheet. If they are packed too closely together, they will release moisture, creating steam rather than crisping up. This leads to a less crunchy, even soggy, outcome. If necessary, use two baking sheets to provide adequate spacing.
- Master the Even Breading: Take your time during the breading process. Ensure each tenderloin is fully and evenly coated at every stage – flour, egg, and panko. A uniform coating is vital for consistent crispiness and flavor in every single bite. Don’t rush this step!
- Light Oil Spray for Extra Crunch: For an even deeper golden color and an extra layer of crunch, lightly mist the breaded chicken tenders with cooking spray or olive oil spray just before they go into the oven. This helps the panko toast beautifully.
- Always Check for Doneness with a Thermometer: To guarantee your chicken is cooked safely and remains juicy, always use a reliable meat thermometer. Insert it into the thickest part of the largest tenderloin; it should register 165°F (74°C). This prevents both undercooking and overcooking, which can lead to dry chicken.
Creative Variations & Customizations to Explore
While the classic crispy baked chicken tenders are undeniably delicious, this recipe serves as a fantastic canvas for culinary creativity. Don’t hesitate to experiment with these ideas to tailor the tenders to your unique taste or dietary preferences:
- Amp Up the Heat: For those who love a bit of a kick, stir in a pinch of cayenne pepper, red pepper flakes, or a dash of chili powder into your panko breadcrumb mixture. Adjust to your desired level of spice.
- Herbaceous Delight: Change the flavor profile by swapping Italian seasoning for other dried herbs like a blend of dill and chives, or a more robust mix of dried rosemary and thyme. Freshly chopped parsley or cilantro can also be mixed into the panko for a brighter flavor.
- Cheese Please! While Parmesan is classic, consider experimenting with other finely grated hard cheeses like Asiago or Pecorino Romano for a different savory note in the crust. Even a sharp cheddar can add an interesting twist.
- Go Gluten-Free: Easily adapt this recipe for a gluten-free diet by substituting the all-purpose flour with your favorite gluten-free flour blend and using gluten-free panko breadcrumbs, which are widely available.
- Nutty Crunch: For an added layer of texture and a boost of nutrients, finely crush a small amount of nuts (such as almonds, walnuts, or pecans) and incorporate them into the panko mixture.
- Smoked Paprika Depth: Replace regular paprika with smoked paprika to infuse the tenders with a wonderful, smoky aroma and flavor, adding another dimension to the dish.
- Lemon Zest Brightness: For a fresh and zesty flavor, grate a teaspoon of fresh lemon zest into your breadcrumb mixture. The citrus notes will brighten the entire dish.
Perfect Pairings: What to Serve with Your Crispy Tenders
These versatile crispy baked chicken tenders are a fantastic centerpiece that pairs beautifully with a wide variety of sides and sauces, making them suitable for any meal. Here are some delicious ideas to complete your culinary creation:
- Dipping Sauce Extravaganza: The ultimate companion! Offer a selection of dipping sauces such as classic ketchup, tangy honey mustard, smoky BBQ sauce, creamy ranch, or a homemade garlic aioli. For a more adventurous palate, try a sweet chili sauce, sriracha mayo, or a vibrant cilantro-lime dip.
- Classic Comfort Sides: Recreate a beloved diner experience by serving them alongside a generous portion of oven-baked french fries, sweet potato fries, or hearty potato wedges.
- Fresh and Zesty Salads: For a lighter, balanced meal, slice the tenders and toss them into a crisp Caesar salad, a colorful garden salad with a vinaigrette, or a refreshing coleslaw.
- Healthy Vegetable Companions: Pair with simple yet delicious roasted vegetables like broccoli, asparagus spears, green beans, or a side of steamed corn on the cob for added nutrition and color.
- Sandwich and Wrap Fillings: Transform your tenders into a satisfying main course by tucking them into warm buns with fresh lettuce, sliced tomatoes, and a dollop of your favorite sauce, or wrap them in a soft tortilla with shredded cheese and crisp veggies.
- Macaroni and Cheese Bliss: For the ultimate comfort food combination, serve your crispy tenders next to a creamy, cheesy bowl of homemade macaroni and cheese.
Storage and Reheating for Best Results
Enjoying your crispy baked chicken tenders beyond the first meal is easy with proper storage and reheating techniques:
- Storage: Any leftover chicken tenders should be transferred to an airtight container and refrigerated promptly. They will stay fresh and delicious for up to 3-4 days.
- Reheating: To best preserve their crisp texture, avoid the microwave, which tends to make them soggy. Instead, reheat your tenders in a preheated oven or an air fryer at 350°F (175°C) for 8-12 minutes, or until they are thoroughly heated through and have regained their wonderful crispiness.
Tried this incredible recipe? We’re eager to hear about your experience! Please share your thoughts and let us know how your Ultra Crispy Baked Chicken Tenders turned out in the comments below!
Leave a Comment