
Product links may contain affiliate links. As an Amazon Associate, I earn from qualifying purchases.
Easy & Delicious Baked Manicotti: Your New Go-To Italian Dinner
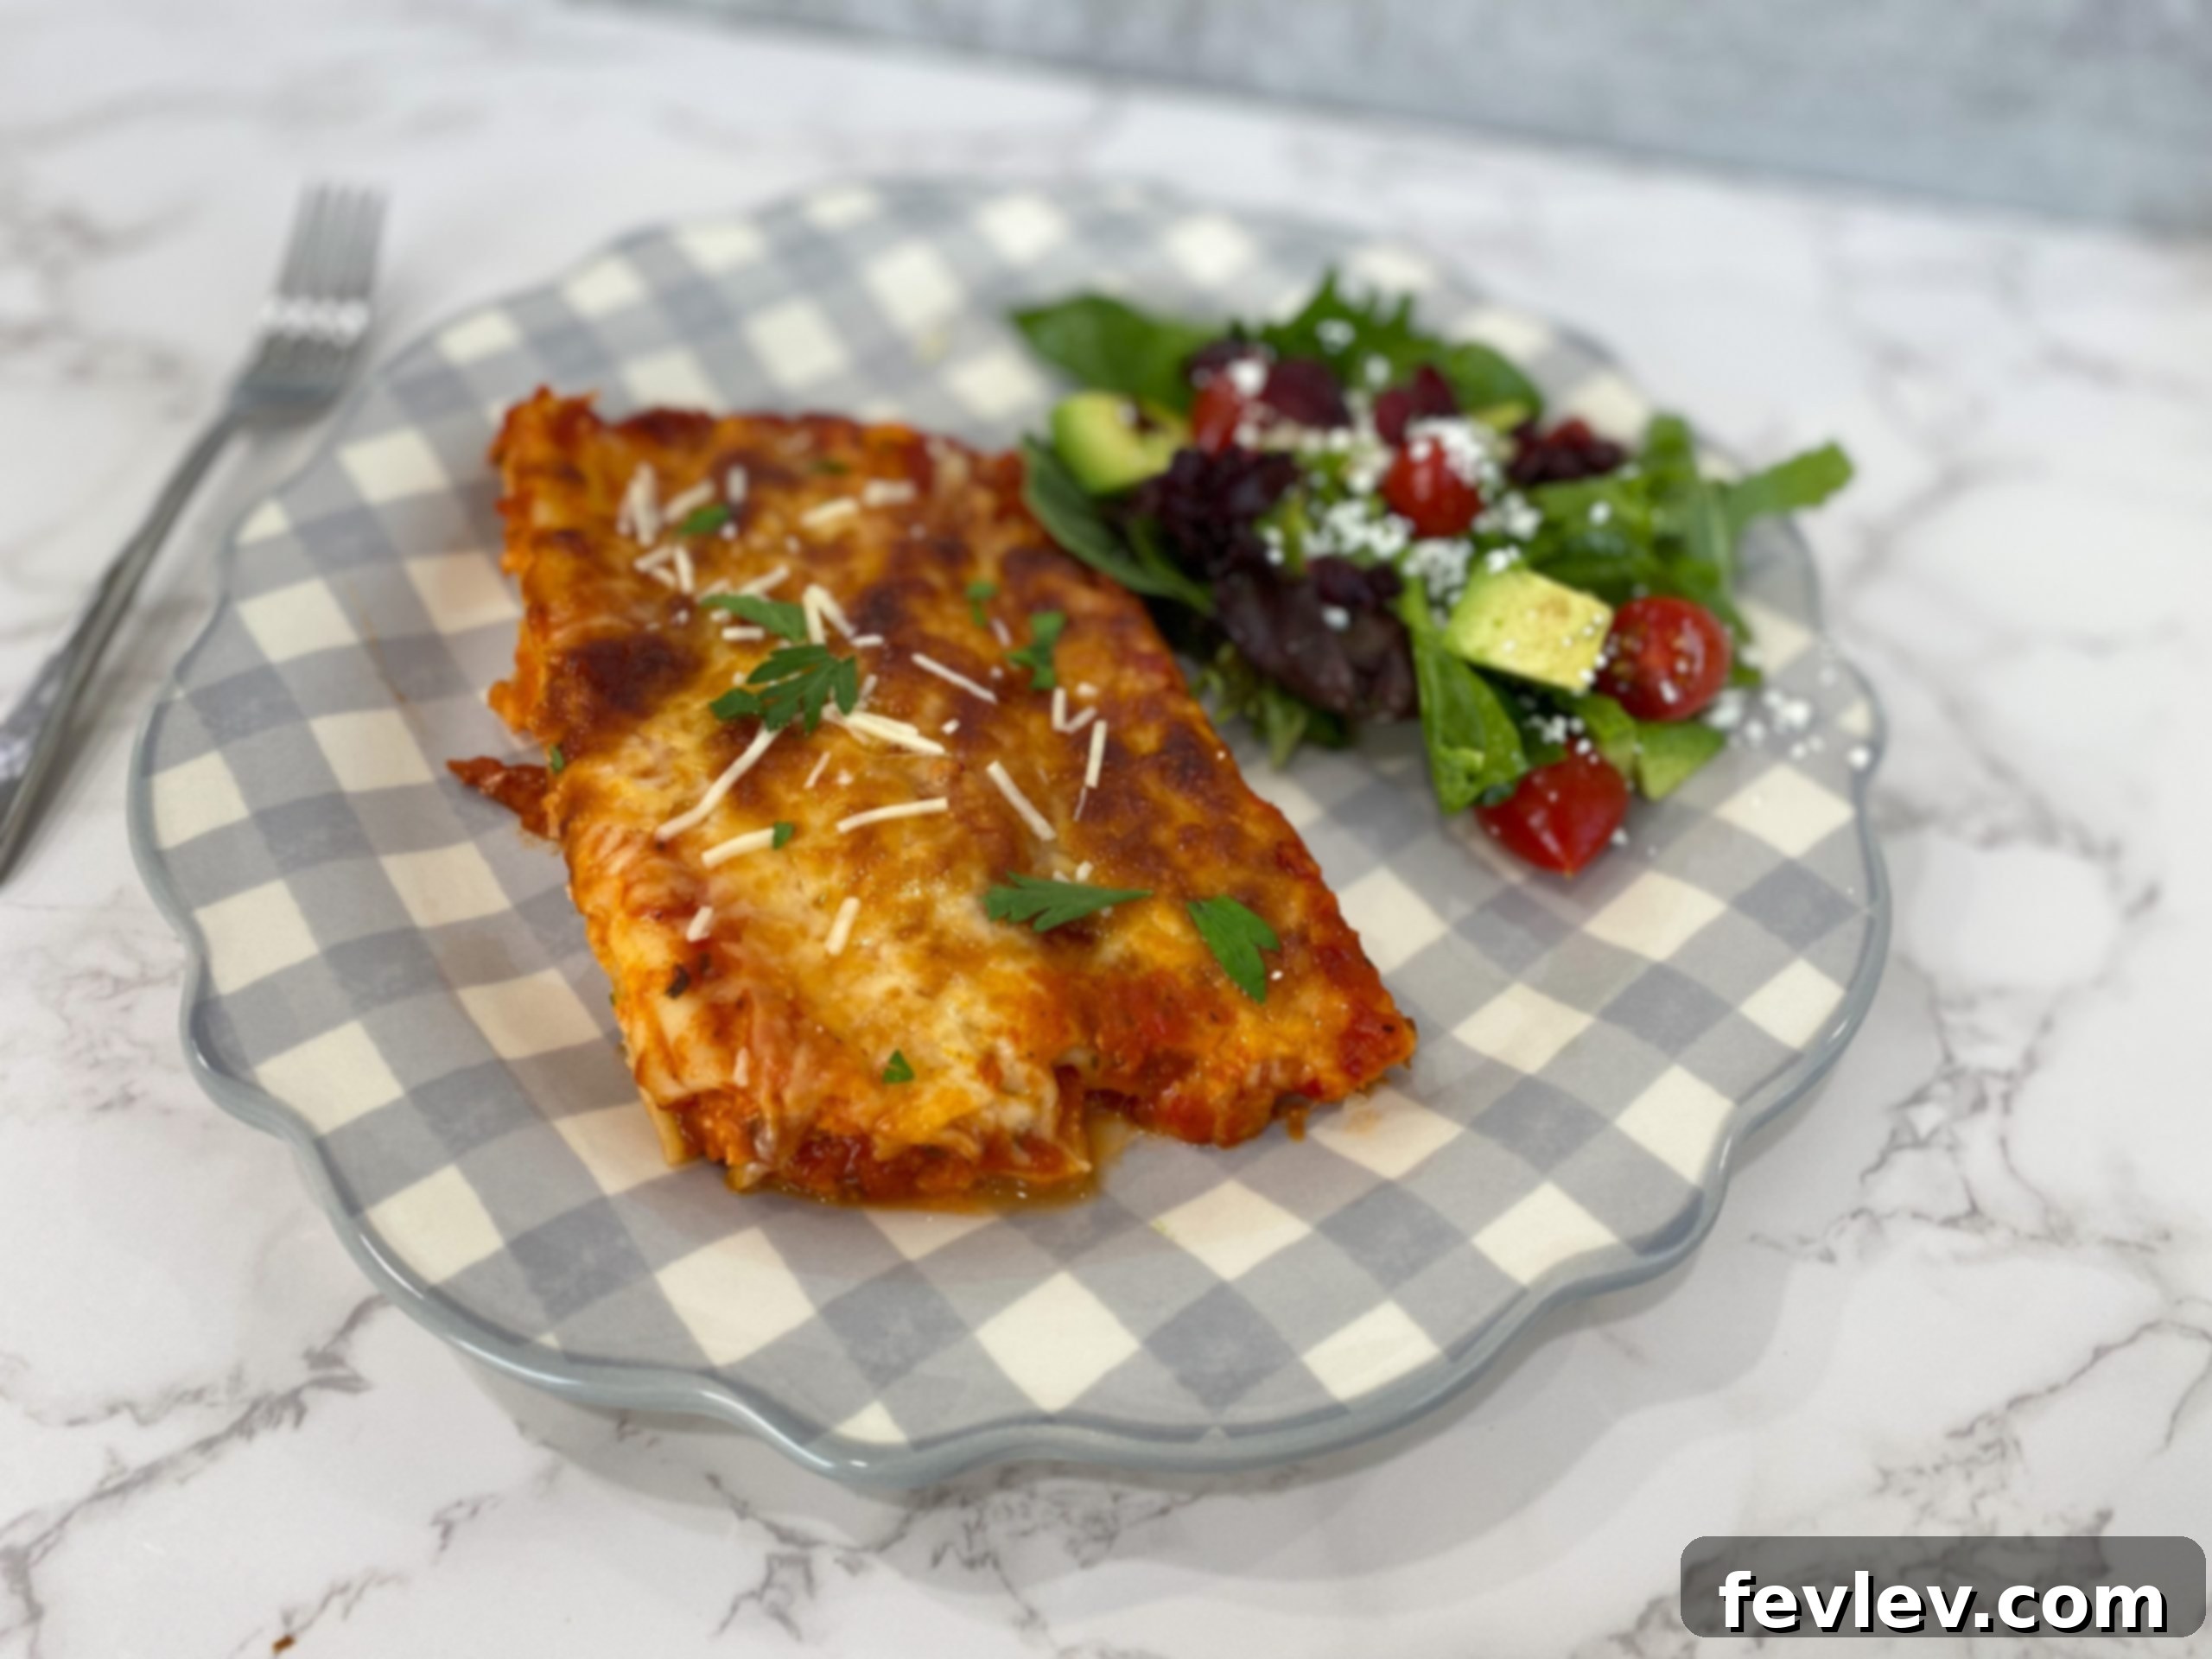
Baked manicotti is a timeless Italian classic that brings warmth and flavor to any dinner table. Imagine tender pasta tubes generously stuffed with a rich, creamy cheese mixture, smothered in a savory marinara sauce, and baked until bubbly and golden. It’s a dish that looks incredibly impressive but is surprisingly simple to make at home. Forget takeout; this recipe guides you through creating restaurant-quality manicotti in under an hour of active prep time, making it perfect for a comforting weeknight meal or a special weekend gathering.
Whether you’re new to Italian cooking or a seasoned home chef, this baked manicotti recipe is designed for success. We’ll cover everything from perfectly boiling the pasta to creating the most delectable cheese filling and assembling it all for a show-stopping bake. Get ready to delight your taste buds and impress your family and friends with this decadent and deeply satisfying dish!
How to Make Baked Manicotti: A Step-by-Step Guide
Creating this magnificent manicotti dish involves a few straightforward stages. Don’t be intimidated by the multi-step process; each part is simple, and we’ll break it down into manageable segments. A crucial tip for any cooking endeavor: always read through the entire recipe before you begin. This helps you visualize the process, understand the flow, and ensure you have all your ingredients and tools ready, making your cooking experience much smoother and more enjoyable.
Step 1: Prepare Your Ingredients and the Manicotti Pasta.
The foundation of exceptional manicotti lies in two key components: perfectly cooked pasta and a flavorful cheese filling. Let’s start with preparing these essentials.
Cooking the Manicotti Pasta
Begin by bringing a large pot of generously salted water to a rolling boil. Carefully add your manicotti pasta shells, ensuring they don’t stick together. Cook them according to the package directions, but with a critical caveat: boil them until they are just al dente. This means they should be firm to the bite but not hard. Overcooked manicotti will become too soft and mushy in the oven, making them difficult to fill and resulting in a less-than-ideal texture. You want them pliable enough to stuff without tearing, but still holding their shape. Once cooked, drain the pasta immediately using a reliable strainer, and rinse them briefly with cold water to stop the cooking process and prevent them from sticking. Lay them out on a clean kitchen towel or parchment paper to cool slightly while you prepare the filling.
Crafting the Creamy Cheese Mixture
While your pasta cools, turn your attention to the heart of the manicotti: the rich and savory cheese filling. In a medium-sized mixing bowl, combine the ricotta cheese, a generous portion of mozzarella cheese, grated Parmesan cheese, two eggs (which act as a binder), Italian seasoning, salt, and black pepper. Stir all these ingredients together thoroughly until well combined and smooth. The ricotta provides the creamy base, mozzarella adds a wonderful gooey texture when melted, and Parmesan introduces a sharp, salty depth of flavor. The seasonings elevate the overall taste, creating a harmonious blend that perfectly complements the marinara sauce.
Step 2: Fill the Manicotti and Assemble the Dish.
This stage, often perceived as the most challenging, is actually quite simple with the right technique. Filling the manicotti tubes neatly and efficiently is key to a beautiful final presentation.
The Easiest Way to Fill Manicotti
The most effective and least messy method for filling manicotti is by using a piping bag. Don’t worry if you don’t own a fancy pastry bag; a large Ziploc bag works perfectly! Simply spoon your prepared cheese mixture into one corner of the Ziploc bag. Snip a small corner off the bag (about half an inch wide). Now, hold each manicotti tube in one hand and pipe the cheese filling directly into the center of the tube with the other. Gently squeeze the bag, allowing the creamy mixture to fill the entire length of the pasta shell. Repeat this process for each manicotti tube, taking care to fill them evenly. Attempting to use a spoon or fork for this task will undoubtedly lead to frustration, mess, and a much longer prep time – trust me, I speak from experience! The piping bag method ensures even distribution and keeps your hands clean.
Assembling Your Baked Manicotti
Once all your manicotti tubes are filled, it’s time to assemble your baking dish. Lightly grease a 9×13 inch baking dish with nonstick spray to prevent sticking. Pour approximately half of your marinara sauce evenly over the bottom of the dish. This creates a flavorful bed for the pasta and helps prevent it from drying out. Carefully arrange the filled manicotti tubes side-by-side in a single layer over the sauce. Once all the manicotti are in place, pour the remaining marinara sauce over the top, ensuring each pasta tube is generously coated. Finally, sprinkle the remaining mozzarella cheese evenly over the saucy manicotti. This top layer of cheese will melt into a golden, bubbly crust during baking, adding an irresistible finish to your dish.
Step 3: Bake to Golden Perfection.
The final stage is the easiest: letting your oven do the work. The aromas that will fill your kitchen during this step are simply divine!
Baking Instructions
Before assembling, preheat your oven to 350°F (175°C). Once your dish is assembled, cover the baking dish loosely with aluminum foil. This helps to steam the pasta and cheese, ensuring everything cooks through and prevents the cheese from browning too quickly. Bake for 30 minutes with the foil on. Then, remove the foil and continue baking for another 10-15 minutes, or until the cheese on top is melted, bubbly, and beautifully golden brown. The total baking time is typically around 40-45 minutes. Once removed from the oven, let the manicotti rest for 5-10 minutes before serving. This allows the cheeses and sauce to set slightly, preventing it from falling apart when you serve. The wait will feel long, but it’s absolutely worth it for that perfect, decadent bite!
What to Serve with Baked Manicotti: Perfect Pairings
Baked manicotti is a hearty and satisfying meal on its own, but pairing it with the right side dishes can elevate your dining experience even further. Since this dish is rich and a little more time-intensive to prepare, opting for simple, quick-to-make sides is often the best choice, creating a balanced and complete meal without adding extra stress.
For a lighter contrast to the creamy pasta, a fresh green salad is always an excellent choice. My favorite classic side salad, with crisp greens and a tangy vinaigrette, offers a refreshing counterpoint. Alternatively, you could grab a ready-made Caesar salad kit from your local grocery store, like Costco, for minimal effort. Steamed or roasted vegetables are another fantastic option. Think bright green beans, tender asparagus, or broccoli florets, lightly seasoned and steamed until crisp-tender. These add essential nutrients and a fresh element to the plate.
If you’re truly embracing the carb-laden comfort food experience, you can’t go wrong with warm, crusty garlic bread or garlic knots. Dipping a piece of buttery garlic bread into the rich marinara sauce is pure bliss. A simple loaf of Italian bread, served with olive oil for dipping, is also a wonderful addition, perfect for soaking up every last drop of sauce.
And let’s not forget dessert! After creating such an amazing and satisfying meal, you absolutely deserve a sweet treat. If you have older children or helpful partners at home, you might even “delegate” dessert duty! Imagine being rewarded with a batch of these delightful Chocolate Peanut Butter Cake Mix Cookies while you relax after your culinary achievement. A dream come true, right?!
Expert Tips for Manicotti Success
- Don’t Overcook the Pasta: This is crucial. Al dente pasta will hold its shape better during filling and won’t turn to mush in the oven.
- Use Quality Ingredients: Good quality ricotta, mozzarella, and marinara sauce make a noticeable difference in flavor.
- Chill the Filling (Optional): If your cheese mixture feels too soft, chilling it for 20-30 minutes in the refrigerator can make it firmer and easier to pipe.
- Make Ahead Option: You can assemble the entire dish, cover it tightly with foil, and refrigerate it for up to 24 hours before baking. Add an extra 10-15 minutes to the baking time if baking from cold.
- Freezing Instructions: Baked manicotti freezes beautifully! After baking and cooling completely, wrap individual portions or the entire dish tightly in plastic wrap and then foil. Freeze for up to 2-3 months. Thaw in the refrigerator overnight and reheat in the oven (covered) until heated through.
- Add a Protein: For a heartier meal, you can brown ground beef, Italian sausage, or a combination, season it, and mix it into the cheese filling before piping.
- Vegetarian Variations: Incorporate sautéed spinach, mushrooms, or finely chopped zucchini into the cheese filling for added flavor and nutrients. Just be sure to squeeze out any excess moisture from vegetables like spinach to prevent the filling from becoming watery.
Frequently Asked Questions About Baked Manicotti
- What is the difference between manicotti and cannelloni?
- Manicotti typically refers to ridged, large pasta tubes that are usually pre-made, while cannelloni are smooth pasta sheets that are rolled around a filling. Both are Italian pasta dishes filled with cheese or meat and baked with sauce.
- Can I use lasagna noodles instead of manicotti shells?
- Yes, you can! If you can’t find manicotti shells, boil lasagna noodles, then cut them in half crosswise. Spoon the filling onto one end and roll them up. This is a common substitution that works very well.
- How do I prevent my manicotti from being watery?
- Ensure your ricotta cheese is well-drained. If it seems excessively watery, you can place it in a fine-mesh strainer lined with cheesecloth over a bowl for an hour or two to let excess liquid drip out. Also, make sure any vegetables added to the filling (like spinach) are thoroughly squeezed dry.
- Can I use a different kind of sauce?
- Absolutely! While marinara is classic, you could use a meat sauce (Bolognese), a creamy rosé sauce, or even a white béchamel sauce for a different flavor profile. Just ensure you have enough sauce to cover the manicotti generously.
- What’s the best way to reheat leftover manicotti?
- Leftover manicotti reheats beautifully in the oven. Cover the dish with foil and bake at 350°F (175°C) for 20-30 minutes, or until heated through. You can also microwave individual portions, though the texture might be slightly softer.
Baked Manicotti
Julia Pacheco
20 mins
40 mins
1 hr
4 servings
Comment
Print Recipe
Ingredients
- 15 oz ricotta cheese
- 1 ¾ cup mozzarella cheese
- ¾ cup parmesan cheese
- 2 eggs
- 1 tsp Italian seasoning
- 1 tsp salt
- ½ tsp pepper
- 24 oz marinara sauce
- 6 oz manicotti pasta
Instructions
-
Preheat oven to 350℉ (175°C).
-
Cook manicotti according to the package instructions until al dente. Drain and rinse with cold water to prevent sticking.
-
In a medium-sized bowl, combine the ricotta, 1 cup of mozzarella cheese, parmesan, eggs, Italian seasoning, salt, and pepper. Stir well. For easy filling, transfer this cheese mixture into a large Ziploc bag and cut a small hole in one corner.
-
Grease a 9×13 inch baking dish with nonstick spray. Pour half of the marinara sauce into the bottom of the dish, spreading it evenly.
-
Using the Ziploc bag, fill each manicotti shell with approximately 3 to 4 tablespoons of the cheese mixture. Place the filled manicotti side-by-side in the prepared baking dish. Pour the remaining marinara sauce over the top, ensuring all pasta is covered, then sprinkle with the remaining mozzarella cheese. Bake for 40 minutes, uncovered for the last 10-15 minutes to brown the cheese. Let rest for 5-10 minutes before serving. Enjoy!
Video Tutorial
Nutrition Information
Calories: 637kcal | Carbohydrates: 46g | Protein: 40g | Fat: 33g | Saturated Fat: 19g | Polyunsaturated Fat: 2g | Monounsaturated Fat: 9g | Trans Fat: 0.01g | Cholesterol: 188mg | Sodium: 2119mg | Potassium: 806mg | Fiber: 4g | Sugar: 8g | Vitamin A: 1816IU | Vitamin C: 12mg | Calcium: 744mg | Iron: 4mg
Nutrition information is automatically calculated and should only be used as an approximation.
Tried this recipe?
Let us know how it was!