
Homemade Freezer Pizza: Your Ultimate Guide to Easy Meal Prep
Julia Pacheco
These homemade freezer pizzas are a game-changer for anyone seeking convenient, make-ahead meals that deliver incredible flavor without the hassle. Forget store-bought frozen options – our recipe allows you to customize every pizza with your favorite toppings, freeze them, and enjoy a quick, delicious dinner whenever you desire. Perfect for busy weeknights, unexpected guests, or simply curbing those pizza cravings instantly!
30 mins
15 mins
45 mins
16 13-inch pizzas
Comment
Print Recipe
Why Homemade Freezer Pizza is a Game-Changer for Meal Prep
In today’s fast-paced world, finding quick yet wholesome meal solutions is paramount. Homemade freezer pizza offers an unparalleled blend of convenience, customization, and cost-effectiveness. Instead of relying on expensive, often additive-filled store-bought frozen pizzas, you can create a batch of your own, perfectly tailored to your family’s tastes, and have them ready to bake at a moment’s notice. This method not only saves you significant time on busy weeknights but also empowers you to control the quality of ingredients, making for a healthier and more satisfying meal.
Imagine coming home after a long day, and instead of debating what to cook, you simply pull out a personalized pizza from your freezer, pop it in the oven, and within 15 minutes, a hot, delicious dinner is served. This recipe for freezer pizza meal prep is designed to maximize efficiency, allowing you to make several pizzas at once. From the perfectly elastic dough to the endless topping possibilities, we’ll guide you through every step to ensure your freezer is stocked with culinary delights.
Ingredients
For the Dough (Makes enough for 16 13-inch pizzas)
- 3 cups warm water (around 105-115°F or 40-46°C)
- 2 tablespoons active dry yeast
- 3 tablespoons honey (or sugar)
- ⅓ cup olive oil, plus extra for bowls
- 1 dash Italian seasoning
- 1 dash garlic powder
- 9 cups all-purpose flour (approximately)
For the Toppings (Per 13-inch pizza, adjust to taste)
- 1 large jar pizza sauce or marinara sauce
- 2-3 cups shredded mozzarella cheese (or a blend of your favorite cheeses)
- Your favorite meats: pepperoni, cooked sausage, ham, grilled chicken, bacon
- Your favorite vegetables: bell peppers, onions, mushrooms, olives, spinach, jalapeños, pineapple
Instructions
-
Activate the Yeast: In the bowl of a stand mixer, combine the warm water, active dry yeast, and honey. Whisk them together gently. Let this mixture sit for 5-10 minutes. You’ll know the yeast is active when it becomes foamy and bubbly, indicating it’s alive and ready to make your dough rise beautifully.
-
Add Flavor and Fat: Once the yeast is visibly activated, add the olive oil, a dash of garlic powder, and a dash of Italian seasoning to the mixture. These additions will infuse your pizza dough with a wonderful aromatic base.
-
Mix the Dough: Attach the dough hook to your stand mixer. Begin slowly adding the all-purpose flour, about 2 cups at a time, until approximately 9 cups have been incorporated. Mix on low speed until a shaggy dough forms, then increase speed to medium-low and knead for 5-7 minutes. The goal is to achieve an elastic, smooth dough that pulls away from the sides of the bowl. If it’s too sticky, add a little more flour, one tablespoon at a time. If it’s too dry, add a tiny bit of water.
-
First Rise: Divide the dough into two equal halves. Lightly grease two large bowls with olive oil. Place one dough ball into each bowl, turning to coat all sides with oil. Cover each bowl tightly with plastic wrap that has been sprayed with a non-stick cooking spray on the side facing the dough. Place the bowls in a warm spot (like a slightly warm oven, or a sunny kitchen counter) for about 1 hour, or until the dough has nearly doubled in size. This crucial step allows the yeast to work its magic and develop flavor.
-
Divide and Knead: Once risen, gently punch down one dough ball to release the air. Transfer it to a lightly floured surface and knead it gently about 5 times. Divide this dough ball in half. Repeat the process with the second dough ball. You should now have a total of four evenly sized dough balls.
-
Par-Bake the Crusts: Preheat your oven to 425°F (220°C). On a lightly floured surface, roll out one dough ball into a 13 to 16-inch round, depending on your desired pizza size. Sprinkle a pizza tray or baking sheet with a thin layer of cornmeal (this helps prevent sticking and adds crispiness). Carefully transfer the rolled dough onto the prepared tray. Bake the crust for about 8 minutes, or until it’s lightly golden and firm. This par-baking step is essential for freezer pizzas, as it prevents a soggy crust when you bake from frozen. Remove the par-baked crust from the oven and let it cool completely on a wire rack or a round cardboard cutout. Repeat this process for the remaining three dough rounds. Ensure all crusts are fully cooled before moving to the next step.
-
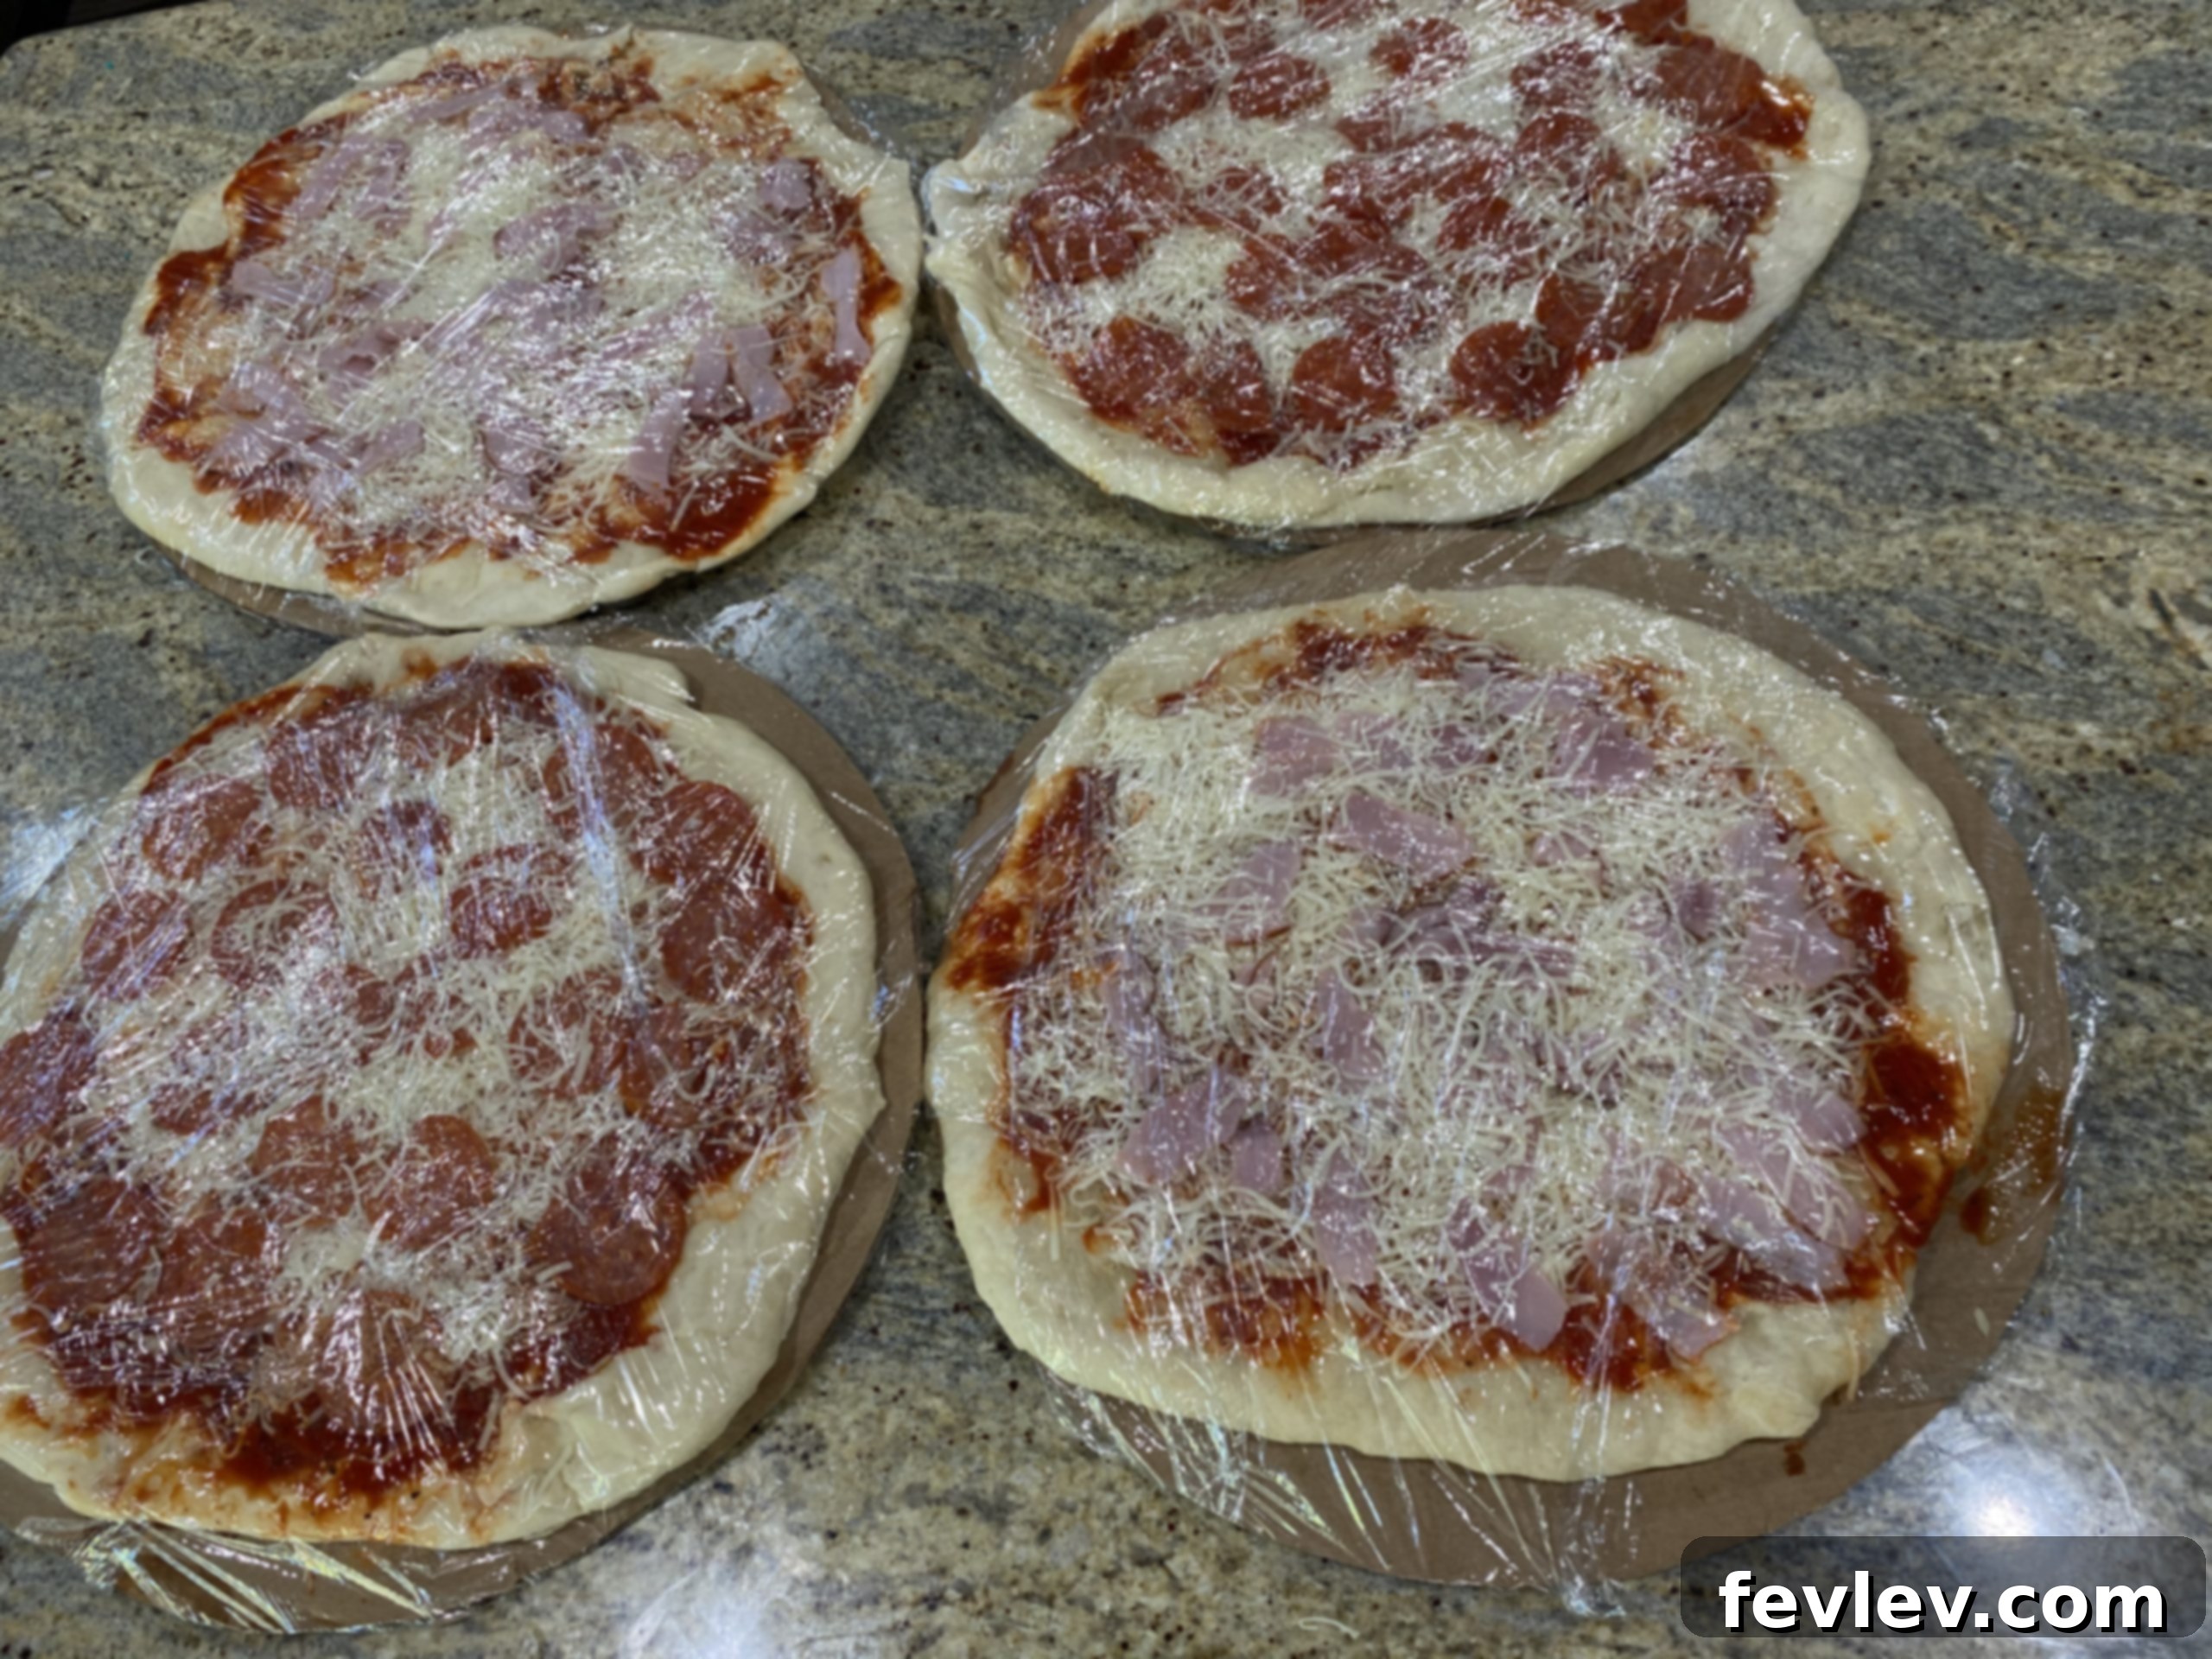
Assemble Your Pizzas: Once the par-baked crusts are completely cool, it’s time for the fun part – topping! Spread your choice of pizza sauce evenly over the crust, leaving a small border for the crust. Then, add a generous layer of cheese, followed by your favorite cooked meats, fresh vegetables, or any other toppings you enjoy. Get creative with different combinations!
-
Freeze for Storage: To prevent freezer burn and keep your pizzas fresh, wrap each assembled pizza meticulously. First, completely cover the pizza with plastic cling wrap, ensuring no air pockets. Then, wrap it tightly again with aluminum foil. This double layer of protection is key for long-term freezer storage.
-
Label for Convenience: Before placing them in the freezer, clearly label each foil-wrapped pizza. Include the type of pizza (e.g., “Pepperoni & Mushroom”), the date it was made, and the cooking instructions. This organization will be a lifesaver when you’re looking for a quick meal.
-
Bake from Frozen: When you’re ready to enjoy a homemade pizza, preheat your oven to 425°F (220°C). Remove the frozen pizza from all its wrappings. Place the frozen pizza directly on a preheated pizza stone or baking sheet. Bake for approximately 15 minutes, or until the cheese is bubbly and golden brown, and the crust is heated through and crispy. Cooking times may vary depending on your oven and the thickness of toppings.
Video Tutorial
Watch Julia Pacheco demonstrate how to incorporate these delicious freezer pizzas into a massive meal prep session, along with other tasty make-ahead dinner recipes.
Tips for the Perfect Homemade Freezer Pizza
- Dough Consistency is Key: Don’t rush the kneading process. An elastic dough will yield a light, airy, and chewy crust. Adjust flour sparingly until the dough is just slightly tacky but not sticky.
- Proper Rising: A warm, draft-free environment is crucial for dough to rise. If your kitchen is cold, you can warm your oven to its lowest setting for a few minutes, then turn it off and let the dough rise inside with the door slightly ajar.
- Par-Baking Prevents Soggy Crusts: This step is non-negotiable for freezer pizzas. It cooks out excess moisture from the dough, ensuring a crisp crust when you bake it from frozen.
- Cool Completely: Ensure your par-baked crusts are entirely cool before adding toppings and freezing. Warm crusts will create condensation, leading to ice crystals and a less desirable texture.
- Don’t Overload: While it’s tempting to pile on toppings, an overly heavy pizza can become difficult to handle and might not cook evenly from frozen. A balanced amount ensures optimal results.
- Pre-Cook Meats and Certain Veggies: All meat toppings (sausage, ground beef, chicken) should be fully cooked before adding to the pizza. Some vegetables like mushrooms, onions, and peppers can release a lot of water; lightly sautéing them beforehand can prevent a watery pizza.
Endless Customization: Make Your Pizza Truly Yours!
One of the biggest advantages of making freezer pizzas is the ability to customize them exactly to your liking. Here are some ideas to inspire your next batch:
- Classic Favorites: Pepperoni, Sausage & Mushroom, Margherita (fresh mozzarella, basil, tomato), Hawaiian (ham and pineapple).
- Gourmet Creations: BBQ Chicken (BBQ sauce base, cooked chicken, red onion, cilantro), White Pizza (garlic olive oil base, ricotta, mozzarella, spinach), Pesto Chicken, Mediterranean (feta, olives, sun-dried tomatoes).
- Vegetarian Delights: Loaded Veggie (bell peppers, onions, olives, mushrooms, spinach), Four Cheese, Spinach & Artichoke.
- Spice It Up: Add red pepper flakes, jalapeños, or a drizzle of hot honey after baking.
- Cheese Blends: Experiment with provolone, cheddar, fontina, or goat cheese alongside mozzarella for diverse flavor profiles.
Don’t be afraid to experiment with different sauces, cheeses, and topping combinations. The more variety you create, the more exciting your freezer pizza stash will be!
Freezing and Reheating Instructions
Proper freezing and reheating are key to enjoying your homemade freezer pizzas at their best.
Freezing Steps:
- Cool Completely: As mentioned, ensure par-baked crusts and all toppings are cool.
- Tightly Wrap: Use at least two layers of wrapping – plastic cling film first, followed by aluminum foil. This creates an airtight seal that protects against freezer burn.
- Flat Storage: If possible, freeze pizzas flat initially. Once solid, you can stack them to save space.
- Label Clearly: Always label with contents and date. Homemade freezer pizzas are best consumed within 1-2 months for optimal taste and quality.
Reheating Steps:
- Preheat Oven: Preheat your oven to 425°F (220°C). A hot oven ensures a crispy crust and melted cheese.
- Remove Packaging: Unwrap the frozen pizza completely.
- Bake Directly: Place the frozen pizza directly on a preheated pizza stone or a baking sheet.
- Bake Until Golden: Bake for 15-20 minutes, or until the crust is golden brown and crispy, and the cheese is thoroughly melted and bubbly. For extra crispiness, you can place it directly on the oven rack for the last few minutes.
- Rest and Serve: Let the pizza rest for 2-3 minutes after removing it from the oven before slicing. This allows the cheese to set slightly.
Nutrition Information
Per serving (approximation for 1/16th of recipe’s dough yield, without specific toppings):
- Calories: 309 kcal
- Carbohydrates: 57g
- Protein: 7g
- Fat: 5g
- Saturated Fat: 1g
- Polyunsaturated Fat: 1g
- Monounsaturated Fat: 3g
- Sodium: 2mg
- Potassium: 83mg
- Fiber: 2g
- Sugar: 3g
- Vitamin A: 1 IU
- Vitamin C: 0.02mg
- Calcium: 12mg
- Iron: 3mg
Nutrition information is automatically calculated and should be used as an approximation. Actual values may vary based on specific ingredients, brands, and topping choices.
Tried this recipe?
Let us know how it was! We love hearing from you.