
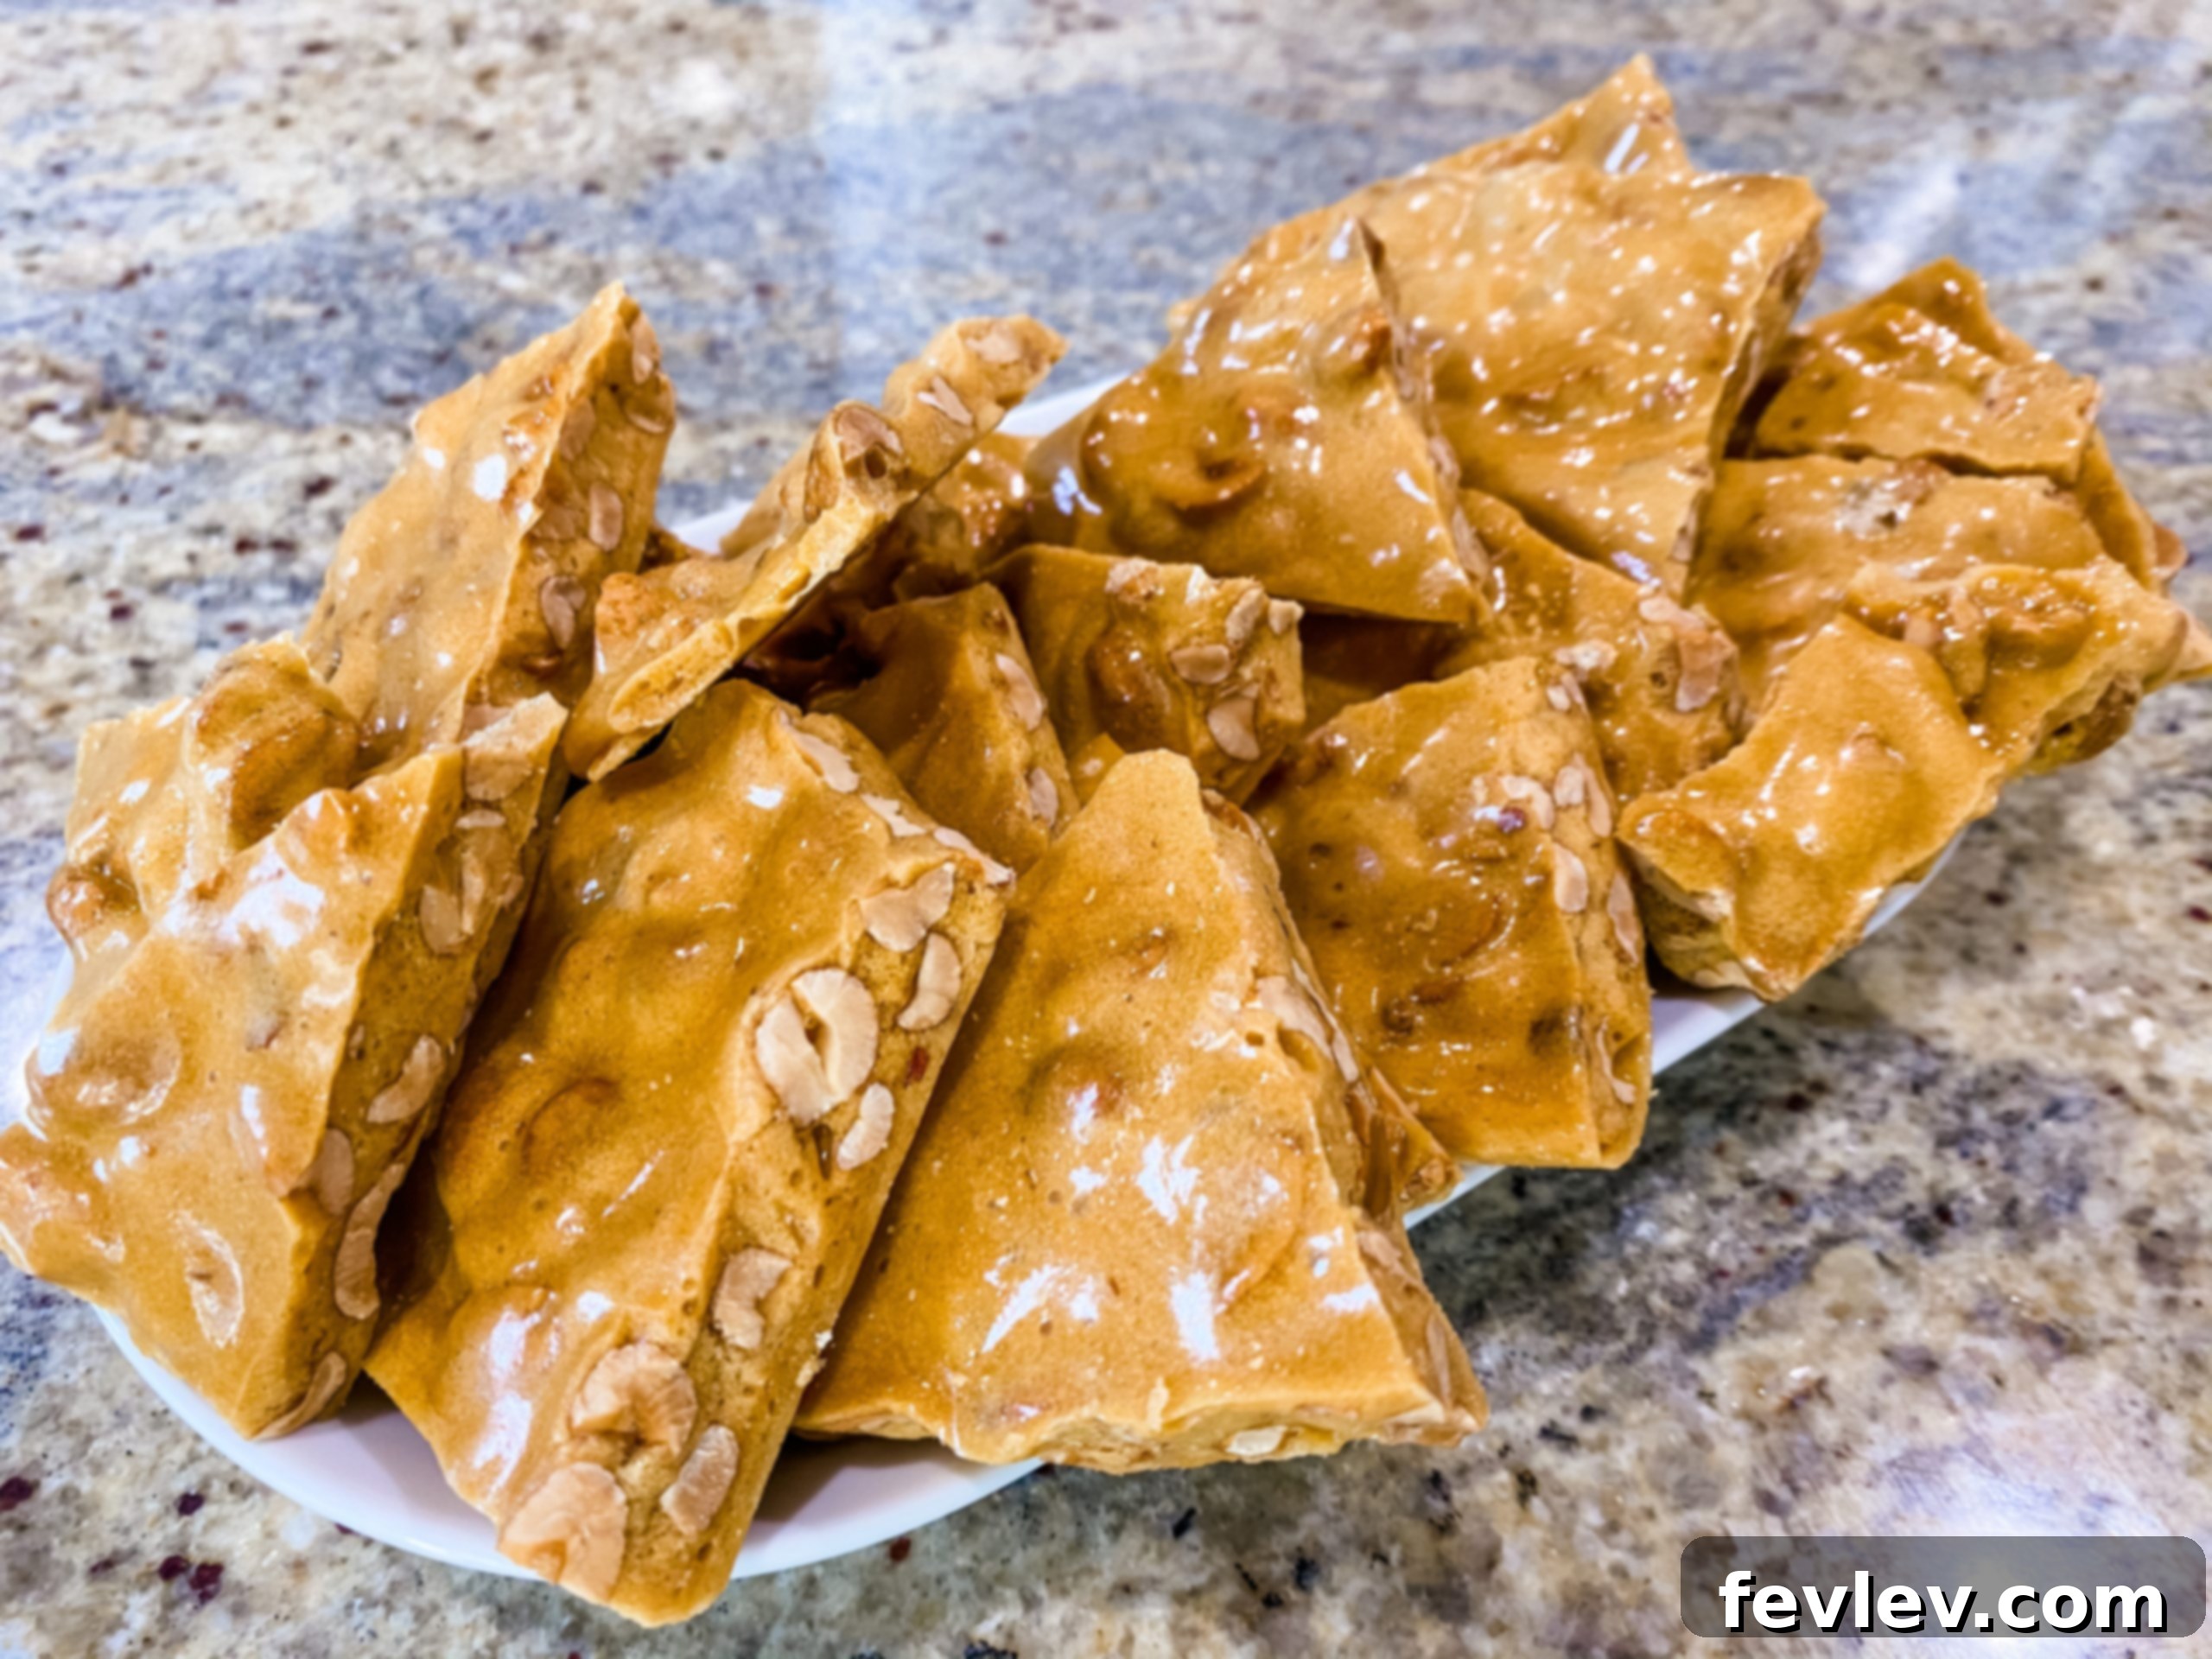
Effortless Microwave Peanut Brittle: Your Quick Guide to a Crunchy Classic
Julia Pacheco
Unlock the secret to perfectly crunchy, delightfully sweet peanut brittle without the fuss of a candy thermometer or constant stovetop stirring. This incredible Microwave Peanut Brittle recipe is a true game-changer, delivering a classic holiday favorite or a spontaneous sweet treat in a fraction of the time. Get ready to impress with this easy-to-make, incredibly addictive confection!
Whether you’re a seasoned candy maker or a kitchen novice, the microwave method simplifies the entire process, making homemade brittle accessible to everyone. Forget the sticky messes and lengthy cooking times; with just a few simple ingredients and your trusty microwave, you’ll be enjoying golden, nutty shards of brittle in about 35 minutes of active preparation and cooking time. It’s the ideal solution for satisfying that brittle craving with minimal effort.
10
25
35
6
servings
Pin Recipe
Comment
Print Recipe
Why Choose Microwave Peanut Brittle for Your Next Sweet Craving?
Traditional peanut brittle often requires meticulous stirring over a hot stovetop, precise temperature monitoring with a candy thermometer, and can be quite intimidating for many home cooks. The microwave method, however, is a game-changer that simplifies the entire process. It dramatically reduces cooking time, minimizes the risk of scorching, and makes cleanup surprisingly easy. This recipe is perfect for those spontaneous sweet cravings or when you need a quick, impressive gift for friends and family. It’s a fantastic way to enjoy a beloved classic confection with modern convenience, bringing the joy of homemade brittle within reach for everyone.
The beauty of making brittle in the microwave lies in its controlled heating and less hands-on approach. You’ll spend less time hovering over a hot stove and more time enjoying the delicious aroma as your kitchen fills with the scent of toasted peanuts and caramelized sugar. Plus, with fewer pots and pans involved, the post-cooking cleanup is minimal, allowing you to savor your creation without the usual kitchen aftermath.
Essential Ingredients for Your Irresistible Brittle
Gathering your ingredients is the first exciting step towards crafting this delightful treat. You’ll find most of these staples already residing in your pantry or readily available at any grocery store. Using quality ingredients ensures the best possible flavor and texture for your homemade peanut brittle, elevating it from good to truly exceptional.
- 1 cup corn syrup (light corn syrup recommended for its clear color and ability to prevent crystallization)
- 2 cups raw peanuts (ensure they are raw and unsalted for optimal roasting and flavor development during cooking)
- 2 cups raw sugar (granulated sugar works too, but raw sugar adds a subtle depth and a hint of caramel flavor)
- 1 tsp salt (fine sea salt or table salt to balance the sweetness and enhance flavors)
- 2 tsp vanilla extract (pure vanilla extract is key for its rich aroma and classic candy taste)
- 1 ½ tsp baking soda (fresh baking soda ensures proper aeration and that desirable crisp texture)
- 2 tbs butter (unsalted, cut into small pieces for easier and faster melting into the hot mixture)
Step-by-Step Instructions: Crafting Your Microwave Peanut Brittle
Follow these easy, detailed steps to create delicious, crispy peanut brittle right in your microwave. Remember to always work quickly and safely, as the sugar mixture becomes extremely hot and can cause burns if not handled with care. Have all your tools ready before you begin!
-
1. Combine Initial Ingredients: In a generously sized microwave-safe bowl (we recommend at least a 2-quart capacity to comfortably accommodate the bubbling mixture), add the corn syrup, raw peanuts, raw sugar, and salt. Using a heat-resistant spatula or wooden spoon, stir these ingredients thoroughly until everything is well incorporated and the sugar is mostly moistened. This initial mixing is crucial for ensuring even cooking and preventing dry spots.
First Microwave Cycle: Place the bowl in the microwave and cook on high power for exactly 4 minutes. Be aware that microwave wattages can vary, so monitor your mixture closely, especially during later cooking intervals. This first round begins the melting process for the sugar.
-
2. Stir and Second Cook: Carefully remove the very hot bowl from the microwave using oven mitts. Stir the mixture vigorously for about 30 seconds. This stirring helps to distribute the heat evenly throughout the mixture and prevents sugar crystals from forming on the sides of the bowl, which could lead to grainy brittle. Return the bowl to the microwave and cook for another 4 minutes on high.
-
3. Third Microwave Interval: Once again, remove the bowl from the microwave (it will be even hotter now!) and stir thoroughly for another 30 seconds. The mixture will be noticeably thicker and warmer. Place it back into the microwave for a third 4-minute cooking interval. At this stage, you should start observing the mixture taking on a light golden hue, indicating the caramelization process has begun.
-
4. Final Pre-Butter Cook: Remove the bowl and give it one more vigorous stir. The mixture should now have deepened to a more prominent amber or light caramel color. Cook for an additional 2 minutes in the microwave. This shorter interval helps bring the brittle mixture to the precise “hard crack” stage (approximately 290-300°F or 143-149°C), which is essential for a truly crispy brittle. While a candy thermometer isn’t strictly necessary for this recipe, you can use one at this point for precision.
-
5. Incorporate Butter and Vanilla: Immediately and carefully stir in the 2 tablespoons of butter and 2 teaspoons of vanilla extract. Stir until the butter is completely melted and smoothly incorporated into the hot sugar mixture. Be extremely cautious during this step as the mixture will be bubbling aggressively due to the temperature difference. Return the bowl to the microwave for one final 1-minute cooking interval. This short burst helps integrate the butter and vanilla perfectly.
-
6. The Baking Soda Magic: This is a critical step for achieving that signature airy, crisp, and delicate texture of classic brittle! After the final microwave minute, remove the bowl and quickly stir in the 1 ½ teaspoons of baking soda. Stir vigorously and well. The mixture will immediately foam up and expand, becoming lighter in both color and consistency. This chemical reaction creates tiny air bubbles throughout the candy, which are responsible for brittle’s unique crispness rather than a dense, hard candy.
-
7. Pour and Set: Before you even start cooking, ensure you have a large baking sheet ready, meticulously lined with generously greased tin foil or a high-quality silicone baking mat. Working incredibly quickly (as the brittle sets very fast once removed from heat), pour the hot, foamy peanut brittle mixture onto your prepared sheet. Use your greased spatula or the back of a greased spoon to spread it out evenly and as thinly as possible. The thinner you spread it, the easier it will be to break into pieces and the crispier the final product will be.
Harden Completely: Allow the brittle to cool and harden completely at room temperature for a minimum of 1 to 1 ½ hours. Resist the temptation to touch, move, or break it before it is fully hardened, or it will be chewy and sticky instead of crisp. Patience is key here!
-
8. Break and Enjoy: Once your microwave peanut brittle is completely hardened and cool to the touch, gently lift it from the foil or silicone mat. Break it into smaller, irregular, and satisfyingly crunchy pieces. Store your freshly made brittle in an airtight container at room temperature to maintain its crispness. Now, it’s finally time to savor your delicious, homemade, microwave peanut brittle!
Watch the Recipe in Action: Visual Guide to Microwave Peanut Brittle
Sometimes, seeing the process makes all the difference when tackling a new recipe, especially one involving hot sugar! Watch this comprehensive video tutorial to guide you through each step of making microwave peanut brittle. It’s an invaluable visual aid to ensure your brittle turns out perfectly crisp and golden, just like you envisioned.
Tips for Perfect Microwave Peanut Brittle Every Time
Achieving that ideal crisp, non-sticky peanut brittle is easier than you think with these expert tips:
- Understand Your Microwave’s Wattage: Microwaves vary greatly in power. If your brittle isn’t reaching the correct golden color and consistency within the suggested times, adjust subsequent cooking intervals by 30-60 seconds. Higher wattage microwaves will cook faster.
- Bowl Size is Crucial: Always use a very large microwave-safe bowl (2-quart or larger). The sugar mixture will bubble up significantly, and ample space prevents messy overflows, ensuring safety and an easier process.
- Consistent Stirring is Essential: Don’t skip stirring between microwave intervals. This isn’t just to mix; it helps distribute the heat evenly throughout the mixture and prevents sugar crystals from forming on the sides of the bowl, which can lead to grainy or crystallized brittle.
- Generously Grease Everything: Ensure your tin foil, baking sheet, spatula, or spoon are meticulously well-greased before pouring and spreading the hot brittle. This step is vital to prevent sticking and makes cleanup much simpler.
- Work Quickly After Baking Soda: Once the baking soda is added, the brittle will begin to foam and set rapidly. Have your prepared baking sheet ready and work swiftly to pour and spread the mixture thinly for the best texture.
- Cool Completely, Don’t Rush: Patience truly is a virtue here! Allow the brittle to cool and harden completely at room temperature for at least an hour before attempting to break it. Rushing this step can result in chewy, sticky, or soft brittle.
- Consider a Candy Thermometer: While this recipe is designed to work without one, a candy thermometer can offer extra assurance. Aim for the “hard crack” stage, usually between 290-300°F (143-149°C), before adding butter and vanilla.
Delicious Variations and Flavorful Add-ins to Try
While classic peanut brittle is undoubtedly a crowd-pleaser, don’t hesitate to get creative and customize your batch! Here are a few exciting ideas to inspire your next brittle creation:
- Alternative Nuts: Replace peanuts with other raw nuts like almonds, cashews, pecans, walnuts, or even a delightful mix of your favorites for a unique flavor profile and textural experience.
- A Hint of Spice: Add a pinch of cayenne pepper (¼ to ½ teaspoon) along with the salt in the initial mixture for a delightful sweet and spicy contrast that will surprise and excite your taste buds.
- Chocolate Drizzle Indulgence: Once the brittle has completely cooled and hardened, melt some chocolate chips (milk, dark, or white) and drizzle generously over the top for an extra layer of rich indulgence.
- Seeded Brittle: Swap peanuts for sesame seeds, sunflower seeds, or pumpkin seeds for an interesting textural and flavor twist that’s equally satisfying.
- Citrus Zest: Add a teaspoon of finely grated orange or lemon zest along with the vanilla extract for a bright, refreshing note that cuts through the sweetness.
Storage Tips for Maximum Freshness and Crispness
To keep your homemade microwave peanut brittle at its absolute best, proper storage is crucial. Once completely cooled and broken into individual pieces, store the brittle in an airtight container at room temperature. Placing parchment paper or wax paper between layers can help prevent the pieces from sticking together, especially if you live in a more humid environment. Stored correctly, homemade peanut brittle can last for up to 2-3 weeks, though in most households, it’s usually devoured much faster than that!
It’s generally advised to avoid refrigerating or freezing brittle. The moisture and fluctuating temperatures within a refrigerator or freezer can cause the brittle to absorb moisture, leading it to become sticky, chewy, and ultimately lose its desired crisp texture. Humidity is the arch-nemesis of brittle, so a cool, dry pantry or countertop is always the ideal storage location.
Common Brittle Troubleshooting: Solutions for Your Sweet Success
Even with an easy microwave method, sometimes things don’t go exactly as planned. Don’t worry, many common brittle issues have simple solutions:
- Brittle is Chewy or Sticky: This is the most common issue and usually means the sugar mixture wasn’t cooked to a high enough temperature. It needed more time in the microwave to reach the “hard crack” stage. The sugar syrup must reach 290-300°F (143-149°C) for true crispness.
- Brittle Tastes Burnt: This can happen if your microwave is very powerful or if the mixture cooked for too long. Try reducing the cooking times by 30-second increments in each interval, especially the later ones. Thorough stirring helps prevent localized hot spots.
- Uneven Texture or Hard Spots: Insufficient stirring between microwave intervals can lead to unevenly cooked brittle. Ensure you mix well after each cooking phase to distribute heat and sugar evenly.
- Nuts are Burnt or Over-Roasted: If your peanuts look too dark or taste bitter, they might have been over-roasted. Using raw, unsalted peanuts is key, as they toast perfectly as the sugar mixture cooks.
- Brittle is Too Thick: This means you didn’t spread it thinly enough after pouring. Work quickly with a greased spatula to spread it out as much as possible before it sets.
Frequently Asked Questions About Microwave Peanut Brittle
- Can I use roasted peanuts instead of raw ones in this recipe?
- While you technically can, it’s generally highly recommended to use raw peanuts. Roasted peanuts tend to get even darker and can sometimes burn during the extended cooking process with the sugar, leading to a bitter or overdone taste. Raw peanuts toast perfectly and develop their flavor as the sugar mixture cooks to its ideal temperature.
- Is a candy thermometer absolutely necessary for making microwave brittle?
- One of the beauties of this specific microwave method is that you can often achieve perfect results without a thermometer by carefully following the suggested timing and visual cues (like the color change and foaming). However, if you desire absolute precision and consistency, particularly if your microwave’s wattage is unpredictable, a thermometer can provide extra assurance that you hit the hard crack stage.
- Why is baking soda used in peanut brittle? What’s its purpose?
- Baking soda is a critical ingredient for brittle’s characteristic texture! It reacts with the hot sugar mixture to create carbon dioxide gas, which forms tiny air bubbles throughout the candy. These bubbles are essential for giving peanut brittle its signature light, airy, and crisp texture. Without baking soda, your brittle would be much harder, denser, and more akin to a hard candy or toffee.
- How long can I expect homemade peanut brittle to last?
- When stored correctly in an airtight container at room temperature, homemade peanut brittle can maintain its quality for 2-3 weeks. The key is to keep it away from humidity, which can make it sticky and compromise its crispness.
- Can I double this microwave peanut brittle recipe for a larger batch?
- It’s generally not recommended to double brittle recipes, especially microwave versions. A larger volume of sugar mixture can lead to uneven heating and crystallization in the microwave, making it much harder to achieve the correct “hard crack” stage consistently. For best results and to ensure perfect crispness, it’s always better to make two separate batches if you need a larger quantity.
Nutrition Facts (Approximate Per Serving)
Understanding the nutritional content of your homemade treats can be helpful for dietary planning. Please note that these figures are automatically calculated based on the ingredients listed and should only be considered an approximation. Individual results may vary based on exact ingredient brands, portion sizes, and preparation methods. For precise dietary information, professional nutritional advice is recommended.
Calories:
742
kcal
|
Carbohydrates:
118
g
|
Protein:
13
g
|
Fat:
28
g
|
Saturated Fat:
6
g
|
Polyunsaturated Fat:
9
g
|
Monounsaturated Fat:
12
g
|
Trans Fat:
0.2
g
|
Cholesterol:
10
mg
|
Sodium:
739
mg
|
Potassium:
385
mg
|
Fiber:
5
g
|
Sugar:
110
g
|
Vitamin A:
117
IU
|
Calcium:
68
mg
|
Iron:
2
mg
Nutrition information is automatically calculated and should only be used as an approximation. It is not a substitute for professional nutritional advice.
A Sweet History of Peanut Brittle: A Beloved Confection
While the exact origins of peanut brittle are often debated and shrouded in culinary lore, most food historians agree that this crunchy confection gained widespread popularity in America during the 19th century. Many charming theories suggest it was an accidental invention, perhaps a fortuitous result of a baker mistakenly adding baking soda instead of cream of tartar to a batch of taffy or a similar sugar candy. Regardless of its true beginning, brittle quickly became a beloved and iconic treat, particularly flourishing in the Southern United States, where peanuts were a readily available and economically important crop. Its simple yet effective combination of ingredients and its immensely satisfying crunch have ensured its place as a festive staple, especially cherished around the holiday season, for generations upon generations. This microwave method continues that tradition, making it accessible to modern kitchens.
Tried this recipe?
Let us know how it was! Your feedback and experiences help others too!