
⭐
⭐
⭐
⭐
Crispy Baked Chicken Tenderloins: Your Ultimate Guide to Perfectly Golden, Juicy Chicken
Julia Pacheco
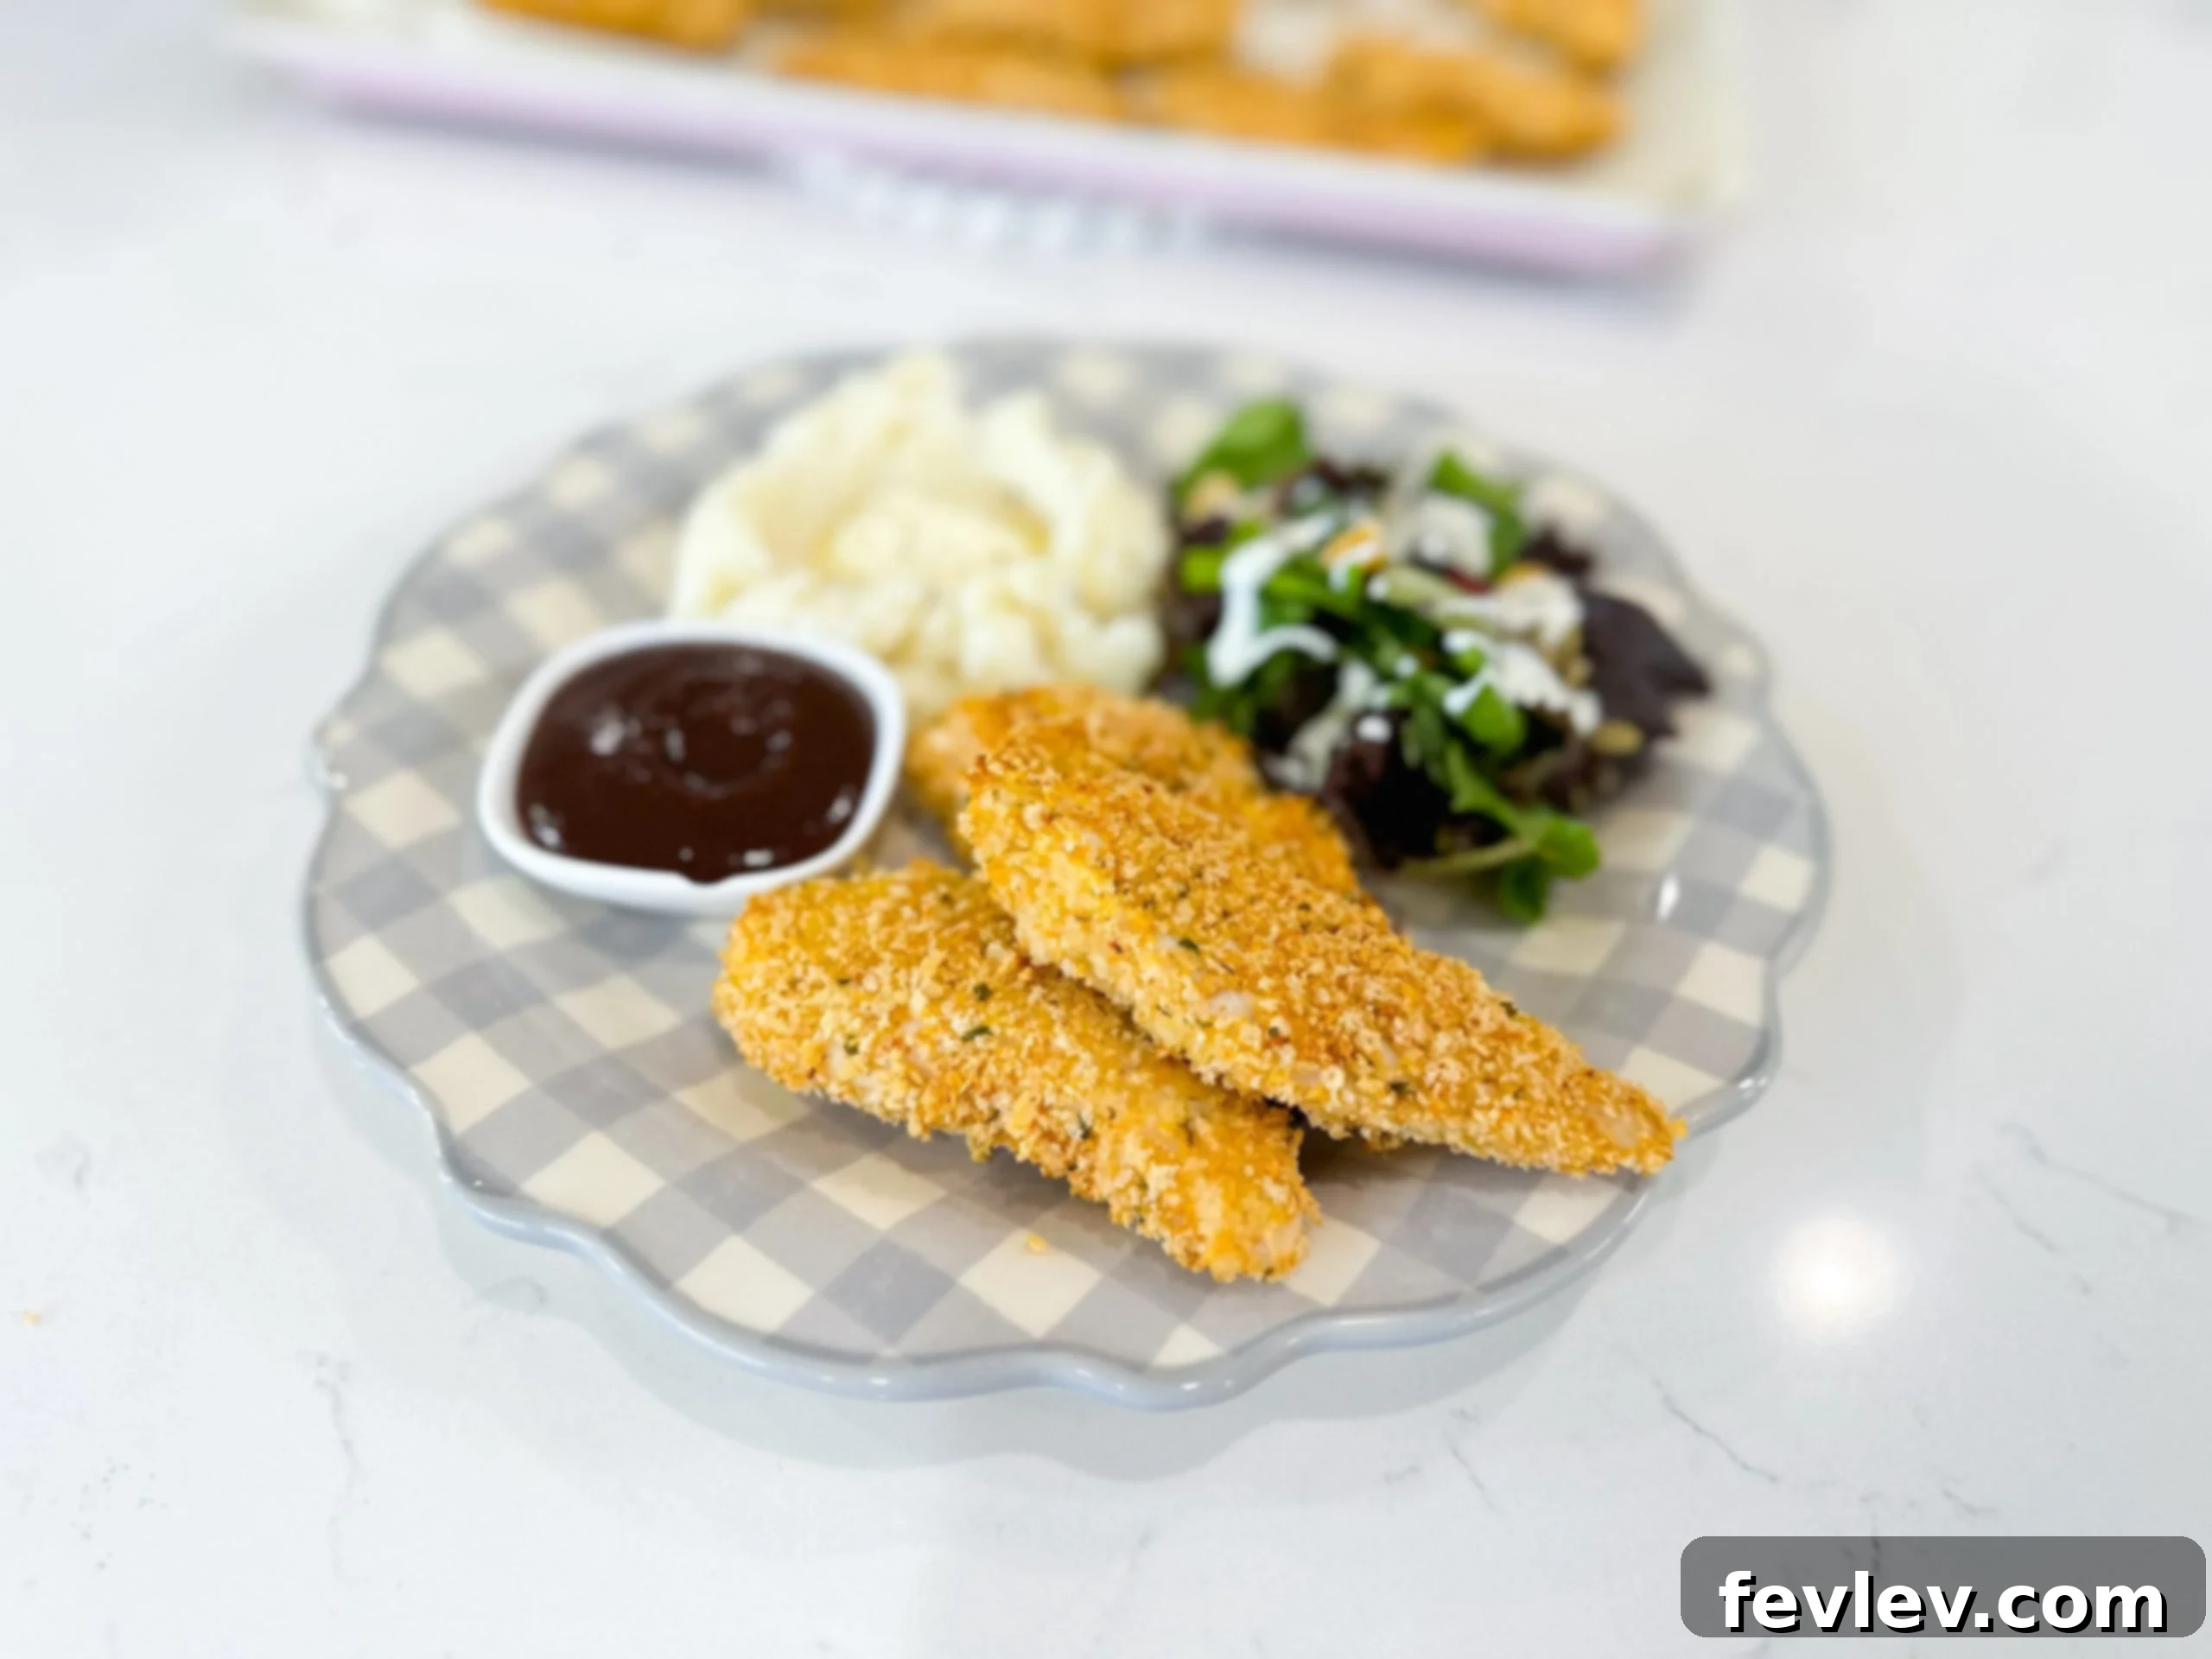
Craving irresistibly crispy chicken without the hassle and extra calories of deep frying? Look no further! Our Crispy Baked Chicken Tenderloins recipe is your answer to a healthy, quick, and utterly delicious meal. These tenderloins are designed to be juicy on the inside, with a beautiful golden-brown, satisfyingly crunchy exterior, all achieved effortlessly in your oven. Perfect for a busy weeknight dinner, a wholesome lunch, or as a versatile component in your meal prep, this dish is a guaranteed family favorite. Its simple preparation makes it accessible for cooks of all skill levels, delivering a dish that’s both comforting and nourishing. Prepare to elevate your chicken game and discover how easy it is to create restaurant-quality baked chicken tenders right in your own kitchen!
10 minutes
20 minutes
30 minutes
4
servings
Pin Recipe
Comment
Print Recipe
About This Recipe: Why Baked is Best for Crispy Chicken
Our Crispy Baked Chicken Tenderloins stand out as an exceptional alternative to traditional deep-fried chicken, delivering all the beloved crunch and robust flavor without the added oils and calories. This recipe is meticulously crafted for maximum ease and minimal cleanup, making it an ideal choice for your busiest weeknights or when you’re seeking a healthier, yet equally satisfying, meal. By harnessing the power of Panko breadcrumbs and a precise baking technique, we guarantee an irresistible golden crust that perfectly encapsulates tender, succulent chicken. This method ensures consistent cooking and a delightful texture, promising delicious results with every single batch. It’s a true testament to how straightforward ingredients, when thoughtfully prepared, can culminate in a truly memorable and wholesome dish for the entire family. Embrace the simplicity and savor the incredible flavor!
Essential Ingredients for Your Crispy Chicken Tenderloins
Gathering the correct components is the foundational step towards culinary success. This recipe skillfully combines a select few key ingredients to achieve that much-desired crispy exterior and a wonderfully juicy interior. Our focus remains on utilizing fresh, high-quality chicken alongside a well-seasoned breading mixture, culminating in a dish that is both profoundly flavorful and deeply satisfying. Each ingredient plays a vital role in creating the perfect texture and taste profile.
Ingredients
-
1 ½ lbs chicken tenderloins -
1 ½ cups Italian style panko breadcrumbs -
4 eggs -
½ tsp salt -
½ tsp pepper -
1 tsp paprika -
1 tsp onion powder
Choosing the Best Ingredients for Optimal Flavor and Texture
The quality and freshness of your ingredients play a pivotal role in the success of this dish. When selecting chicken tenderloins, aim for plump, uniformly sized pieces, as this ensures even cooking and consistent results. If fresh tenderloins are unavailable, boneless, skinless chicken breasts can be easily sliced into strips of comparable size. Italian-style Panko breadcrumbs are highly recommended for their superior crispiness and built-in seasoning, which adds depth of flavor. However, plain Panko can be used with a slightly more generous hand in seasoning your egg wash. Fresh eggs are fundamental for creating a robust binder that allows the breadcrumbs to adhere beautifully. Regarding your spices—salt, pepper, paprika, and onion powder—feel free to adjust quantities to match your personal taste, remembering that high-quality, fresh spices will always yield a more vibrant and aromatic final product.
Ingredient Substitutions and Creative Variations
This recipe is remarkably versatile, allowing for easy adaptations to suit various dietary requirements and flavor preferences. For those following a gluten-free diet, a simple swap to a gluten-free Panko breadcrumb alternative will ensure the same delightful crunch. Don’t hesitate to experiment with different spice blends; consider incorporating garlic powder, a touch of dried oregano, or a pinch of cayenne pepper for an added kick. For an enhanced savory flavor in your breading, finely grated Parmesan cheese can be mixed in with the Panko. If you’re seeking a unique textural experience, crushed cornflakes offer an interestingly extra-crunchy coating. For individuals avoiding eggs, a milk bath (using either dairy or a non-dairy alternative) combined with a tablespoon of cornstarch can serve as an effective binder, ensuring your chicken tenderloins are perfectly coated and maintain their signature crispiness.
Step-by-Step Instructions for Perfectly Baked Chicken Tenderloins
Achieving perfectly crispy and juicy chicken tenderloins in the oven is simpler than you think. Follow these detailed steps carefully to ensure a golden-brown, evenly cooked result that will impress. This method is designed to be straightforward, guiding you through each stage with clarity to help even novice cooks achieve professional-tasting results in their home kitchen.
Instructions
-
Begin by preheating your oven to a precise 400 degrees Fahrenheit (200 degrees Celsius). This initial step is absolutely crucial; a thoroughly preheated oven ensures that the chicken starts cooking immediately at the optimal temperature, which is essential for developing that desirable crispy texture from the moment it enters the oven.
-
Prepare a large, sturdy sheet pan by lining it completely with aluminum foil. This simple trick not only prevents the chicken from sticking but also makes cleanup incredibly effortless, saving you time and effort after cooking. For those seeking an even crispier result, consider placing an oven-safe wire rack directly on top of the foil-lined pan. This elevation allows hot air to circulate freely around all sides of each chicken piece, significantly promoting a more uniform and satisfying crunch.
-
Set up your efficient breading station. In one shallow bowl, pour the Italian-style Panko breadcrumbs, spreading them out evenly. In a second separate shallow bowl, crack the four eggs and add the specified amounts of salt, pepper, paprika, and onion powder. Whisk the eggs thoroughly and vigorously until the yolks and whites are fully incorporated, and all the seasonings are evenly dispersed. This well-mixed, seasoned egg wash will serve as the perfect adhesive for the breadcrumbs, ensuring a complete and flavorful coating on your chicken.
-
Take each chicken tenderloin, one at a time, and dip it completely into the seasoned egg mixture, allowing any excess egg to drip off briefly. Next, transfer the tenderloin to the bowl of Panko breadcrumbs, gently pressing the breadcrumbs onto all surfaces to ensure a thick and even coating. Carefully place the breaded chicken tenderloin onto the prepared sheet pan, arranging them in a single layer with a small amount of space between each piece to facilitate proper air circulation. Repeat this breading process for all remaining chicken tenderloins. Once all pieces are breaded and arranged, bake them in the preheated oven for precisely 10 minutes. After this initial baking period, carefully remove the sheet pan from the oven. Using a pair of tongs, meticulously flip each chicken tenderloin over to ensure even browning and crispiness on both sides. Return the pan to the oven and continue baking for an additional 10 minutes, or until the chicken is thoroughly cooked through and reaches a safe internal temperature of 165°F (74°C). The crust should appear beautifully golden brown and boast an irresistible crispiness.
Expert Tips for Perfectly Crispy Baked Chicken Tenderloins
Achieving truly crispy baked chicken tenders without any deep frying requires a few clever culinary insights. Firstly, always ensure your oven is fully preheated to the specified temperature. A hot oven is paramount for initiating an immediate crisping action upon contact. Secondly, it is critical not to overcrowd your baking sheet. Placing too many tenderloins too close together will cause them to steam rather than bake, resulting in a soggy, rather than crispy, exterior. If necessary, bake in smaller batches to maintain ample space. For an even more enticing golden crust, consider lightly spraying the coated chicken with a fine mist of cooking oil or olive oil spray just before it goes into the oven. This contributes significantly to browning and enhances the overall crispiness. Finally, for both food safety and to preserve the chicken’s coveted juiciness, always verify the internal temperature with a reliable meat thermometer, ensuring it reaches precisely 165°F (74°C) before serving.
Achieving Maximum Crispiness: The Panko Advantage
The undisputed secret weapon for unparalleled crispiness in this recipe is the use of Panko breadcrumbs. Their unique, larger, and flakier texture is designed to absorb less moisture and oil compared to traditional breadcrumbs, thus crisping up far more effectively. To further amplify the crunch, consider utilizing a wire rack placed inside your baking sheet. This ingenious elevation allows hot air to circulate freely around all sides of each chicken tenderloin, preventing any sogginess on the bottom and ensuring an all-around golden, crunchy perfection. A light, even spray of olive oil or cooking spray before baking can also profoundly contribute to a deeper golden color and an ultimately more satisfyingly crunchy texture that rivals fried chicken.
Ensuring Juicy Results: The Art of Perfect Doneness
While an incredibly crispy exterior is paramount, no one desires dry, overcooked chicken. Chicken tenderloins are inherently more delicate and cook much faster than larger cuts, making them perfectly suited for this quick-bake recipe. The ultimate key to preserving their natural juiciness is to strictly avoid overcooking. Always, without exception, check the internal temperature of the thickest part of the chicken using a reliable meat thermometer, aiming for precisely 165°F (74°C). Promptly removing them from the oven once this temperature is achieved will effectively lock in all the precious moisture, guaranteeing tender, succulent, and mouth-wateringly juicy chicken every single time.
Serving Suggestions and Creative Pairings
These versatile crispy baked chicken tenderloins are not just a meal; they are a fantastic foundation for a myriad of culinary creations. While they shine brilliantly as the star protein for dinner, their inherent adaptability means they can be seamlessly integrated into a diverse range of dishes, transforming everyday meals into exciting culinary experiences.
- Classic Dipping Sauces: A quintessential pairing! Offer an enticing assortment of your favorite sauces such as tangy honey mustard, smoky barbecue, creamy ranch, sweet and sour, or a zesty spicy sriracha mayo to tantalize every palate.
- Wholesome Side Dishes: Complement your crispy chicken with simple, healthy, and satisfying sides. Options like perfectly roasted vegetables (think vibrant broccoli, crisp asparagus, or sweet roasted potatoes), a fresh and invigorating green salad, rich and creamy mashed potatoes, or fluffy, aromatic rice are all superb choices that round out the meal beautifully.
- Kid-Friendly Perfection: When cut into smaller, manageable pieces, these tenderloins transform into the ideal finger food for children, especially when paired with their beloved ketchup or a mild dipping sauce.
Creative Ways to Enjoy Your Chicken Tenderloins Beyond the Plate
Do not confine these wonderfully flavorful tenderloins to just a main course! Their versatility allows them to significantly enhance many other meals, adding both protein and an incredible textural element:
- Dynamic Wraps and Sandwiches: Effortlessly slice them into strips and integrate them into soft tortillas with crisp lettuce, ripe tomatoes, your favorite cheese, and a generous drizzle of dressing for a quick, satisfying, and portable meal. They also make an outstanding filling for a gourmet chicken sandwich.
- Protein-Packed Salad Toppers: Dice the cooked tenderloins and artfully scatter them over a vibrant, fresh salad for a protein-rich and delightfully crunchy addition. They harmonize beautifully with a classic Caesar salad, a hearty Cobb salad, or any refreshing garden salad you desire.
- Elevated Pasta Dishes: Cut them into perfect bite-sized pieces and stir them into a light pasta dish, perhaps with a fresh pesto sauce or a simple, rich marinara, to add substantial texture and a burst of savory flavor.
- Effortless Sheet Pan Dinners: Although baked independently in this recipe, these tenderloins can also be added to sheet pan vegetable roasts during the final 10 minutes of cooking, creating a complete, easy-to-prepare, and delicious one-pan dinner.
Meal Prepping and Storage Solutions
These crispy baked chicken tenderloins are an exceptional choice for meal prepping, empowering you to enjoy healthy, delicious, and home-cooked meals throughout your week with minimal ongoing effort. Their robust flavor and satisfying texture hold up remarkably well, making them an incredibly convenient option for packed lunches, quick post-workout refuels, or effortless weeknight dinners. Thoughtful storage ensures their quality and extends their delectable appeal.
- Optimal Storage: It is imperative to allow the cooked chicken to cool completely to room temperature before transferring it to an airtight container. Store these in the refrigerator for a duration of up to 3-4 days. For superior results and to help maintain their crispiness, consider placing a paper towel inside the container with the chicken; this clever trick helps absorb any lingering excess moisture.
- Effective Reheating: To best preserve their cherished crispiness, the ideal method for reheating these tenderloins is in an oven or an air fryer. Preheat either appliance to 350°F (175°C) and reheat for approximately 5-10 minutes, or until the chicken is thoroughly heated through. While microwaving offers speed, it may unfortunately result in a slightly softer texture.
- Freezing for Future Feasts: Cooked and completely cooled chicken tenderloins can be frozen successfully for an extended period, typically up to 2-3 months. To prevent them from sticking together, first arrange them in a single layer on a baking sheet and flash freeze until they are solid (this usually takes about 1-2 hours). Once solid, transfer them to a freezer-safe bag or container. When ready to enjoy, simply thaw them overnight in the refrigerator before reheating.
Smart Make-Ahead Tips for Even Easier Dinners
If your goal is to further streamline your cooking process and save valuable time, several components of this recipe can be prepared in advance, setting you up for a hassle-free meal:
- Advance Breading Station Setup: You can proactively prepare your breading station—meaning, setting up your separate bowls for eggs and breadcrumbs—an hour or two before you plan to cook. Ensure your eggs are thoroughly whisked and seasoned well.
- Limited Pre-Coating: While the ultimate crispiness is achieved when breaded and baked fresh, you can bread the chicken a couple of hours ahead of time. If doing so, refrigerate the breaded tenderloins on the baking sheet, uncovered, to help prevent the breadcrumbs from becoming soggy from moisture.
Nutrition and Health Benefits of Baked Chicken
One of the significant advantages of this recipe lies in its excellent nutritional profile, making it a very smart and mindful choice for maintaining a balanced and healthy diet. By opting for baking instead of traditional deep frying, we considerably reduce the overall fat content, offering a far healthier and guilt-free way to indulge in crispy chicken. This method maximizes lean protein intake while minimizing unhealthy fats.
Nutrition
|
Carbohydrates: 17g
|
Protein: 45g
|
Fat: 10g
|
Saturated Fat: 3g
|
Polyunsaturated Fat: 2g
|
Monounsaturated Fat: 3g
|
Trans Fat: 0.04g
|
Cholesterol: 273mg
|
Sodium: 716mg
|
Potassium: 754mg
|
Fiber: 1g
|
Sugar: 2g
|
Vitamin A: 536IU
|
Vitamin C: 2mg
|
Calcium: 79mg
|
Iron: 3mg
Nutrition information is automatically calculated, so should only be used as an approximation. It is provided for informational purposes only and is not a substitute for professional nutritional advice.
Frequently Asked Questions (FAQ)
- Can I use chicken breast instead of tenderloins?
- Yes, absolutely! If you don’t have chicken tenderloins readily available, you can easily substitute boneless, skinless chicken breasts. Simply slice them lengthwise into strips of similar thickness to tenderloins. This preparation ensures they cook evenly and maintain a wonderfully juicy texture. You may need to adjust the cooking time slightly if your chicken pieces are significantly thicker or thinner than the tenderloins.
- How do I make these chicken tenderloins gluten-free?
- Converting this recipe to be gluten-free is very straightforward and requires just one key substitution. The primary ingredient to swap is the breadcrumbs. Opt for a high-quality gluten-free Panko breadcrumb brand, which is now widely accessible in most grocery stores and health food markets. All other ingredients listed in the recipe are naturally gluten-free, but as a precautionary measure, always double-check the labels of your spices for any hidden additives if you have severe sensitivities or allergies.
- Can I freeze cooked crispy baked chicken tenderloins?
- Yes, these tenderloins are an excellent candidate for freezing, and they hold up beautifully! Once completely cooked and cooled to room temperature, arrange them in a single layer on a baking sheet and flash freeze them until they are solid (this usually takes about 1-2 hours). Afterward, transfer the frozen tenderloins to a freezer-safe airtight bag or container. This method prevents them from sticking together. They can be safely stored in the freezer for up to 2-3 months. For best results, thaw them overnight in the refrigerator before reheating in an oven or air fryer to restore their signature crispiness.
- What is the ideal internal temperature for cooked chicken?
- For both optimal food safety and to ensure the most succulent juiciness, all chicken should be cooked to an internal temperature of 165°F (74°C). We highly recommend using a reliable meat thermometer inserted into the thickest part of the chicken, being careful to avoid touching any bone, which can give an inaccurate reading. Reaching this precise temperature guarantees the chicken is fully cooked without becoming dry or tough.
- Can I use an air fryer to cook these crispy chicken tenderloins?
- Absolutely! An air fryer is a superb alternative for cooking these chicken tenderloins and often results in an even crispier exterior due to the intense, circulating hot air. To use an air fryer, preheat it to 375°F (190°C). Arrange the breaded chicken in a single layer in the air fryer basket, being careful not to overcrowd it to allow for optimal air flow. Cook for approximately 12-15 minutes, making sure to flip them halfway through the cooking time, or until they are beautifully golden brown and have reached an internal temperature of 165°F (74°C). Please note that cooking times may vary slightly depending on your specific air fryer model.
- How do I prevent the breading from falling off the chicken?
- To ensure the breading adheres perfectly and stays on throughout the cooking process, there are a few crucial steps. Firstly, it’s vital to thoroughly pat your chicken tenderloins dry with paper towels before you dip them into the egg wash. Any excess moisture on the chicken surface can create a barrier, preventing the egg from sticking properly. Secondly, when coating with Panko breadcrumbs, make sure to press the breadcrumbs firmly onto all surfaces of the chicken to create a robust and even layer. Finally, once the chicken is on the baking sheet and in the oven, avoid flipping it too early or too frequently; ideally, only flip once after the initial baking period to allow the crust to set.
Conclusion: Enjoy Your Crispy Baked Chicken Masterpiece!
Congratulations! You have now mastered the art of creating perfectly crispy and incredibly juicy baked chicken tenderloins. This recipe is more than just a simple meal; it’s a testament to the fact that healthy, convenient, and utterly delicious home cooking is entirely achievable. Whether you’re preparing them for a hungry family dinner, packing wholesome lunches for the week ahead, or simply treating yourself to a satisfying and nutritious meal, these tenderloins are destined to become a beloved staple in your culinary repertoire. We wholeheartedly encourage you to explore and experiment with different spice combinations and a variety of serving styles to truly make this versatile recipe your own. Don’t forget to share your delectable creations and culinary experiences with us – we love to see your kitchen triumphs!
Tried this recipe?
Let us know how it was!