
Product links may contain affiliate links. As an Amazon Associate, I earn from qualifying purchases.
Irresistibly Easy Oreo Dump Cake: Your Ultimate Cookies and Cream Dessert Guide
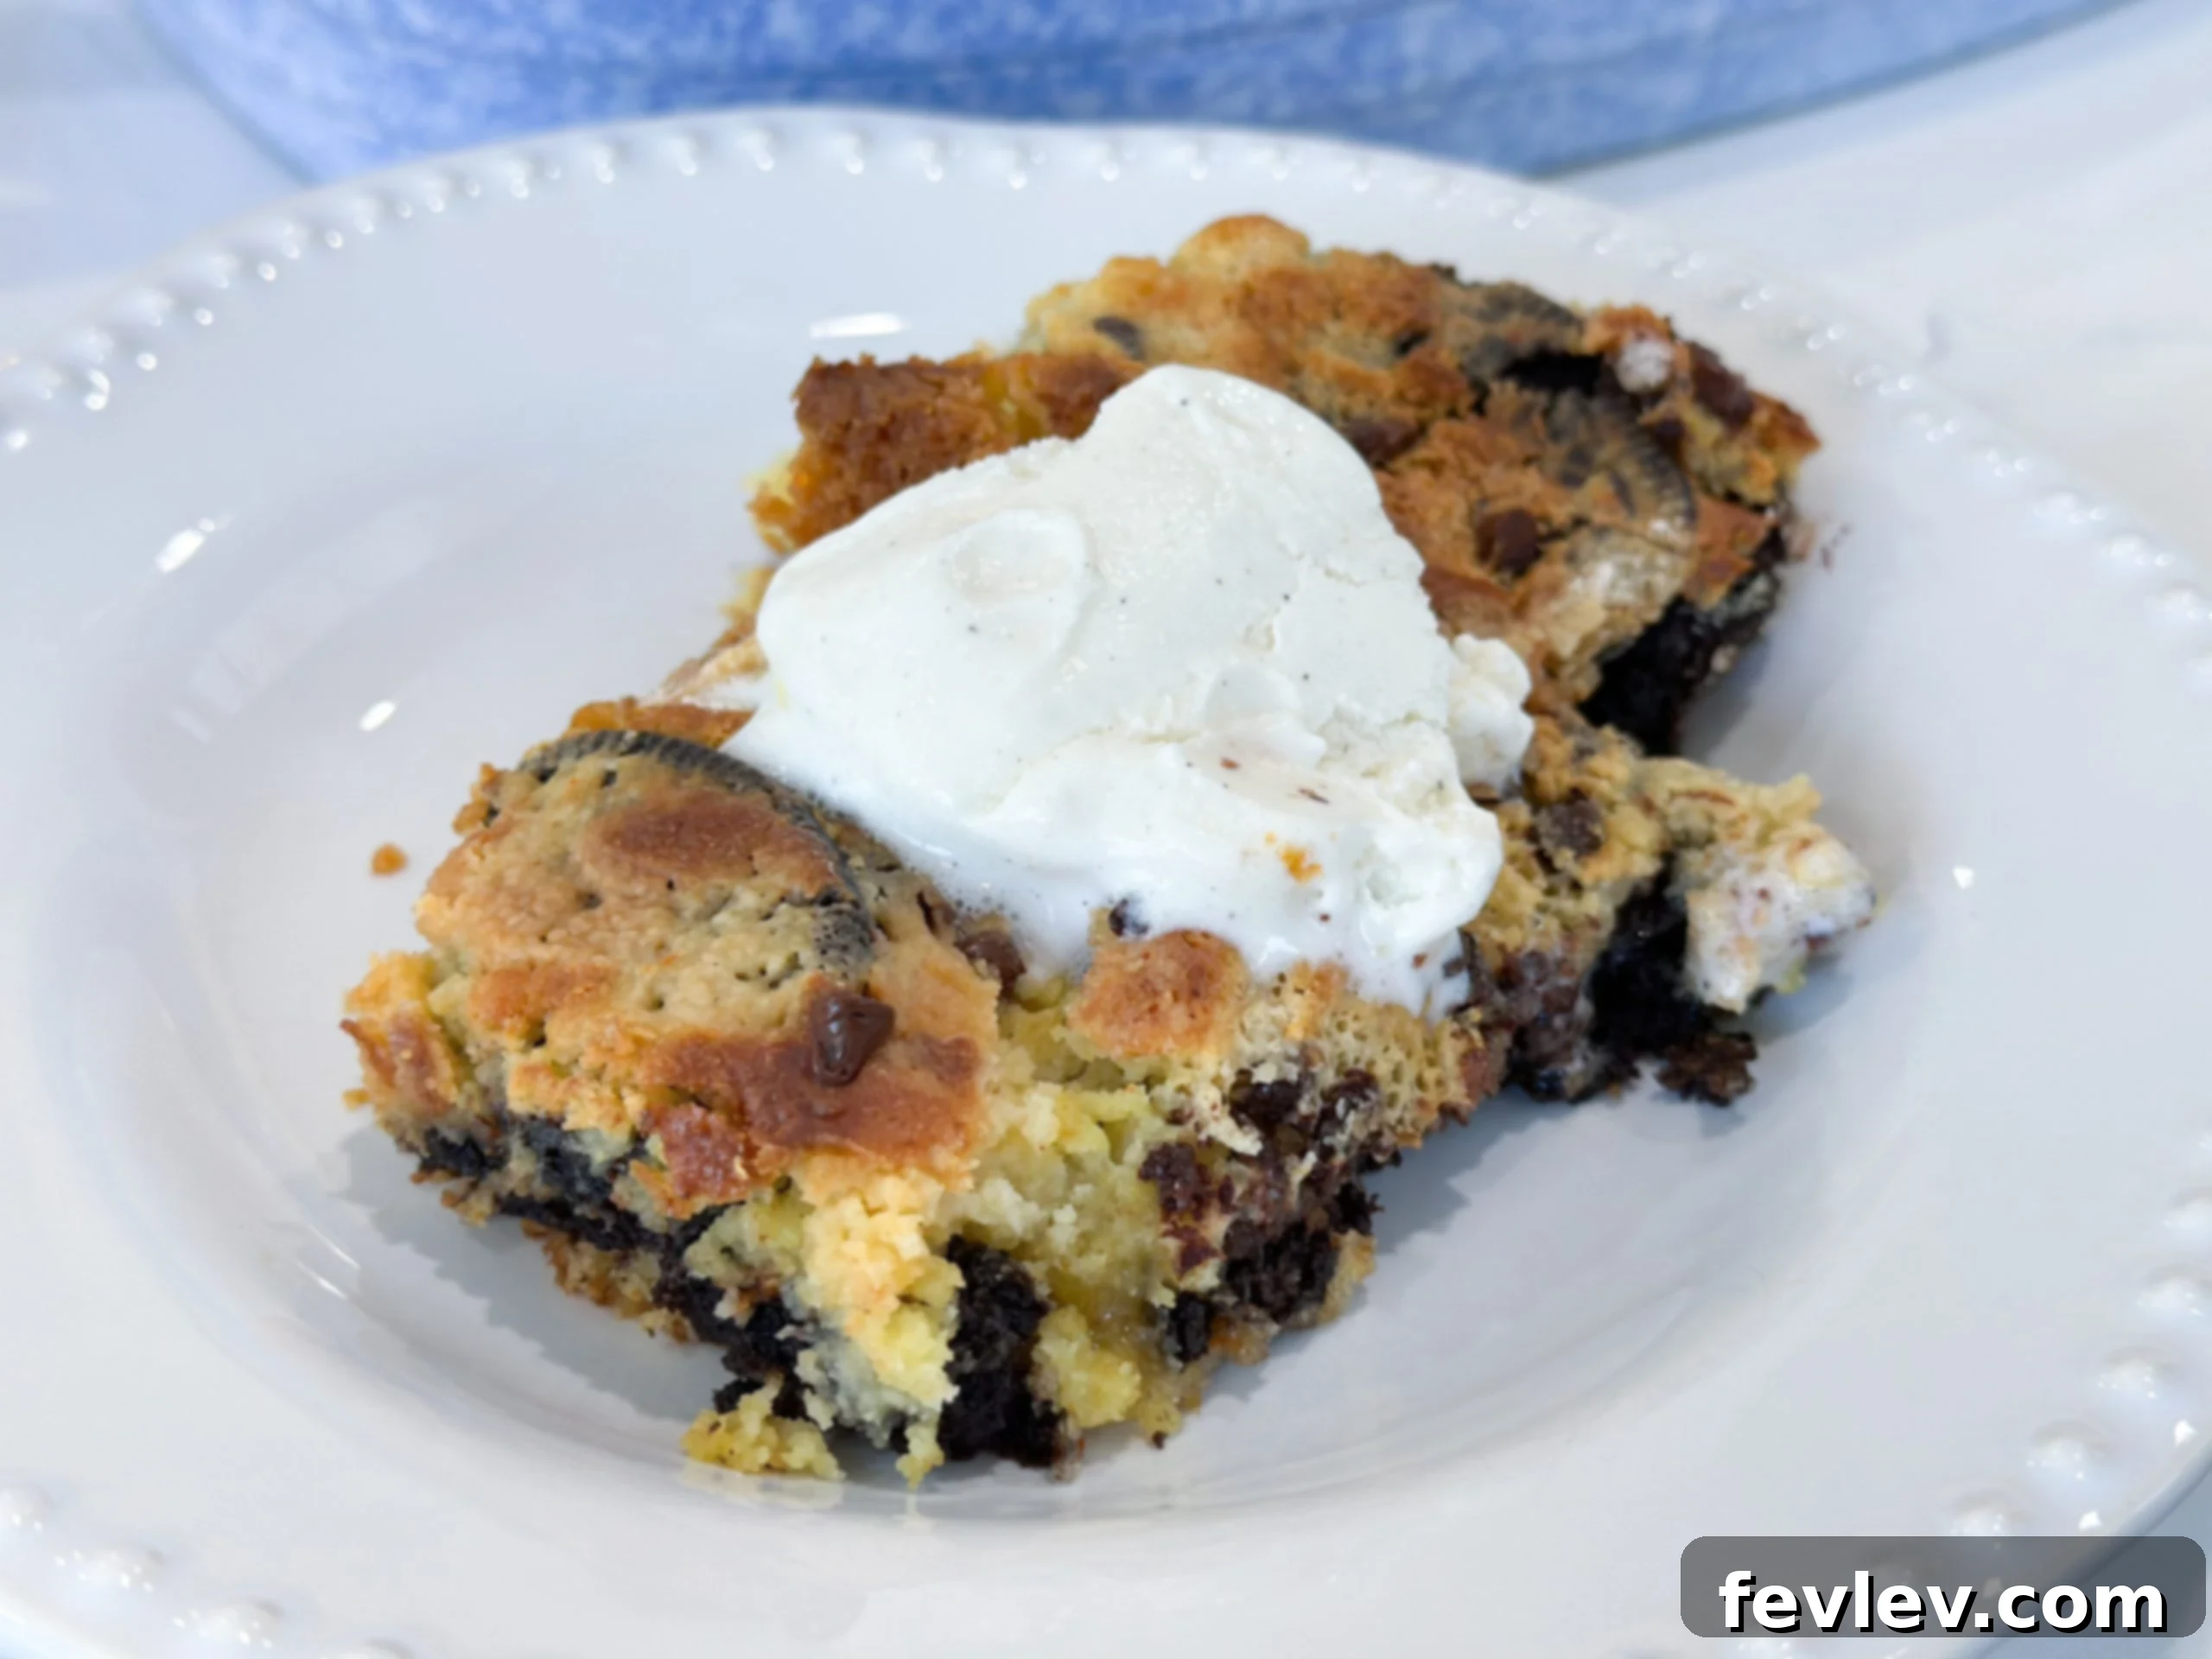
Prepare to fall in love with the most effortlessly delicious dessert you’ll ever bake: the Oreo Dump Cake. This decadent creation combines the irresistible crunch of Oreo cookies with a moist, rich cake, delivering a dreamy cookies and cream experience in every bite. It’s truly a dessert that tastes like it took hours to prepare but comes together with minimal effort and just a handful of pantry staples.
Perfect for busy weeknights, impromptu gatherings, or simply satisfying that sudden sweet craving, this easy Oreo dump cake is a revelation. The beauty of a “dump cake” lies in its simplicity – you literally “dump” the ingredients into a baking dish, and the oven does the rest. No complicated mixing, no multiple bowls, and absolutely no frosting required to make this cake an instant hit. The result is a delightfully moist, incredibly flavorful dessert that your entire family will adore, especially when served warm with a generous scoop of vanilla ice cream or a dollop of whipped cream.
Why You’ll Love This Easy Oreo Dump Cake
There are countless reasons why this Oreo dump cake will quickly become a cherished recipe in your repertoire:
- Unbeatable Simplicity: As the name suggests, this cake is incredibly straightforward. It requires no fancy baking skills or extensive prep work. Just layer your ingredients, bake, and enjoy!
- Minimal Ingredients: You’ll only need a few common pantry items, making it a budget-friendly and accessible dessert solution.
- Crowd-Pleasing Flavor: Who can resist the classic combination of cookies and cream? This cake delivers all the nostalgic flavors of your favorite Oreo cookies in a comforting, cake form.
- Versatility: Easily customize it with different cake mix flavors, various Oreo varieties, or a range of toppings to suit any preference or occasion.
- Perfect for Any Occasion: Whether it’s a casual family dinner, a potluck, a birthday celebration, or a holiday feast, this dump cake is always a welcome treat.
- Moist and Decadent: The unique preparation method ensures a super moist cake with pockets of melted cookie goodness throughout.
Essential Ingredients for Your Oreo Dump Cake
Gathering your ingredients is the first step towards this delightful dessert. The beauty is in their simplicity and accessibility:
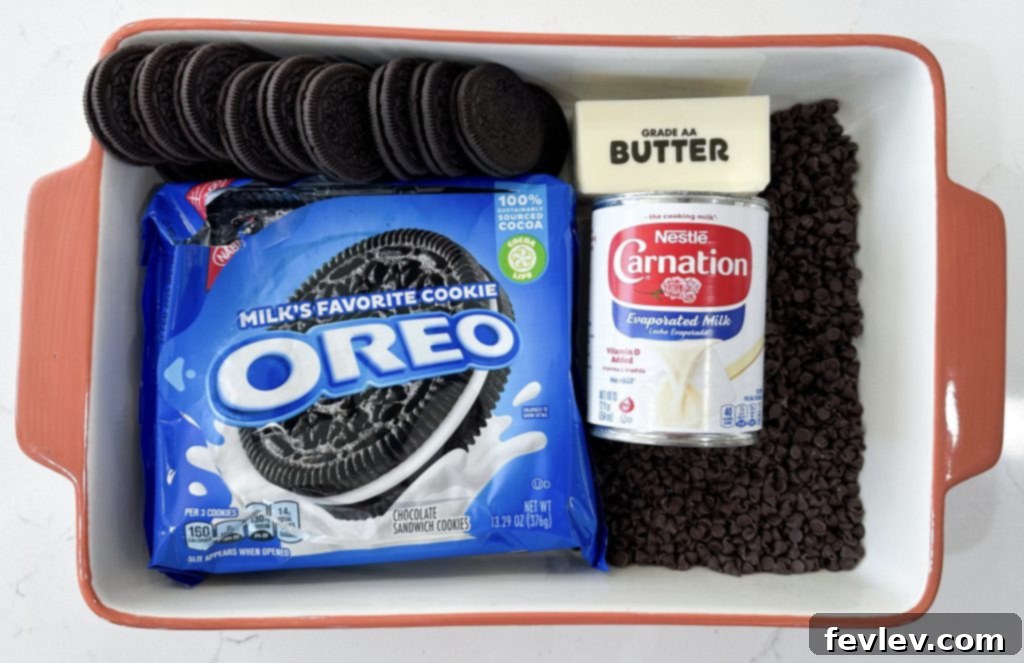
- Oreo Cookies: You’ll need a standard package of original Oreo cookies. Don’t worry if you can’t find the exact brand; any chocolate sandwich cookie will work. Remember to reserve a few for the topping – about 5 or 6 cookies should be set aside for that extra crunch.
- Yellow Cake Mix: A 14-ounce box of your favorite brand of yellow cake mix forms the base of this indulgent dessert. Yellow cake mix is ideal for achieving that classic cookies and cream flavor profile, providing a rich, buttery backdrop for the Oreos.
- Evaporated Milk: One 12-ounce can of evaporated milk adds incredible moisture and richness to the cake, contributing to its creamy texture without making it too thin. This is key to a truly decadent dump cake.
- Whole Milk: Half a cup of whole milk complements the evaporated milk, ensuring the perfect consistency and adding to the overall richness. Full-fat milk is recommended for the best flavor and texture.
- Cold Unsalted Butter: Three-quarters of a cup of cold unsalted butter, sliced extremely thinly, is crucial. The thin slices allow the butter to melt slowly and evenly over the dry cake mix during baking, creating a moist, cake-like texture and preventing any dry spots.
- Optional: Chocolate Chips: A handful of chocolate chips, sprinkled over the top along with the crushed Oreos, can add an extra layer of chocolatey goodness and texture.
- For Serving: Don’t forget a generous scoop of vanilla ice cream or a dollop of cool whip for an extra special treat!
Step-by-Step Guide: How to Make Oreo Dump Cake
Creating this cookies and cream masterpiece is incredibly simple. Follow these easy steps for a perfect Oreo dump cake every time:
Step 1: Prepare Your Oven and Baking Dish
Begin by preheating your oven to 350 degrees Fahrenheit (175 degrees Celsius). While the oven heats, lightly spray a 9×13-inch baking dish with non-stick cooking spray. Ensure the entire bottom and sides of the pan are coated to prevent sticking and make serving easier.
Step 2: Create the Oreo Base Layer
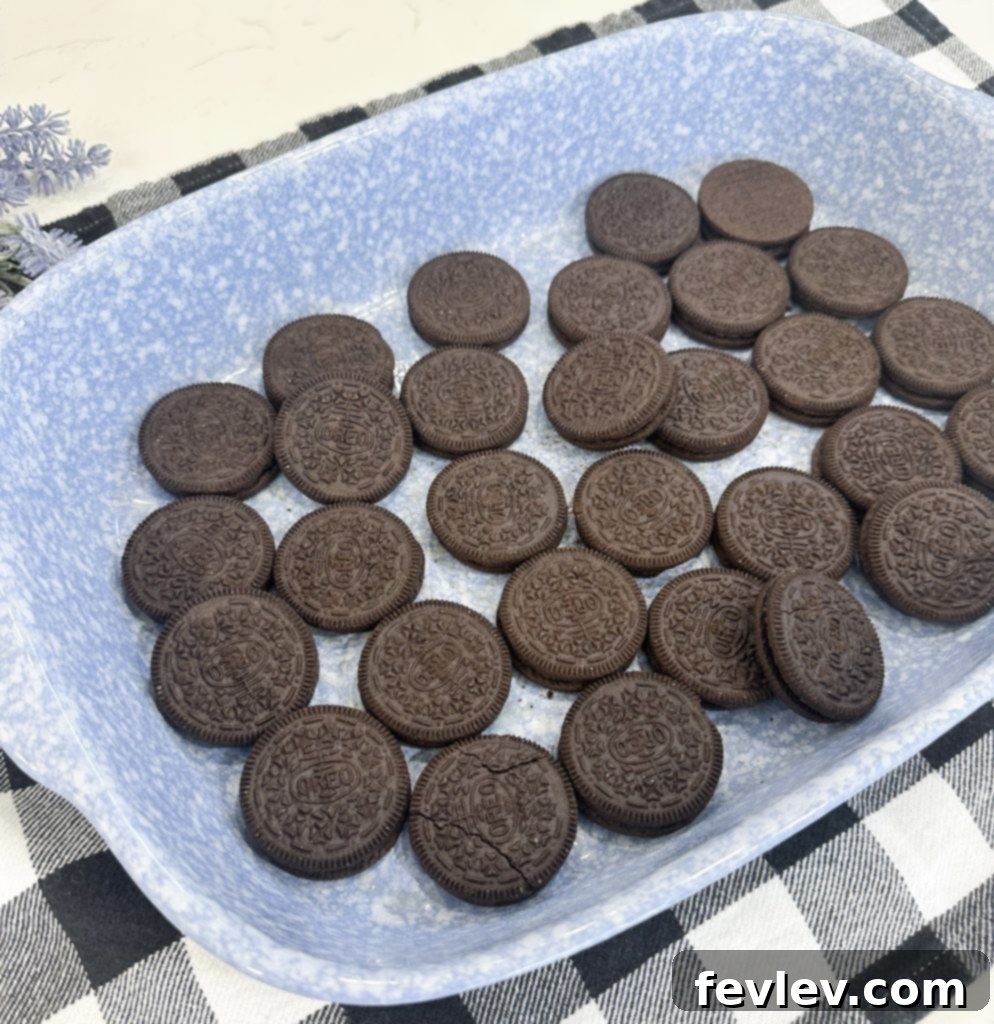
Carefully arrange approximately 20 whole Oreo cookies side by side across the bottom of your prepared baking dish. Aim for an even, single layer that covers the entire base. This forms the delicious, crunchy foundation of your dump cake.
Step 3: Add the Cake Mix
Evenly sprinkle the entire contents of the yellow cake mix over the layer of Oreo cookies. Try to distribute the dry mix as uniformly as possible, ensuring it covers all the cookies. This will be the main “cake” portion that bakes into a moist delight.
Step 4: Pour in the Milks
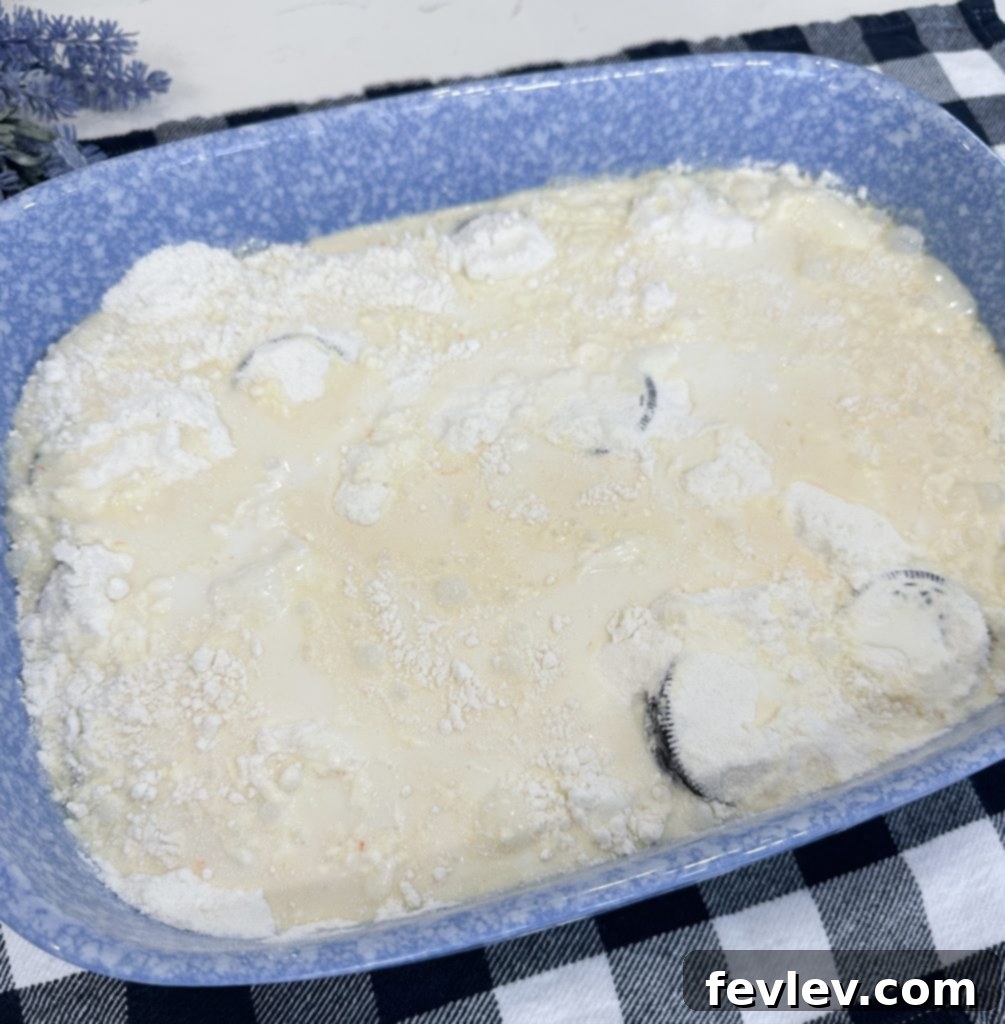
Gently and evenly pour both the evaporated milk and the whole milk over the dry cake mix. Be careful not to disturb the layers too much. The liquids will slowly seep into the cake mix, beginning the magic of the dump cake.
Step 5: Add Crushed Oreos and Optional Chocolate Chips
Take the remaining 5 or 6 Oreo cookies and crush them. You can do this by placing them in a Ziploc bag and crushing them with a rolling pin or by pulsing them in a food processor. Sprinkle these crushed Oreo pieces generously over the top of the wet cake mix. If you’re using chocolate chips, sprinkle them on now as well for an extra chocolatey boost.
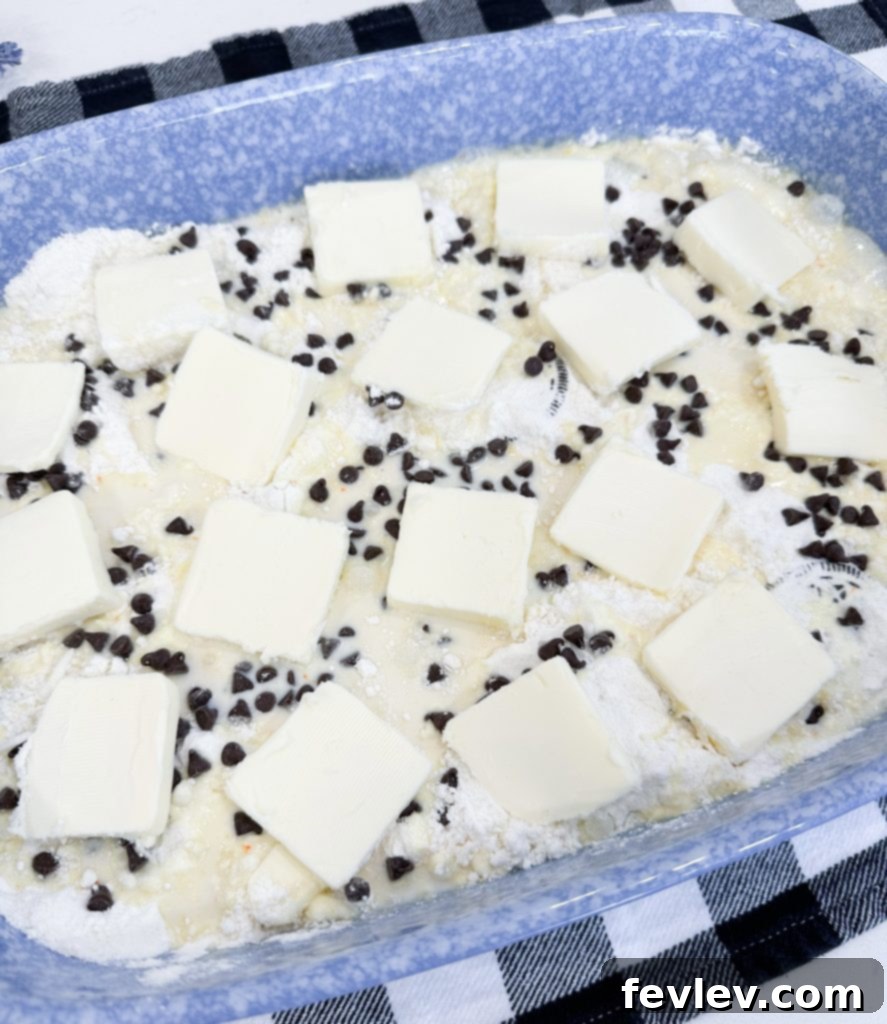
Step 6: Layer with Thinly Sliced Butter
This step is crucial for moisture and texture! Arrange the thinly sliced cold butter pieces over the entire surface of the dry cake mix. Try your best to cover as much of the cake mix as possible. As the butter melts, it will soak into the dry ingredients, preventing any dry spots and ensuring a wonderfully moist, rich cake.
Step 7: Bake to Perfection
Place the baking dish in your preheated oven and bake for approximately 40 minutes. The cake is ready when the top is golden brown and the edges are bubbling. A toothpick inserted into the cake part (avoiding the cookie base) should come out mostly clean. Allow the cake to cool slightly before serving. The warm cake with its gooey center and crisp cookie base is an absolute dream.
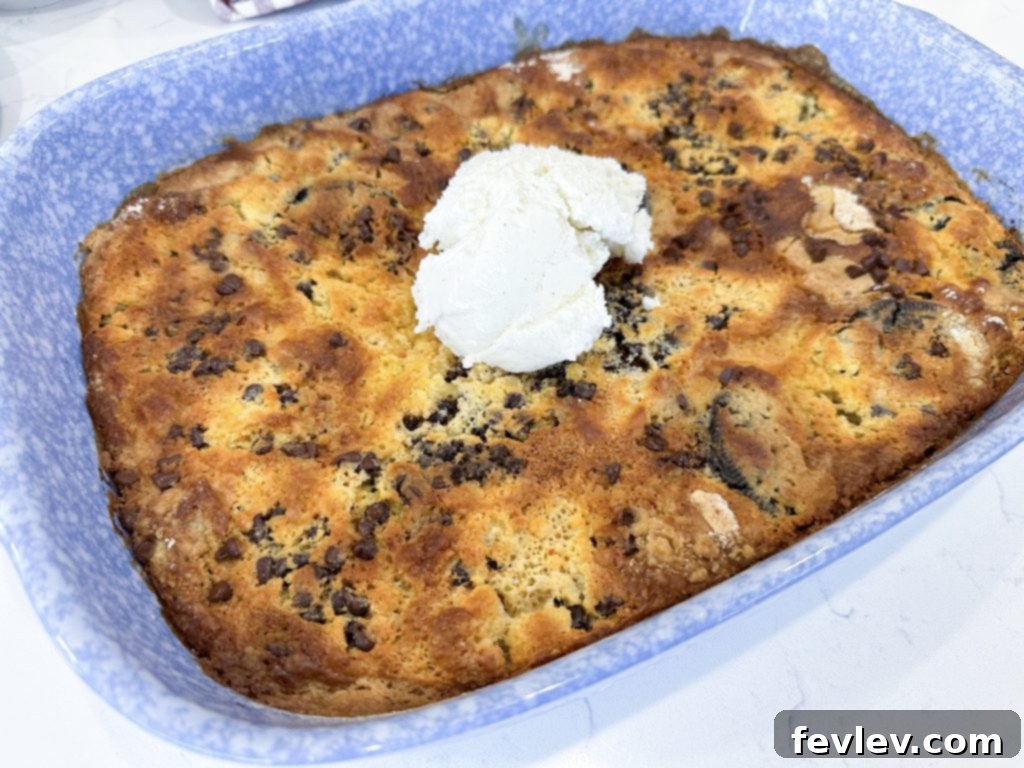
Step 8: Serve and Enjoy!
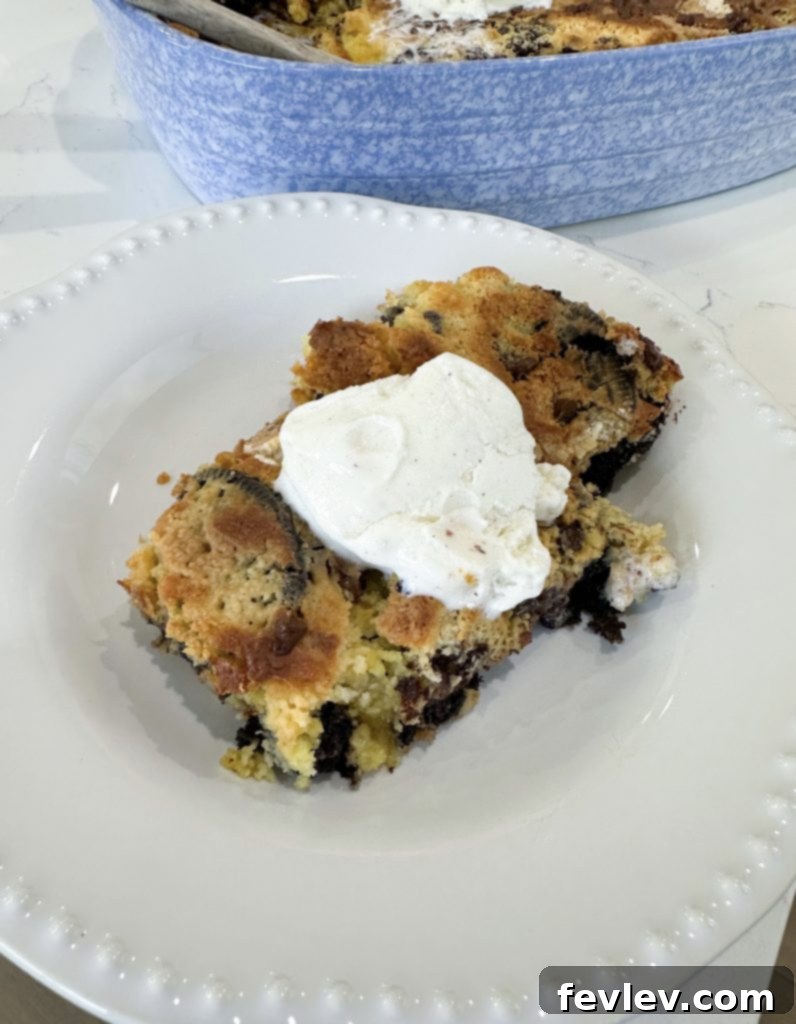
This decadent dessert is best served warm, straight from the oven. Top each serving with a generous scoop of vanilla ice cream, a dollop of whipped topping, or a drizzle of chocolate syrup for an extra touch of indulgence.
Storing Your Easy Oreo Dump Cake
While this delightful cake is often devoured quickly, any leftovers can be easily stored to enjoy later:
- Fridge: Once cooled to room temperature, cover the baking dish tightly with plastic wrap or an airtight lid. Store the cake in the refrigerator for 4-5 days. Reheat individual servings in the microwave for a warm, gooey treat, or enjoy it chilled.
- Freezer: For longer storage, you can freeze the dump cake. Once completely cooled, cut the cake into individual servings. Wrap each piece tightly in plastic wrap, then place them in a freezer-safe container or bag. It can be stored for up to 2-3 months. Thaw in the refrigerator overnight or reheat directly from frozen in the microwave until warm.
Tips and Tricks for the Most Delicious Oreo Dump Cake
Take your Oreo dump cake from great to absolutely extraordinary with these helpful tips and creative variations:
Cake Mix Flavor Variations:
- Classic Cookies and Cream: Yellow cake mix is our top recommendation for achieving the most authentic cookies and cream flavor, allowing the Oreo notes to truly shine.
- Double Chocolate Dream: For chocolate lovers, swap the yellow cake mix for a devil’s food or chocolate cake mix. This creates a rich, double-chocolate Oreo cake that is intensely satisfying.
- Vanilla Bliss: A vanilla or white cake mix can offer a milder, creamier base, allowing the bold flavor of the Oreos to stand out even more.
- Fun & Festive: Don’t hesitate to experiment with seasonal cake mixes like red velvet, strawberry, or even spice cake for unique flavor combinations.
Choosing Your Oreo Cookies:
- Original Oreos: The classic choice for a reason, providing the perfect balance of chocolate and cream.
- Double Stuffed Delight: Personally, double-stuffed Oreos are my favorite! The extra cream filling adds an even richer, gooier texture to the cake.
- Flavorful Variations: The world of Oreos is vast and exciting! Consider using mint Oreos for a refreshing twist, peanut butter Oreos for a nutty kick, or any of the numerous seasonal or limited-edition flavors to create endless variations of this decadent dessert. Golden Oreos can also be used with a vanilla cake mix for a “golden cookies and cream” experience.
Enhancing with Toppings:
While delicious on its own, adding toppings can elevate your Oreo dump cake to new heights:
- A Scoop of Ice Cream: Classic vanilla bean is perfect, but chocolate, coffee, or even mint chip ice cream can be incredible pairings.
- Whipped Cream or Cool Whip: A light, airy topping that balances the richness of the cake beautifully.
- Chocolate Syrup: A drizzle of chocolate syrup or hot fudge sauce provides extra indulgence.
- Mini Chocolate Chips: Sprinkle these over the top for added texture and chocolate flavor.
- Chocolate Shavings: A sophisticated touch that adds visual appeal and a delicate chocolate taste.
- Caramel Drizzle: For a salty-sweet contrast, a caramel drizzle can be a fantastic addition.
- Fresh Berries: A few fresh raspberries or strawberries can cut through the richness and add a pop of color.
Baking Dish Alternatives:
While a 9×13-inch baking dish is standard, you can adapt:
- Smaller Pans: For a thicker cake, use an 8×8 or 9×9-inch pan, but you may need to increase baking time slightly and cover loosely with foil if the top browns too quickly.
- Individual Servings: This recipe can be adapted for individual portions using ramekins or muffin tins, reducing baking time significantly.
Preventing Dry Spots:
The key to a consistently moist dump cake is the butter. Ensure your butter is sliced as thinly as possible and distributed evenly over the entire surface of the dry cake mix. This ensures that as it melts, it coats all the cake mix, preventing any unhydrated, powdery areas.
The Perfect Serve:
This cake is truly best served warm. The warm, gooey cookie layer at the bottom and the soft, moist cake on top create an irresistible texture contrast. Allow it to cool for about 15-20 minutes after baking so it sets slightly, making it easier to scoop.
Frequently Asked Questions (FAQ)
- Can I use a different type of milk?
- While evaporated milk is recommended for its richness and thickness, you could try half-and-half or heavy cream for an even more decadent result. Regular whole milk can be used if evaporated milk isn’t available, but the texture might be slightly less rich.
- Do I have to use cold butter?
- Yes, cold butter is important. Slicing it thinly and placing it cold on top allows it to melt slowly and evenly, permeating the dry cake mix during baking. Room temperature butter might melt too quickly and not distribute as effectively.
- Can I add other mix-ins?
- Absolutely! Beyond chocolate chips, consider adding a sprinkle of chopped nuts (like pecans or walnuts) for extra crunch, or even a layer of cream cheese frosting dots (like with a classic dump cake) for an even richer cream cheese swirl.
- Is this considered a “no-bake” dessert?
- No, this is a “dump cake,” which means it’s incredibly easy to assemble by “dumping” ingredients, but it does require baking in an oven. It’s a low-effort baked dessert!
Oreo Dump Cake
By: Julia Pacheco
Oreo Dump Cake is one of the best and easiest cookies and cream cake recipes that you can make with only a few simple ingredients.
Prep: 10 mins
Cook: 40 mins
Total: 1 hr 10 mins
Servings: 10 servings
Average rating: 4.27 from 15 votes
Pin Recipe
Comment
Print Recipe
Ingredients
- 25 Oreo cookies (save 5-6 to the side for the topping)
- 1 14-ounce box yellow cake mix
- 1 12-ounce can evaporated milk
- ½ cup whole milk
- ¾ cup cold unsalted butter, sliced extremely thinly
- Ice cream or whipped topping for serving (optional)
- ¼ cup chocolate chips (optional, for topping)
Instructions
- Preheat oven to 350 degrees F (175 degrees C).
- Spray a 9×13-inch baking dish with non-stick cooking spray.
- Place 20 Oreo cookies side by side to cover the bottom of the baking dish in an even layer.
- Evenly sprinkle the yellow cake mix over the Oreo cookies.
- Pour the evaporated milk and regular milk over the top of the cake mix, trying to cover the surface as much as possible.
- Crush the remaining 5-6 Oreo cookies and sprinkle them over the top, along with any optional chocolate chips.
- Carefully place the thinly sliced butter pieces over the dry cake mix layer. Ensure most of the cake mix is covered with butter slices; this is key to preventing dry spots.
- Bake for 40 minutes, or until the top is golden brown and the cake is set.
- Remove from oven, let cool slightly, and serve warm with a heaping scoop of ice cream or whipped topping.
Video
Nutrition
Calories: 261kcal | Carbohydrates: 21g | Protein: 2g | Fat: 20g | Saturated Fat: 11g | Polyunsaturated Fat: 2g | Monounsaturated Fat: 6g | Trans Fat: 1g | Cholesterol: 38mg | Sodium: 225mg | Potassium: 89mg | Fiber: 1g | Sugar: 12g | Vitamin A: 446IU | Vitamin C: 0.002mg | Calcium: 26mg | Iron: 3mg
Nutrition information is automatically calculated and should only be used as an approximation.
Tried this recipe? Let us know how it was!
Quick Links to Simplify Your Meal Planning and Cooking
- Discover easy and efficient family meal plans
- Explore essential tools for the kitchen and more
- Find the best cookbook for family dinner recipes
- Download your FREE budget meal plan today
- Watch helpful cooking videos for inspiration
We love hearing from you! If you give these delicious recipes a try, make sure to tag us on Instagram @julia.pacheco.cooking and share your thoughts. Your feedback inspires us to create more amazing, easy-to-make dishes!