
Instant Pot White Rice: Achieve Fluffy Perfection Every Time
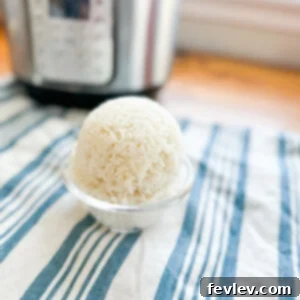
Discover the secret to consistently perfect, fluffy white rice using your Instant Pot. This foolproof recipe eliminates guesswork, delivering ideal results for any meal.
Comment
Print Recipe
Why Your Instant Pot is a Game-Changer for White Rice
Cooking white rice can often feel like a culinary challenge. Whether it ends up mushy, sticky, or burnt, achieving that ideal fluffy texture consistently seems elusive. This is precisely where your Instant Pot shines! Gone are the days of hovering over a simmering pot, constantly adjusting heat or worrying about boil-overs. The Instant Pot transforms rice cooking into a hands-off, “set-it-and-forget-it” experience, guaranteeing perfectly cooked grains every single time.
The beauty of pressure cooking lies in its ability to create a sealed environment that cooks food faster and more evenly. For white rice, this means superior absorption of water, leading to distinct, tender grains that are never clumped together. Moreover, the consistent temperature and pressure eliminate external variables, ensuring that whether you’re making a small batch for yourself or a larger quantity for a family meal, the results will be identical in quality. Say goodbye to guesswork and hello to consistently delicious rice!
This recipe focuses on simplicity and consistency, making it ideal for beginners and seasoned cooks alike. With just a few basic ingredients and straightforward steps, you’ll master Instant Pot white rice, freeing up your stovetop and your time for other delicious components of your meal.
Foolproof Instant Pot White Rice Recipe
Ingredients
- 1 tbsp olive oil
- 1 cup jasmine rice (or long-grain white rice)
- 1 ½ cups cold water
- A pinch of salt (optional, to taste)
Optional Seasonings:
- 1 tbsp taco seasoning (for a Mexican flair)
- 1 tbsp Italian seasoning (for a Mediterranean touch)
- 1 tbsp any other preferred seasonings (e.g., garlic powder, onion powder)
Pro Tip: For richer flavor, consider using vegetable or chicken broth instead of water, adjusting the salt content accordingly.
Instructions
-
Rinse the Rice Thoroughly: Place your chosen rice in a fine-mesh strainer. Rinse it under cold running water, stirring gently with your hand, until the water draining from the bottom runs completely clear. This crucial step washes away excess surface starch, which prevents the rice from clumping together and ensures each grain remains separate and perfectly fluffy. Don’t skip this step for the best results!
-
Combine Ingredients in the Instant Pot: Transfer the thoroughly rinsed rice to the inner pot of your Instant Pot. Add the olive oil, 1 ½ cups of cold water, and any desired optional seasonings (like taco or Italian seasoning) along with an optional pinch of salt. Stir gently to combine everything, ensuring the rice is evenly distributed at the bottom of the pot.
-
Pressure Cook to Perfection: Secure the lid onto the Instant Pot, ensuring it’s properly locked. Rotate the steam release valve to the “Sealing” position. Select the “Rice” button on your Instant Pot (if your model has one). If your Instant Pot doesn’t feature a dedicated “Rice” button, manually set it to “Manual” or “Pressure Cook” on High Pressure for 5 minutes. Some older models might require pressing “Start” after selecting the program. The Instant Pot will take a few minutes to build pressure before the cooking countdown begins.
-
Quick Release and Serve: Once the cooking cycle is complete, immediately perform a Quick Release (QR). To do this, carefully move the steam release valve to the “Venting” position. It’s recommended to stand back and use a long spoon or oven mitt to avoid direct contact with the hot steam. Once all the steam has been released and the float valve has dropped, it’s safe to open the lid. Gently fluff the perfectly cooked rice with a fork, then serve immediately. The quick release method is key for white rice, as it prevents overcooking and ensures the grains remain distinct and tender.
A video tutorial demonstrating these steps will be available here soon! Check back for visual guidance on achieving your best Instant Pot white rice.
Nutrition Facts
Carbohydrates: 38g |
Protein: 3g |
Fat: 4g |
Saturated Fat: 1g |
Polyunsaturated Fat: 0.5g |
Monounsaturated Fat: 3g |
Sodium: 53mg |
Potassium: 69mg |
Fiber: 1g |
Sugar: 0.2g |
Vitamin A: 80IU |
Vitamin C: 0.3mg |
Calcium: 33mg |
Iron: 1mg
Nutrition information is automatically calculated and should be used as an approximation. Actual values may vary.
The Key to Fluffy, Non-Sticky Instant Pot Rice
Achieving perfect rice isn’t just about the right appliance; it’s also about understanding a few key principles. The Instant Pot helps automate these, but knowing why they work will truly elevate your rice game. First, the **rice-to-water ratio** is paramount. For most white rices, a 1:1.5 ratio (1 cup rice to 1.5 cups water) generally works best in an Instant Pot, ensuring sufficient moisture for cooking without making it mushy. Too much water leads to sticky, soft rice, while too little results in crunchy, undercooked grains. Secondly, **rinsing the rice** cannot be overstressed. This simple yet vital step removes excess surface starch, which is the main culprit behind sticky, gummy rice. Rinse until the water running off the rice is perfectly clear. Lastly, the **quick release method** is crucial for white rice. A natural pressure release can lead to overcooked, softer rice due to residual heat. A quick release, on the other hand, stops the cooking process promptly, preserving the ideal texture of individual grains.
Choosing the Right White Rice for Your Instant Pot
While this recipe works beautifully with common long-grain white rice, jasmine rice is particularly excellent for Instant Pot cooking. Its delicate floral aroma and slightly sticky but distinct grains make it a favorite for many Asian cuisines. Basmati rice, another popular long-grain variety, also performs exceptionally well, yielding incredibly fragrant, elongated grains. For these types, the 1:1.5 ratio is ideal. Avoid using short-grain or medium-grain rice with this specific ratio, as they require less water and often a different cooking time due to their higher starch content and natural tendency to become much stickier.
Elevate Your Meal with Flavorful White Rice Variations
Plain white rice is a versatile staple, but it’s also a fantastic canvas for flavor experimentation. The optional seasonings mentioned in the recipe are just the beginning. Don’t hesitate to get creative and tailor your rice to complement any dish:
- Herbal Infusion: Add a bay leaf, a few sprigs of fresh thyme, or rosemary directly into the pot along with the water. Remove them before serving for a subtle aromatic touch.
- Garlic & Onion Base: For a deeper flavor, sauté minced garlic and/or finely diced onion in the Instant Pot on the Sauté setting with the olive oil for 2-3 minutes before adding the rice and water. This builds a rich aromatic foundation.
- Citrus Brightness: A tiny bit of lemon or lime zest added after cooking and fluffing can brighten the flavor significantly, making it an excellent pairing for seafood or light chicken dishes.
- Broth Boost: Substitute half or all of the water with chicken, vegetable, or beef broth for a deeper, more savory flavor profile. Remember to adjust any added salt if using broth, as many are already seasoned.
- Spicy Kick: A pinch of red pepper flakes, a dash of cayenne pepper, or a few slices of fresh jalapeño can add a subtle to moderate heat, perfect for Tex-Mex or Asian-inspired meals.
- Buttery Richness: Stir in a tablespoon of butter or ghee after the rice is cooked and fluffed for extra richness and a glossy finish.
Perfect Pairings: Serving Suggestions for Your Instant Pot Rice
Perfectly cooked white rice is the ideal accompaniment to countless dishes, serving as a neutral canvas that allows other flavors to shine or as a subtly seasoned component that enhances the entire meal. Serve it alongside:
- Asian-Inspired Dishes: The individual grains beautifully absorb the complex sauces of stir-fries, curries (like Thai or Indian curries), and General Tso’s chicken.
- Grilled or Pan-Seared Proteins: A light and satisfying side for grilled chicken, fish (salmon, cod), or pork chops.
- Hearty Stews and Soups: It adds substance and helps to soak up the delicious liquid of beef stew, chicken chili, or lentil soup.
- Mexican or Latin American Meals: When seasoned with taco seasoning or a bit of cumin, it’s perfect for building burritos, filling tacos, or as a robust side for enchiladas, fajitas, or cilantro-lime chicken.
- Mediterranean Flavors: Paired with roasted vegetables, hummus, and grilled lamb or chicken.
- As a Base for Bowls: Create quick and easy rice bowls with your favorite protein (tofu, chicken, beef), roasted or fresh vegetables, and a flavorful sauce.
Troubleshooting Common Instant Pot Rice Issues
Even with the convenience of the Instant Pot, occasionally things might not go exactly as planned. Here’s how to tackle common problems and ensure your next batch is perfect:
- Mushy or Gummy Rice: This usually means too much water or too long of a cooking time. Ensure you’re using the precise 1:1.5 ratio for white rice and performing a quick release immediately. Next time, if it’s still too soft, try slightly reducing the water (e.g., 1.25 cups of water for 1 cup of rice) until you find your Instant Pot’s sweet spot.
- Crunchy or Undercooked Rice: This indicates insufficient water, not enough cooking time, or a faulty seal on your Instant Pot. Double-check your water ratio, ensure the sealing ring is properly in place, and confirm the steam release valve is set to “Sealing” before starting.
- Sticky Rice (beyond what’s expected for jasmine): Most often, this is due to not rinsing the rice thoroughly enough. Rinsing removes excess starch, which is the primary cause of stickiness. While some rice varieties are naturally stickier (e.g., sushi rice), for long-grain and jasmine rice, thorough rinsing is paramount.
- “Burn” Message: If you get a “burn” warning, it typically means something is stuck to the bottom of the pot, preventing proper pressure build-up, or there isn’t enough liquid. Always ensure you add oil first, then rice, then water, and stir gently to ensure nothing is sticking to the bottom before closing the lid and starting the cooking process.
Storing and Reheating Leftover Rice
Cooked rice can be safely stored in an airtight container in the refrigerator for up to 3-4 days. It’s important to cool the rice quickly after cooking to minimize bacterial growth. When reheating, it’s best to add a tablespoon or two of water or broth per cup of rice to prevent it from drying out, as rice tends to absorb moisture during refrigeration. Reheat gently in the microwave or on the stovetop over low heat, stirring occasionally until heated through. Freezing rice is also an excellent option for longer storage; spread cooled rice in a single layer on a baking sheet to flash freeze, then transfer to a freezer-safe bag or container for up to one month. Reheat from frozen with a splash of liquid, stirring until warm.
Frequently Asked Questions (FAQ) About Instant Pot White Rice
Do I need to soak the rice before cooking in the Instant Pot?
Soaking is generally not required for white rice when using the Instant Pot, especially with the recommended thorough rinsing step. Soaking can sometimes lead to mushier results with pressure cooking, as the Instant Pot already speeds up water absorption efficiently.
Can I double or triple this recipe for more servings?
Absolutely! You can easily double or even triple this recipe to accommodate more servings. The crucial factor is to maintain the precise 1:1.5 rice-to-water ratio. The cooking time (5 minutes on high pressure) generally remains the same regardless of the quantity of rice, though the Instant Pot may take a few extra minutes to come to pressure with a larger volume of ingredients.
What if my Instant Pot doesn’t have a specific “Rice” button?
No problem at all! If your Instant Pot model lacks a dedicated “Rice” button, simply use the “Manual” or “Pressure Cook” button and set the time to 5 minutes on High Pressure. The “Rice” button is often a pre-set for specific rice types, but manual settings offer greater control and the same excellent results.
Is it better to use hot or cold water for Instant Pot rice?
For optimal results with white rice in the Instant Pot, cold water is generally preferred. Starting with cold water allows the rice grains to gradually heat up and absorb water more evenly, contributing to a better, fluffier texture. Hot water can sometimes rush the cooking process, potentially leading to less consistent or slightly gummy results.
How much salt should I add to the rice?
For a basic unseasoned rice, a pinch (about 1/4 to 1/2 teaspoon per cup of rice) is usually sufficient to enhance flavor, but this is entirely to personal taste. If you’re using seasoned broth instead of water, or incorporating other salty seasonings, taste your ingredients before adding extra salt to avoid over-seasoning.
Can I use brown rice with this recipe and cooking time?
No, this recipe and its cooking instructions are specifically formulated for white rice varieties (jasmine, long-grain white). Brown rice requires a different water ratio and a significantly longer cooking time (typically 20-22 minutes on High Pressure with a 1:1.25 rice to water ratio, followed by a Natural Pressure Release) due to its outer bran layer. Please look for a dedicated Instant Pot brown rice recipe for best results.
Tried this recipe? We’d love to hear how it turned out!
Leave a comment below and share your experience with Instant Pot White Rice!