
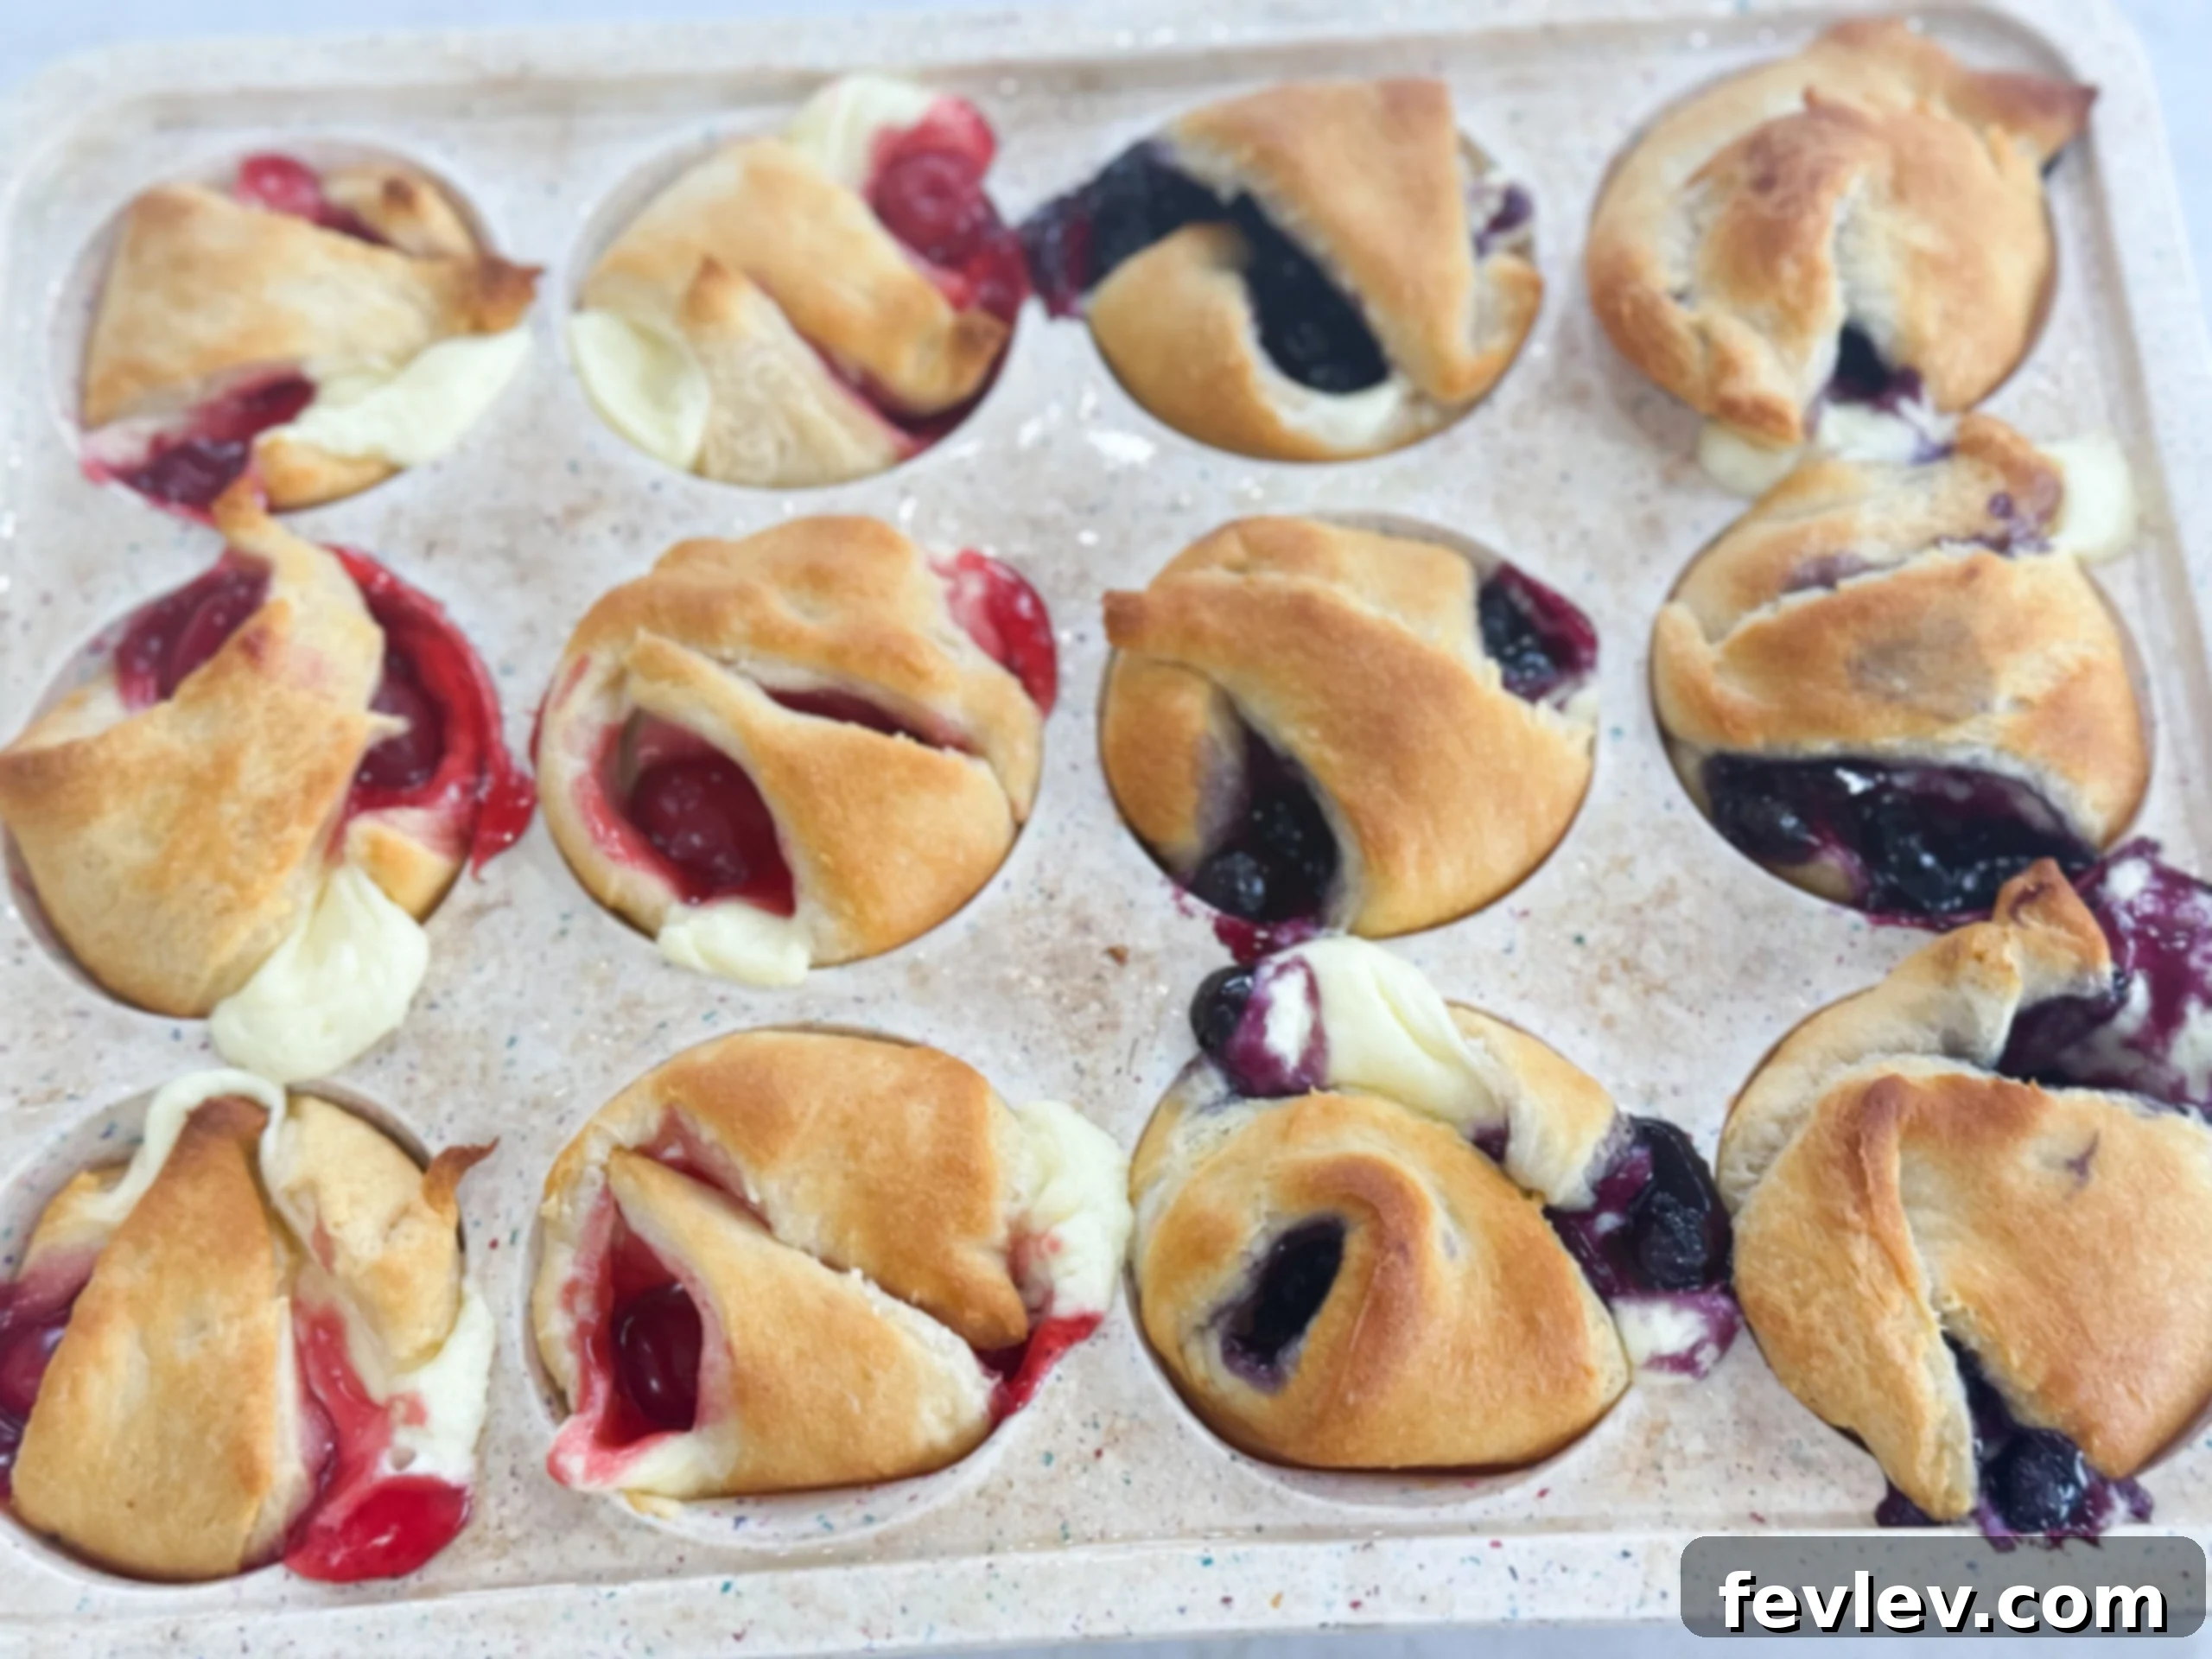
Irresistible Mini Cheesecake Pies: Easy Recipe with Crescent Dough and Fruit
Prepare to fall in love with these delightful Mini Cheesecake Pies! They are the ultimate hassle-free dessert, combining flaky crescent dough with a rich, creamy cheesecake filling and a vibrant fruit topping. Baked in convenient muffin cups, each pie offers a perfect bite-sized burst of flavor. Whether you’re planning for a holiday gathering, a casual party, or simply craving a sweet and simple treat, these mini pies are guaranteed to be a hit with everyone who tries them.
Looking for more quick and delicious treats to impress your guests or satisfy your sweet tooth? You might also enjoy our popular Apple Crescent Donuts or our comforting Crescent Roll Cinnamon Rolls for another exciting crescent dough adventure!
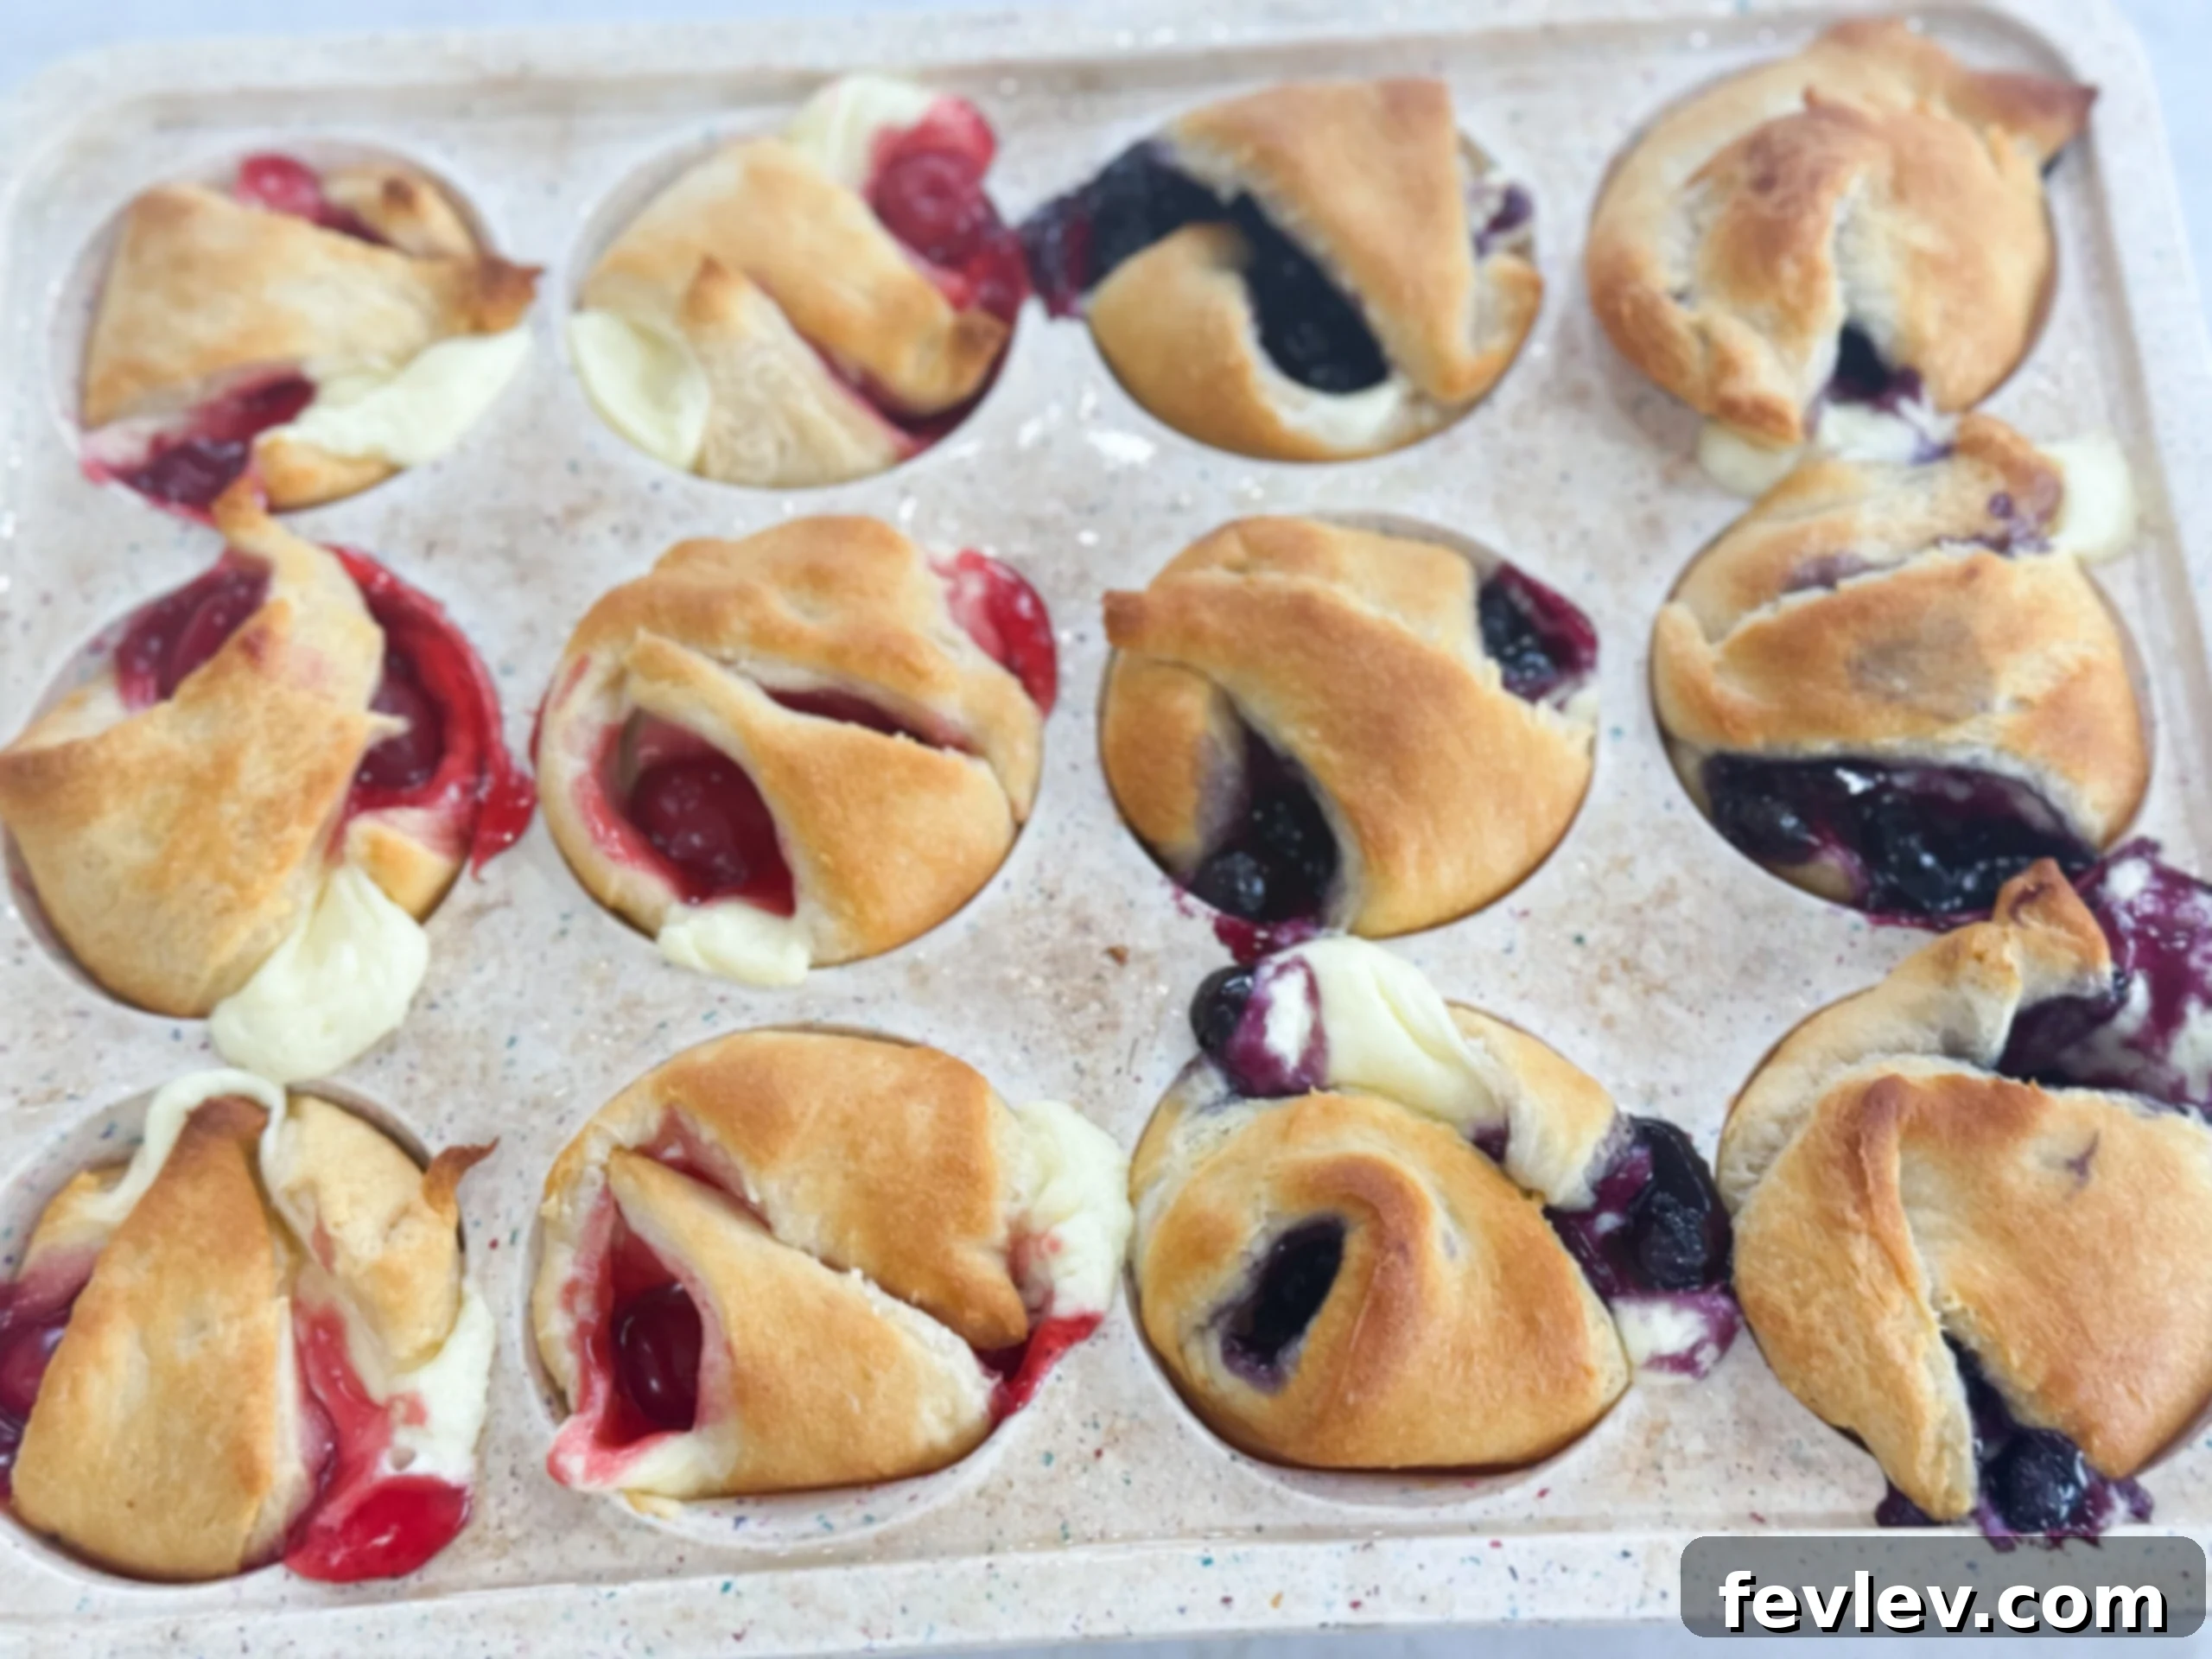
These individual Mini Cheesecake Pies are not just desserts; they are little edible works of art that impress with minimal effort. The golden, tender crust, ingeniously made from versatile crescent dough, cradles a velvety cheesecake center, all crowned with your favorite fruit. They are flawlessly portioned, making them an ideal dessert for any occasion, from elegant brunches to cozy family dinners, ensuring everyone gets a perfect share of sweetness.
Watch the Recipe Video: Quick & Easy Baking Guide
Sometimes, seeing is believing, especially when it comes to quick baking projects! Don’t just read the recipe; watch this concise 1-2 minute video demonstration to visually grasp every step involved in crafting these delicious mini cheesecake pies. It’s the most straightforward way to master the technique and feel confident before you even preheat your oven.

Fresh Cooking Videos Every Week!
Join my YouTube Cooking Channel for more delightful recipes and kitchen tips!
Why You’ll Adore These Easy Mini Cheesecake Pies

These mini cheesecake pies truly strike the perfect balance between gourmet appeal and effortless preparation. You’ll love how sophisticated and festive they look, yet they come together in just a matter of minutes, making them an ideal choice for busy individuals who don’t want to compromise on taste or presentation. Their individual portions make them especially fantastic for entertaining, as each guest gets their own charming, perfectly sized pie, eliminating the need for slicing and serving messy larger desserts.
Beyond their ease and elegant appearance, their versatility is a major highlight. The simple base recipe allows for endless customization. Feel free to experiment with a wide variety of fruit pie fillings – classic blueberry and cherry are always delightful winners, but apple, raspberry, or even peach fillings can transform these treats into exciting new flavor experiences. The humble crescent dough bakes up beautifully, achieving a delightful golden-brown and buttery texture that forms the perfect, tender foundation for the creamy cheesecake. This isn’t just a dessert; it’s a clever shortcut to creating memorable sweet bites that consistently garner rave reviews and compliments from everyone who tastes them.
- ⏰ Total Time: Ready in approximately 20 minutes from start to golden finish!
- 🍂 Perfect For: Ideal for holidays, family gatherings, casual parties, potlucks, or simply as a delightful weeknight dessert.
- 🛒 Key Ingredients: You only need ready-to-use crescent dough, creamy cheesecake filling (store-bought for convenience or a simple homemade version), and your favorite canned fruit pie filling.
- 🍽️ Servings: This recipe yields 12 perfectly portioned mini pies, making them easy to share.
- 🥄 Skill Level: Remarkably easy – perfect for beginner bakers, busy parents, and seasoned pros alike looking for a quick win.
- 🧊 Storage: Keep them fresh and tasty in an airtight container in the refrigerator for up to 3 days.
If these charming treats captured your heart, you’ll definitely want to try my Apple Crescent Donuts for another fruity pastry or perhaps my indulgent Pumpkin Dump Cake for a truly comforting dessert experience.
Made With Love,
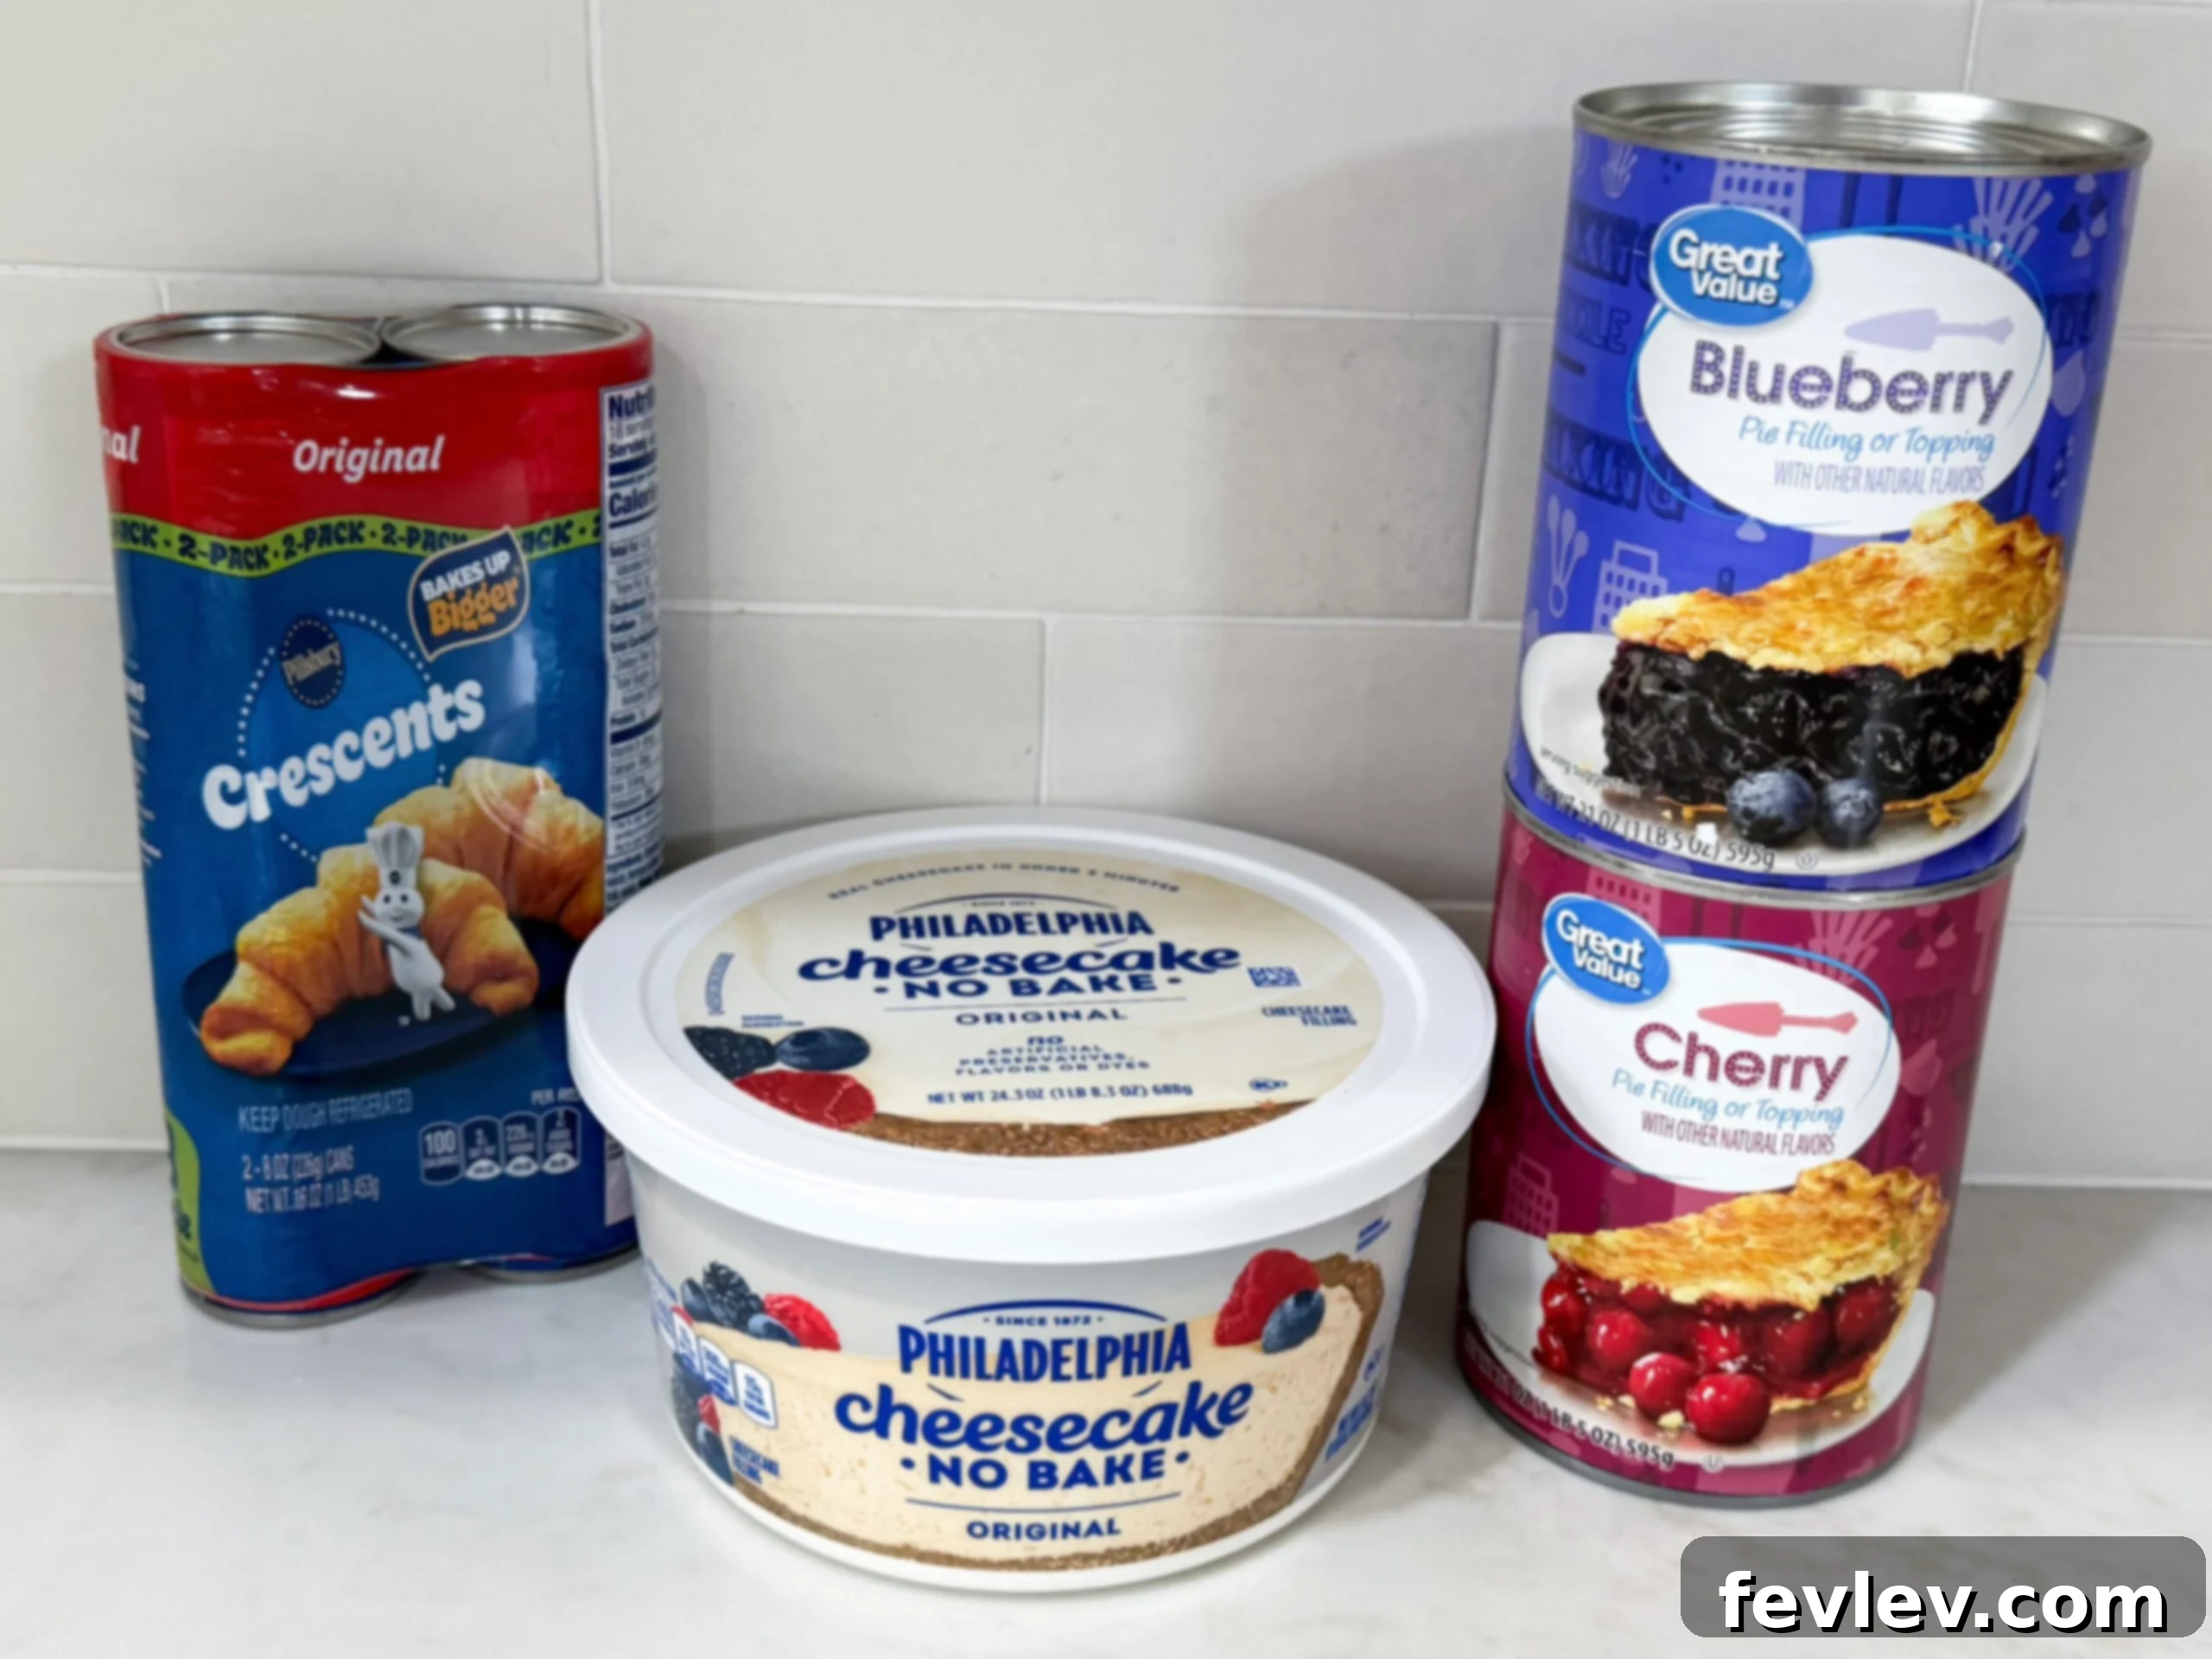
Essential Ingredients for Your Delicious Mini Cheesecake Pies
Crafting these delectable mini cheesecake pies requires just a handful of readily available ingredients, making this recipe a fantastic choice for both novice and experienced bakers. The beauty of this dessert lies in its simplicity and the delightful way these core components come together to create something truly special. Here’s a closer look at what you’ll need to gather:
- Crescent Dough: This is your ultimate shortcut for a flaky, golden crust! We utilize pre-made crescent dough triangles, which are conveniently pressed into muffin cups to create the perfect buttery and slightly tender pie crust. This ingredient saves you immense time and effort compared to preparing traditional pie crusts from scratch, making dessert making a breeze.
- Cheesecake Filling: For maximum convenience and a consistently creamy result, store-bought cheesecake filling works wonderfully. It’s pre-sweetened and boasts that signature smooth, rich texture. However, if you prefer a homemade touch, a simple mixture of softened cream cheese, granulated sugar, and a hint of vanilla extract can be easily whipped up at home.
- Fruit Pie Filling: This is the vibrant crowning glory of these mini pies! Choose your absolute favorite canned fruit pie filling. Blueberry, classic cherry, and comforting apple are incredibly popular choices that offer a delightful burst of fruity flavor and a beautiful, contrasting color. Don’t hesitate to get creative and experiment with other varieties like peach, strawberry, or even a mixed berry blend for a unique and personalized twist.
- Powdered Sugar: A light dusting of finely sifted powdered sugar provides a charming and elegant finishing touch. It adds a subtle hint of extra sweetness and enhances the overall visual appeal of your freshly baked mini pies, making them look professionally made.
For another absolutely delicious and easy-to-make dessert that’s sure to be a hit, don’t miss my recipe for Caramel Butter Bars!
Full Recipe Ingredients List (Yields 12 Mini Pies)
Here are the precise measurements for preparing 12 scrumptious mini cheesecake pies. Gather these items and you’ll be well on your way to creating a fantastic, crowd-pleasing dessert!
- 2 cans (8 oz each) crescent roll dough (triangle-style)
- 12 tbsp cheesecake filling (approximately 1.5 – 2 small containers if store-bought, or a homemade batch)
- 1 can (standard size, about 21 oz) fruit pie filling of your choice (e.g., blueberry, cherry, apple, raspberry)
- 1 tbsp powdered sugar (for dusting)
A comprehensive, printable recipe card with these exact amounts and detailed instructions is provided further down the page. It’s perfect for keeping handy in your kitchen or sharing with friends and family!
How to Make Mini Cheesecake Pies: A Simple Step-by-Step Guide
Creating these charming mini cheesecake pies is incredibly straightforward and requires minimal fuss. Follow these easy steps to achieve perfectly baked, delightful treats every single time, even if you’re new to baking!
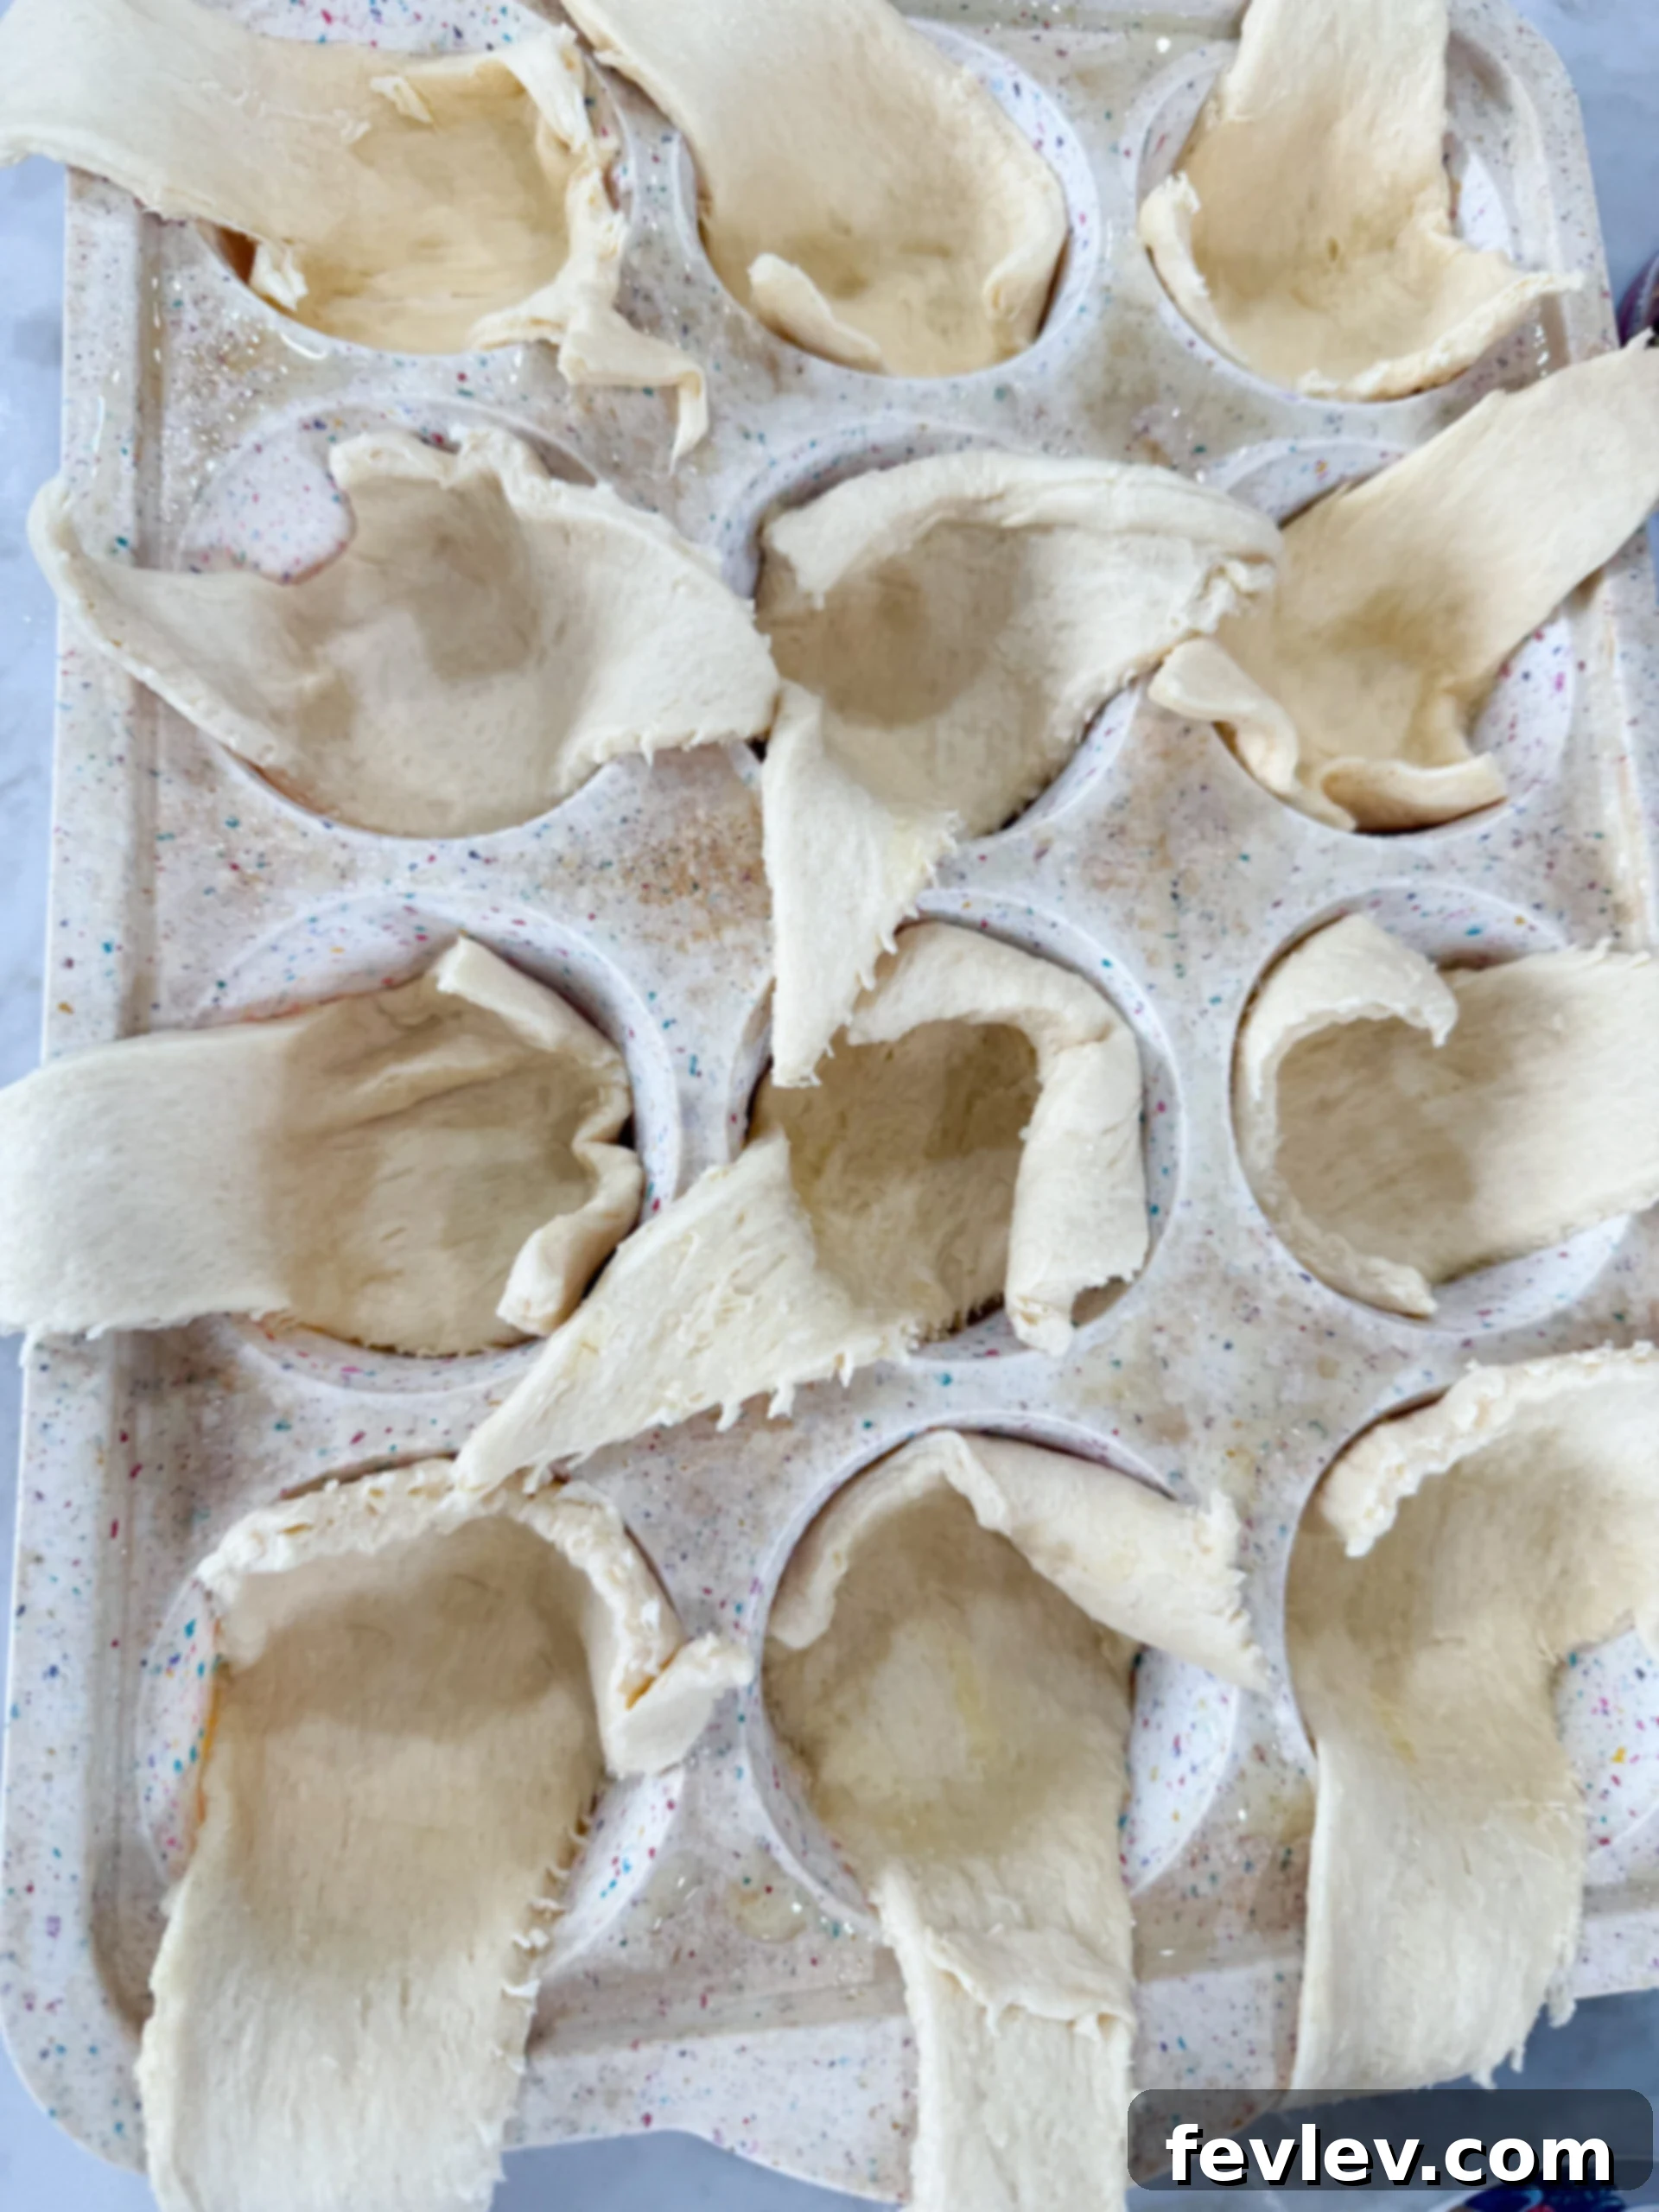
Step 1: Prepare Your Oven and Muffin Pan. Begin by preheating your oven to 350°F (175°C). While the oven heats up, take a moment to lightly grease a standard 12-cup muffin pan. This crucial step is key to ensuring your delicate crescent crusts won’t stick and will release easily and cleanly after baking. You can use butter, cooking spray, or even muffin liners for added assurance.
Step 2: Form the Crescent Dough Crusts. Carefully unroll the crescent dough from its package and separate it into individual triangles. Gently press one triangle into each greased muffin cup, making sure it forms a neat cup shape. Allow the wider, rounded ends of the dough to slightly hang over the edges of the muffin cup – this will give your mini pies a rustic, homemade look and make them much easier to handle and remove later.
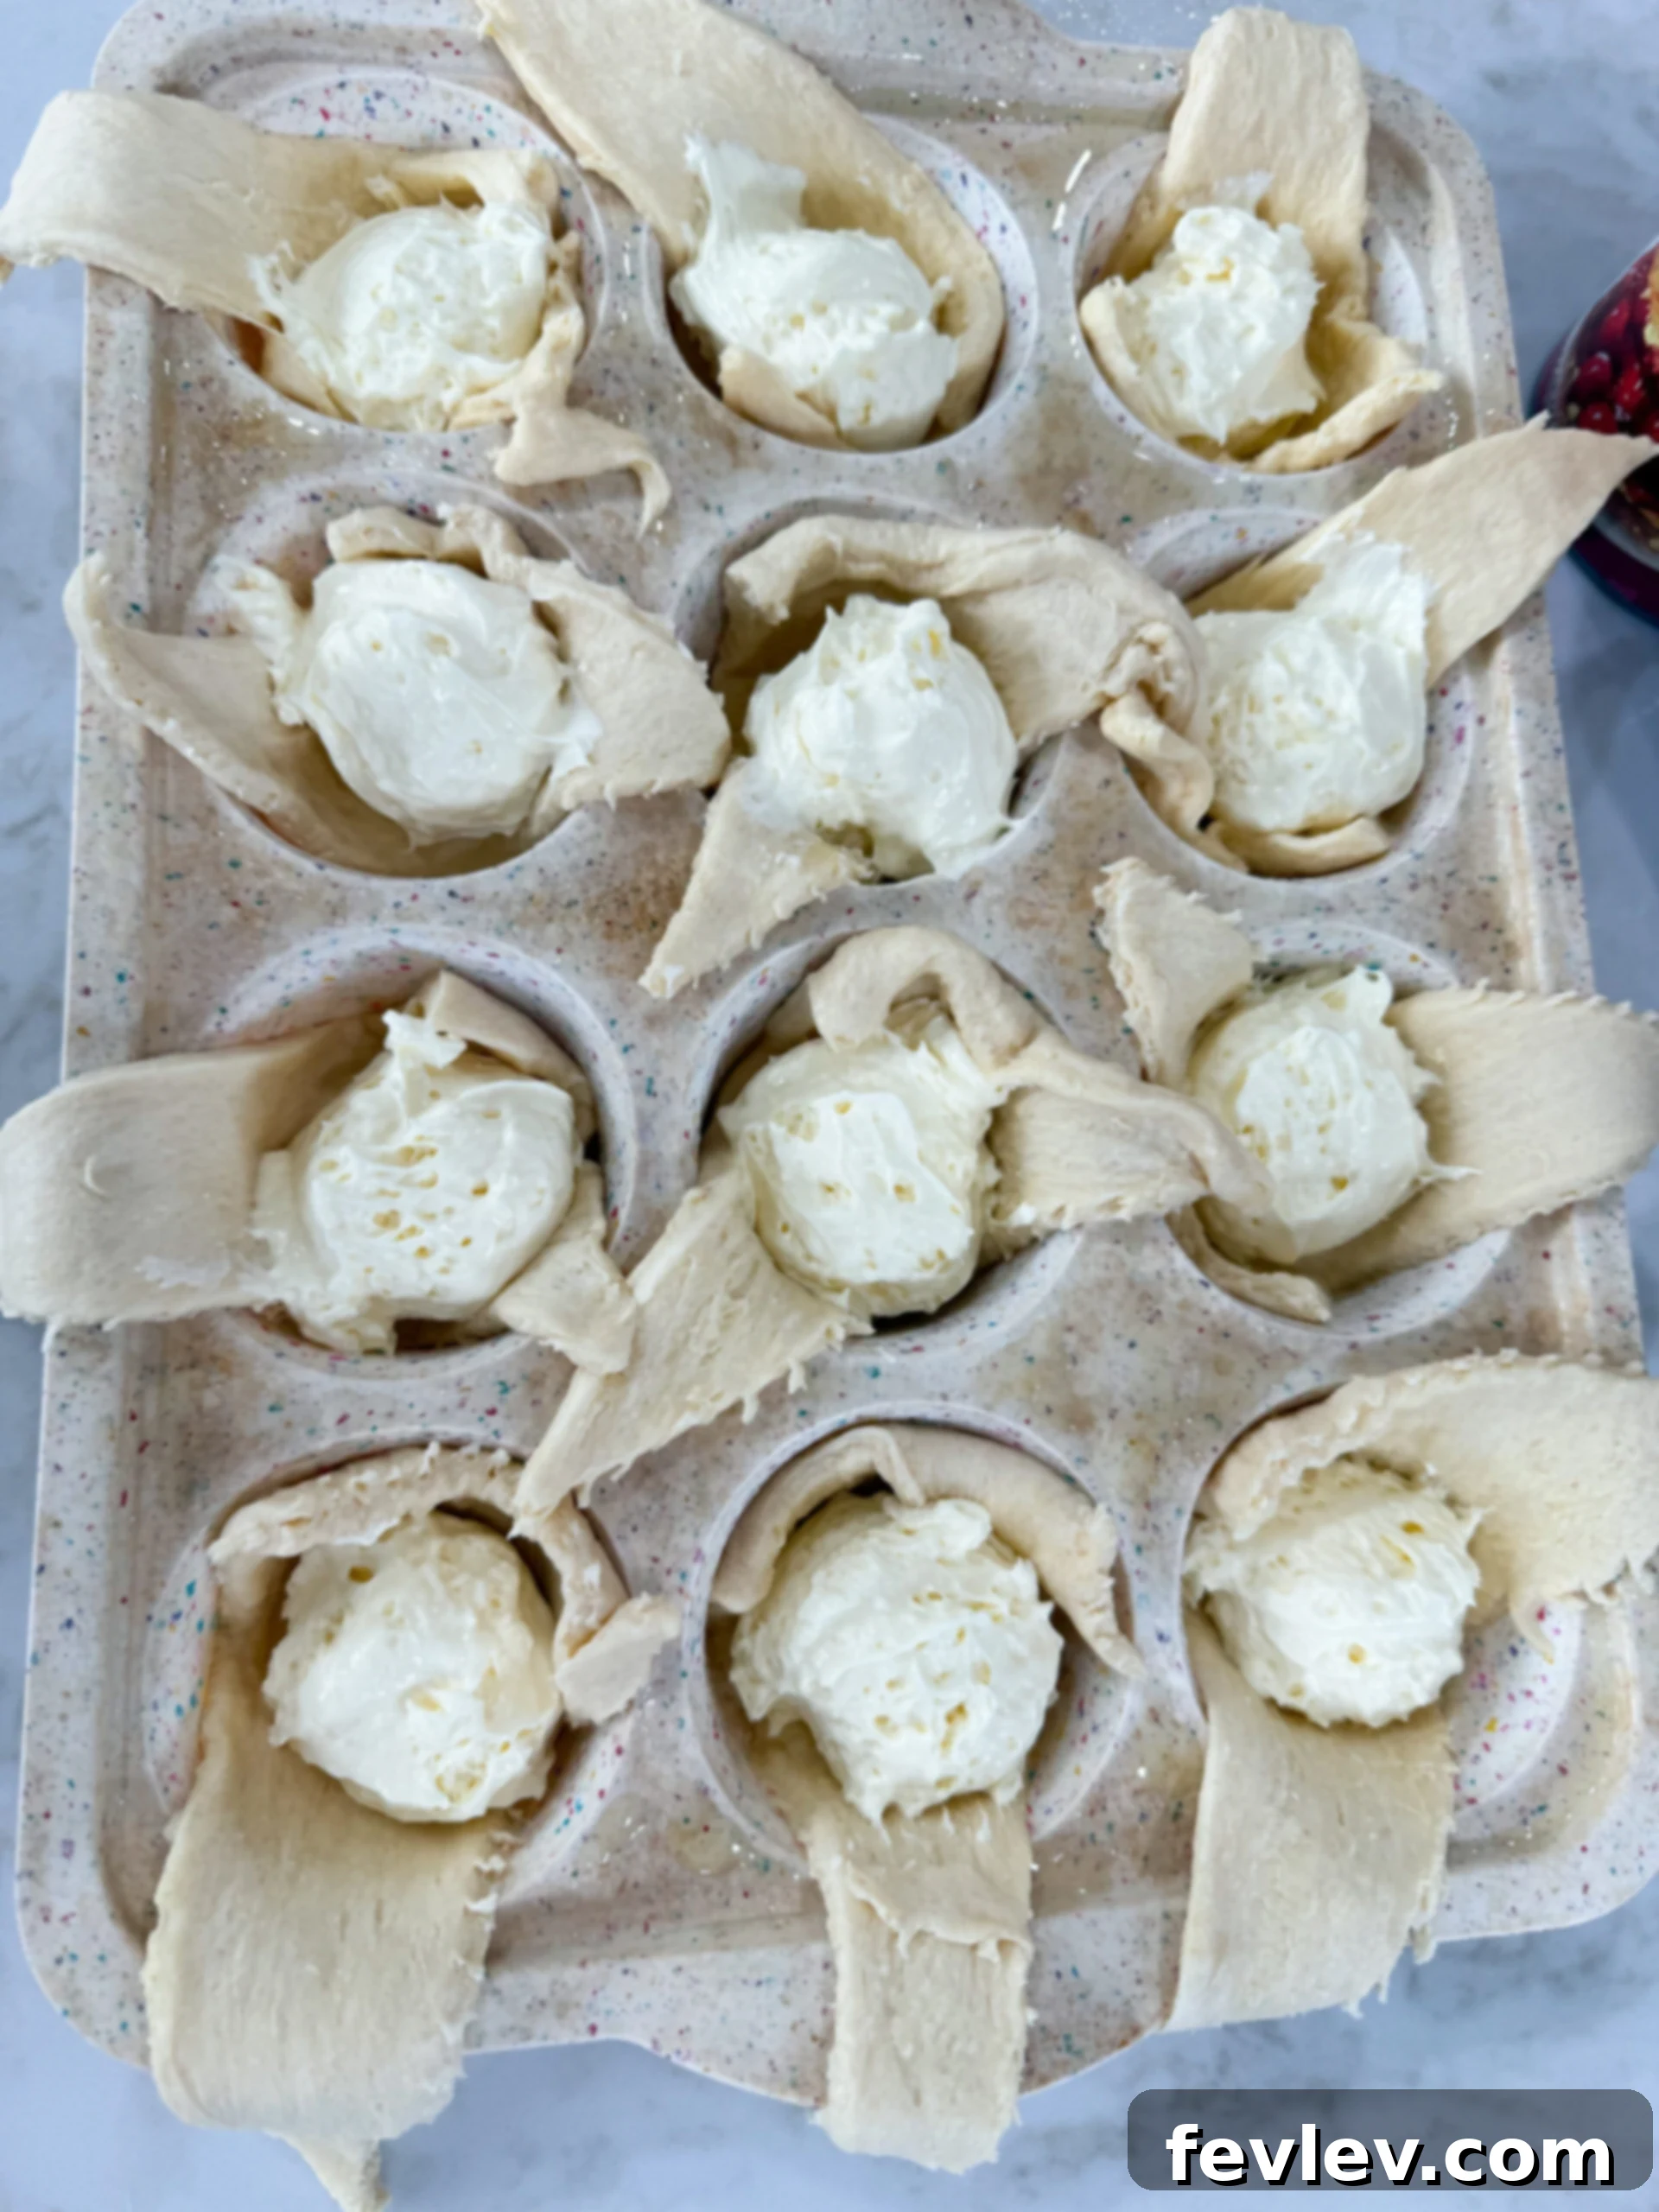
Step 3: Add the Creamy Cheesecake Filling. Spoon approximately 1 to 2 tablespoons of your chosen cheesecake filling into each crescent dough-lined muffin cup. Distribute the filling evenly among all the cups, ensuring each pie has a generous amount of creamy goodness. Be mindful not to overfill to prevent any spillage during baking, which can make cleanup a bit trickier.
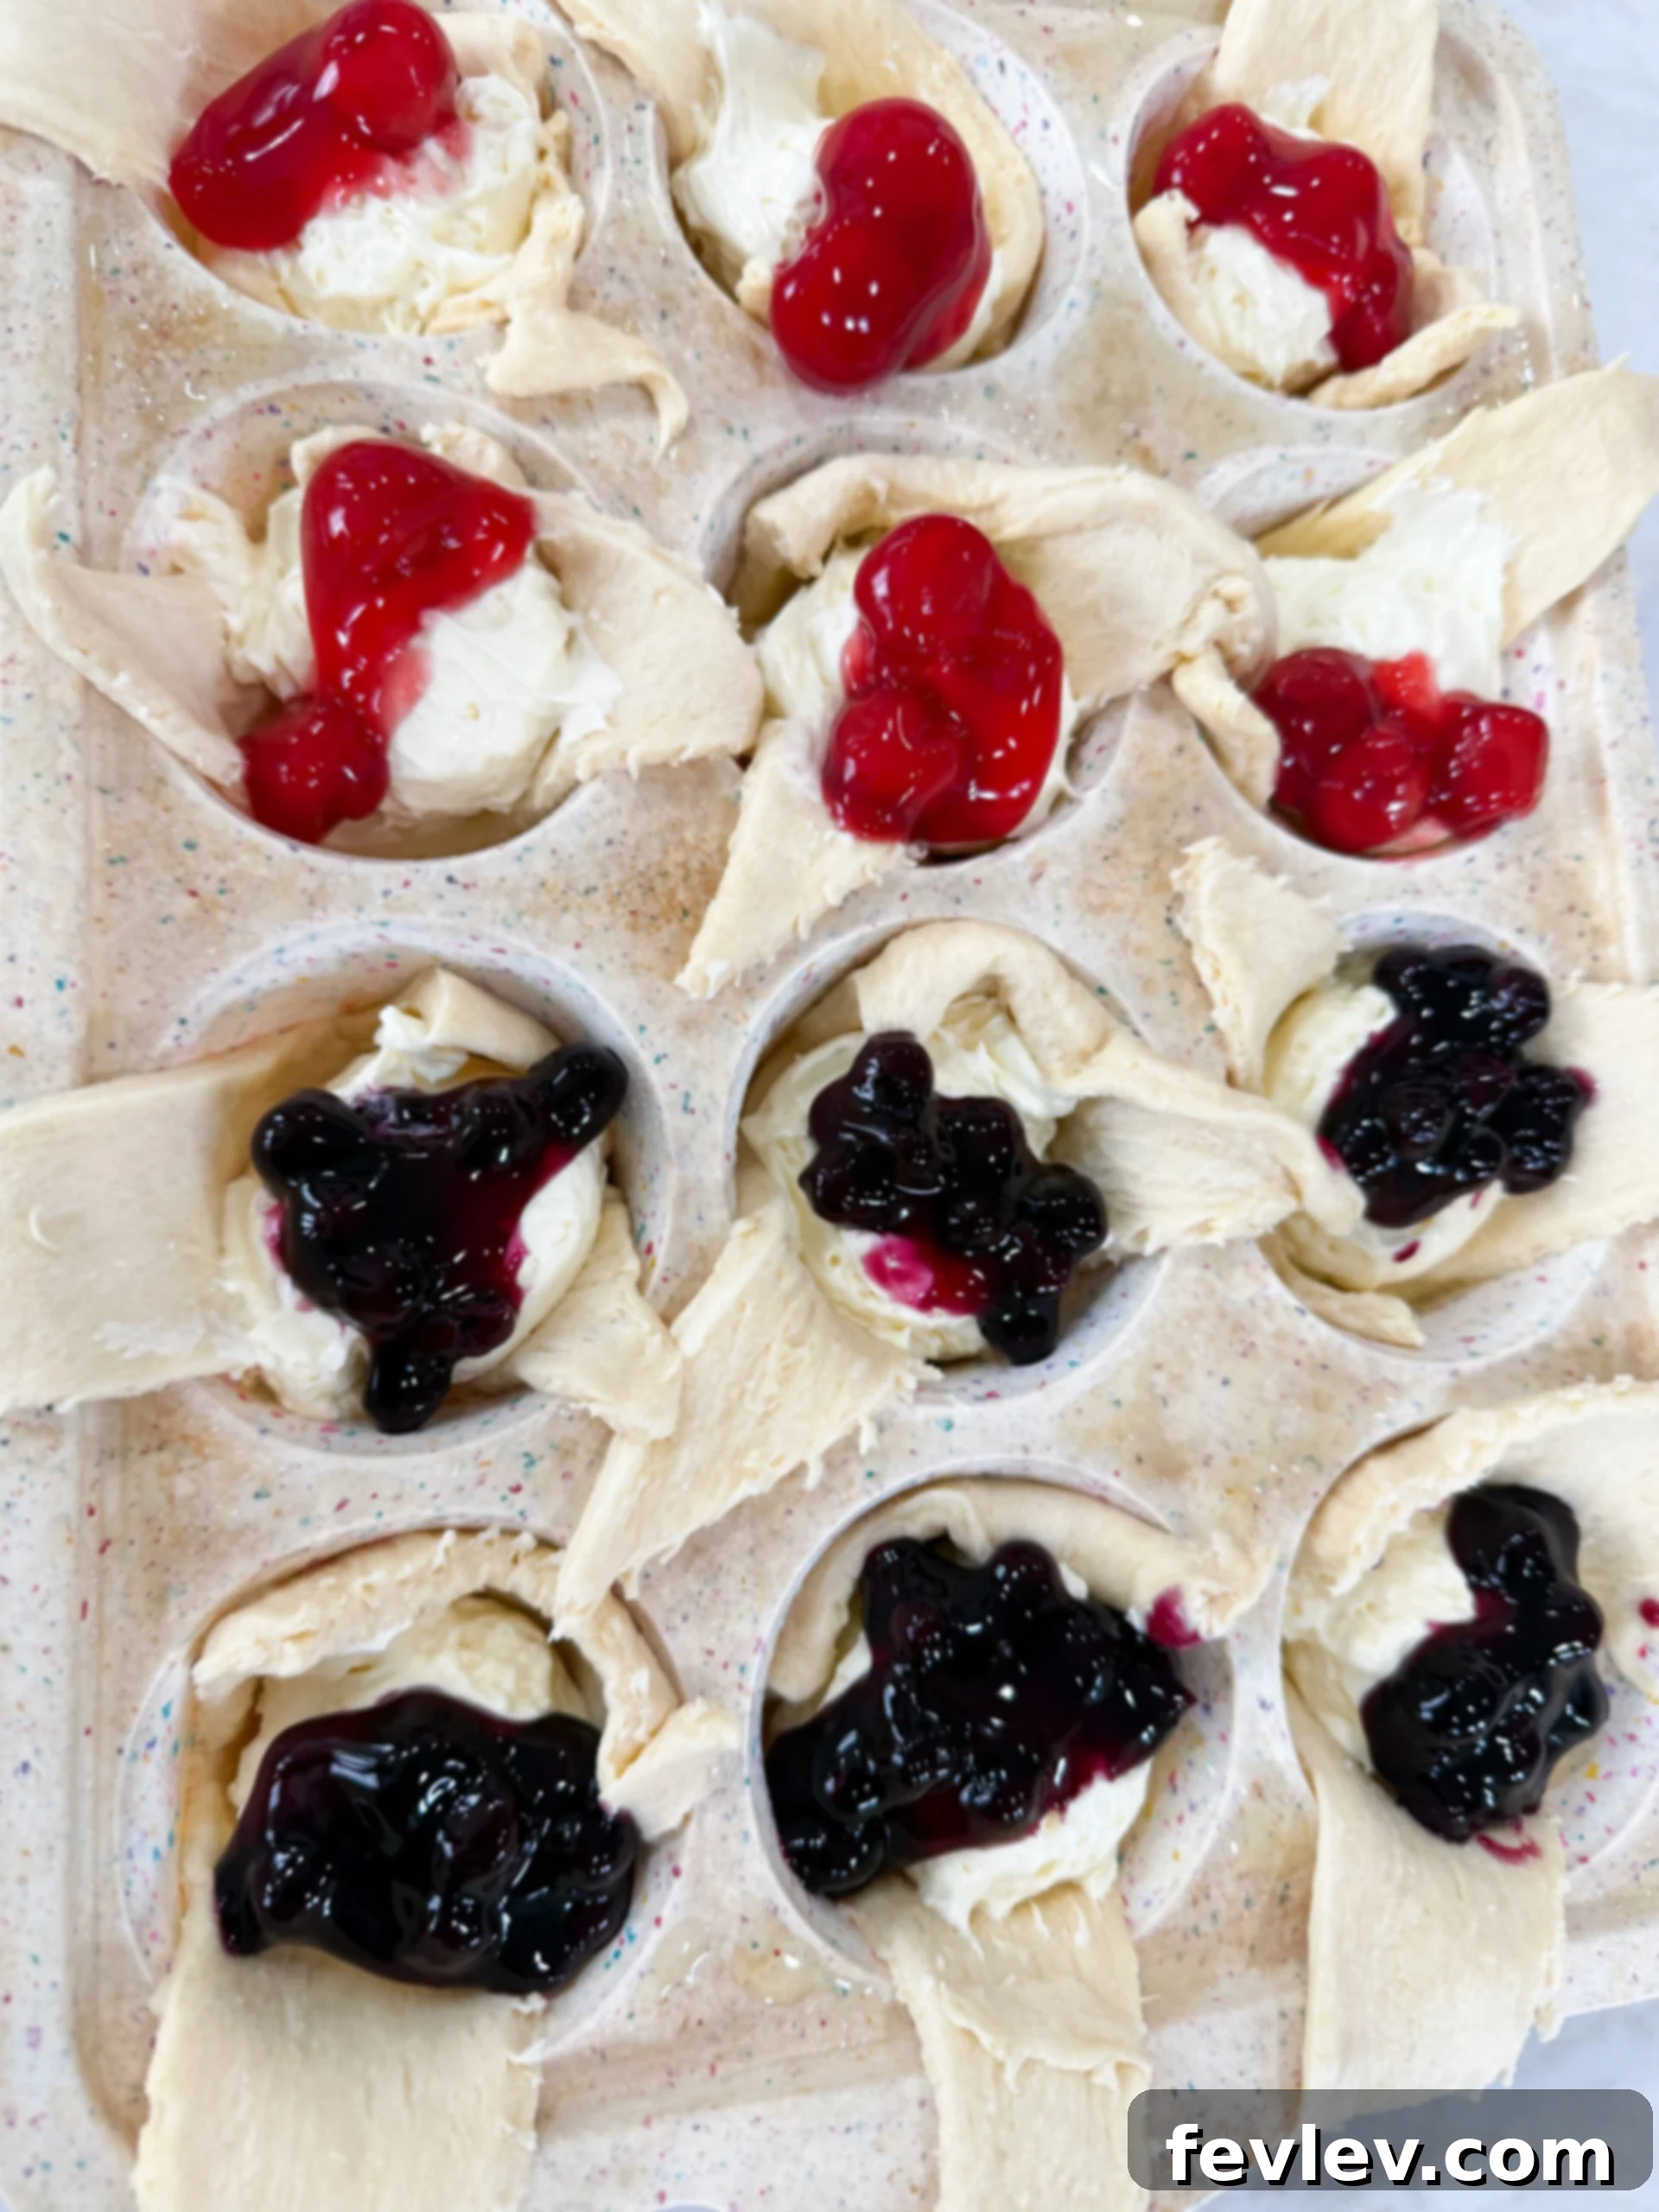
Step 4: Top with Luscious Fruit Pie Filling. Carefully add about ½ tablespoon of your preferred fruit pie filling on top of the cheesecake layer in each cup. The fruit adds a wonderful, contrasting tartness and a beautiful pop of vibrant color that complements the rich cheesecake perfectly. For a visually appealing result, try not to mix the layers too much, allowing them to remain distinct.
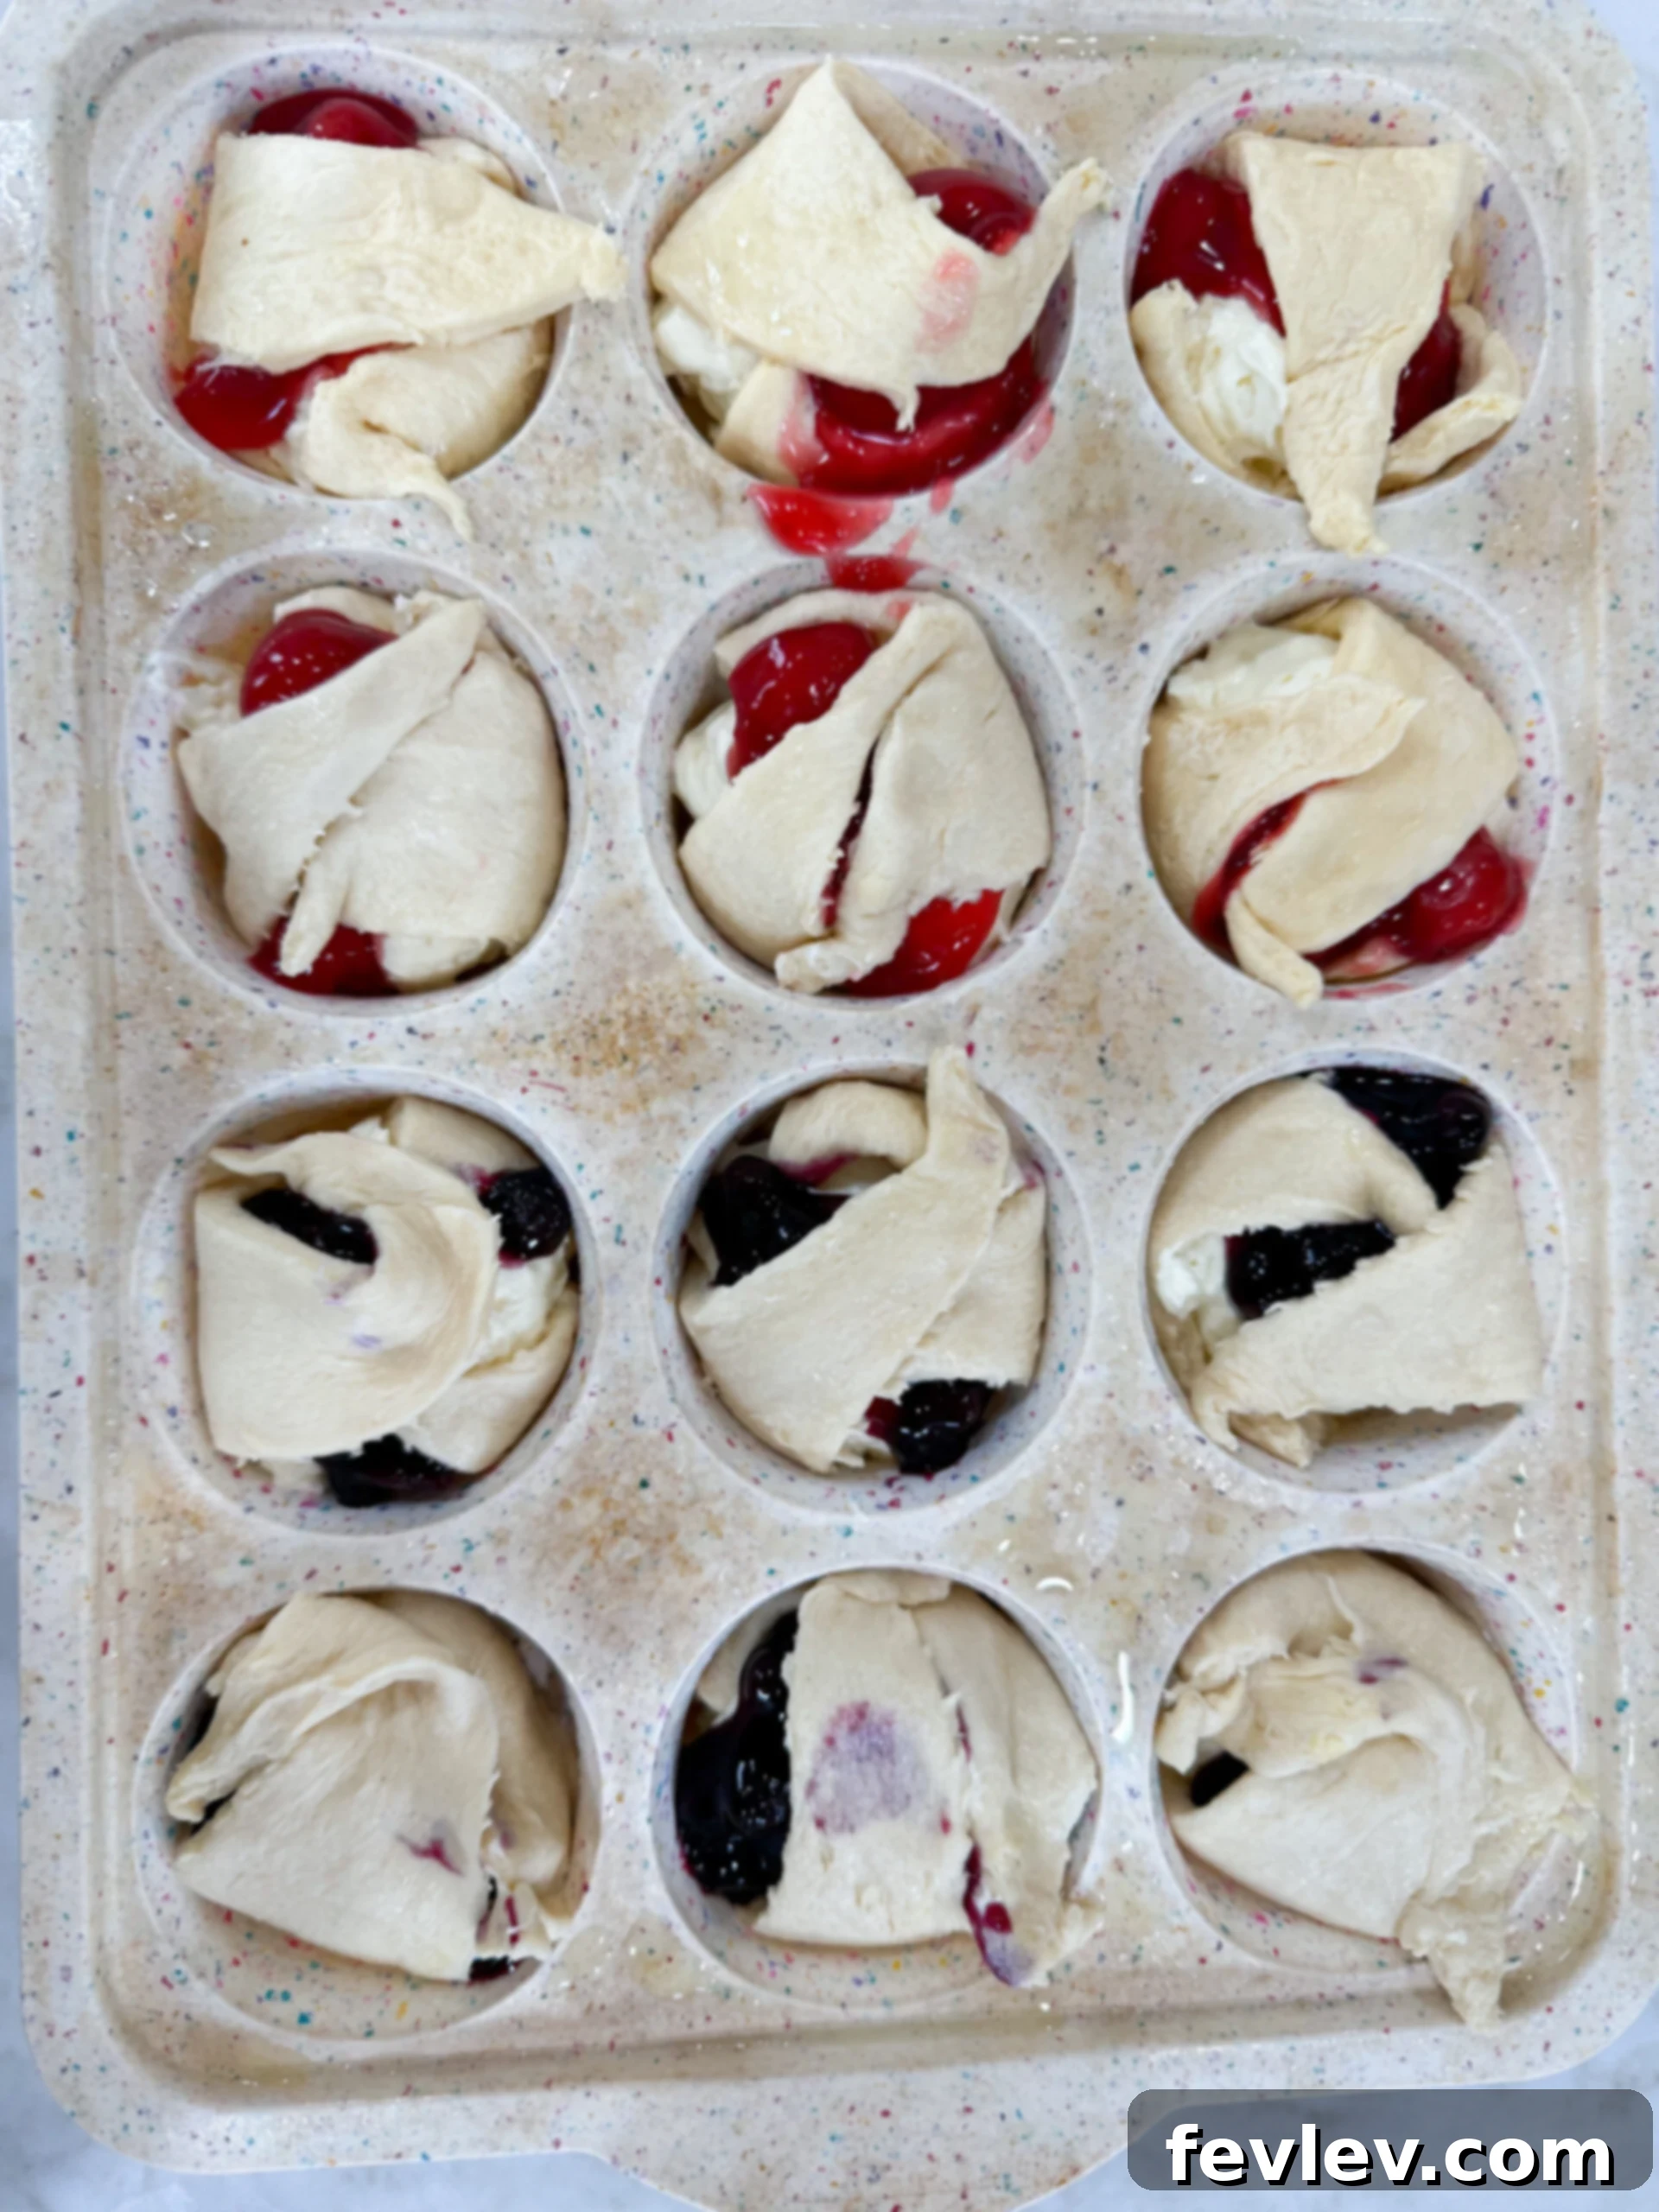
Step 5: Fold the Dough Edges. Gently fold the hanging edges of the crescent dough inward, carefully draping them over a portion of the filling. Don’t worry if they don’t fully cover the top; this creates an appealing open-faced pie look that allows the vibrant fruit topping to shine through. This step also helps to contain the delicious filling during baking and adds to the rustic, homemade charm of these mini pies.
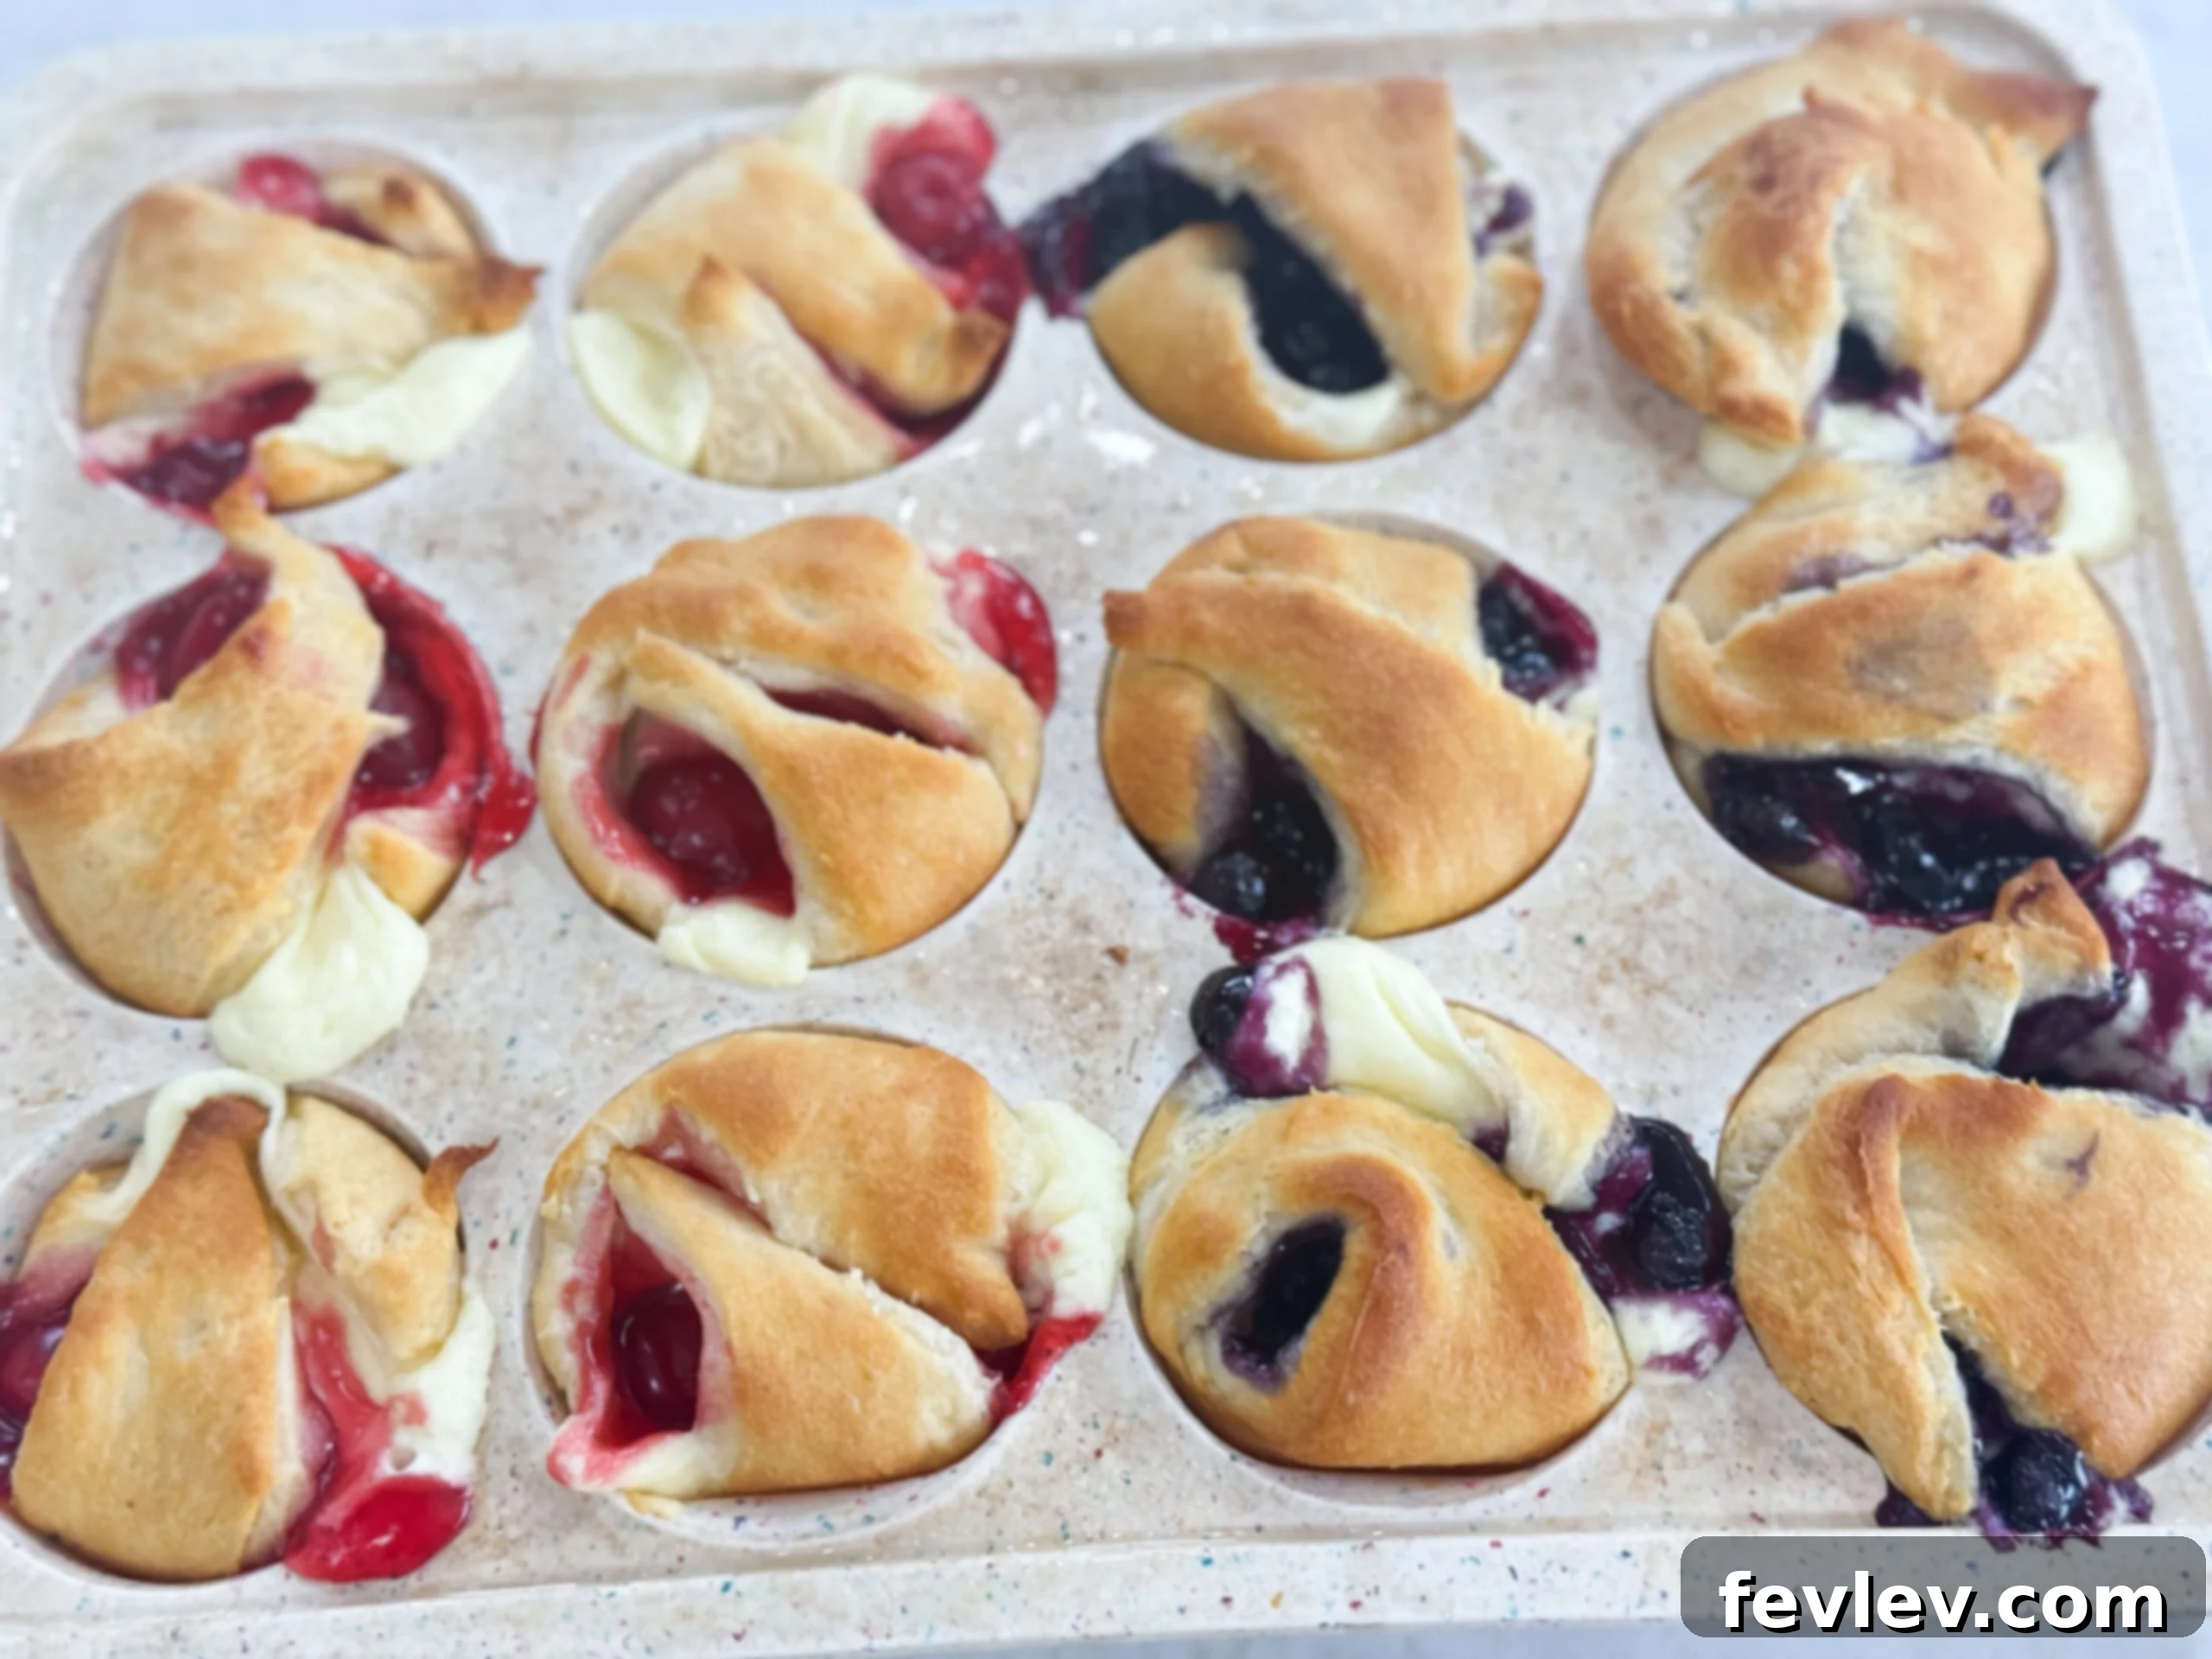
Step 6: Bake to Golden Perfection. Carefully place the muffin pan into your preheated oven and bake for 12 to 15 minutes, or until the crescent dough crusts are beautifully golden brown and the cheesecake filling appears set. Keep a close eye on them towards the end of the baking time, as oven temperatures can vary slightly.
Step 7: Cool and Serve. Once baked, carefully remove the pan from the oven. Let the mini pies cool slightly in the muffin pan for about 5-10 minutes. This crucial cooling period allows the crust to firm up and the filling to set completely before you attempt to remove them, preventing any breakage. After this initial cooling, transfer them to a wire rack to cool completely. Just before serving, lightly sprinkle them with powdered sugar for an elegant and sweet finish. Enjoy your homemade delights!
These step-by-step instructions are also conveniently available in the printable recipe card further below – a perfect resource to save or print for all your future baking adventures!
Mini Cheesecake Pie Variations & Creative Flavor Twists
One of the most exciting aspects of this mini cheesecake pie recipe is its incredible adaptability and potential for customization. While the classic fruit topping is always a winning choice, don’t be afraid to unleash your creativity and explore a variety of delicious flavor variations:
- Chocolate Lover’s Dream: For those who adore chocolate, simply add a spoonful of mini chocolate chips or a dollop of rich, creamy Nutella on top of the cheesecake layer instead of fruit filling. The warm, gooey chocolate will melt wonderfully into the creamy filling as it bakes.
- Zesty Lemon Curd Delight: For a bright, tangy, and refreshing contrast, swap out the fruit pie filling for a generous spoonful of store-bought or homemade lemon curd. The vibrant citrusy zing perfectly complements the sweet and creamy cheesecake.
- Decadent Caramel Indulgence: Drizzle a little caramel sauce over the cheesecake layer before adding fruit (or as a standalone topping) for a wonderfully rich and chewy texture. A tiny sprinkle of sea salt afterward can create a delightful salted caramel effect.
- Nutty Crunch Addition: Before baking, sprinkle a small amount of finely chopped nuts like pecans, walnuts, or almonds over your chosen fruit or chocolate topping. This adds a fantastic crunch and a rich, earthy flavor dimension.
- Embrace Seasonal Delights: Tailor your mini pies to the season! In the fall, try using pumpkin pie filling seasoned with a touch of cinnamon and nutmeg. In the summer, fresh berries or a vibrant homemade berry compote would be absolutely fantastic.
- Alternative Toppings: Beyond powdered sugar, consider finishing your pies with a simple glaze made from powdered sugar and a touch of milk, or an elegant swirl of melted white chocolate for a more sophisticated touch.
If you’re a fan of these easy and adaptable sweet treats, be sure to also check out my recipe for Apple Crescent Donuts!
Chef’s Insights
Expert Tips for Perfect Mini Cheesecake Pies Every Time
Achieve bakery-quality mini cheesecake pies every single time with these handy tips and tricks from my kitchen to yours. A little extra attention to detail can make all the difference!
- Grease the Muffin Cups Generously: This might seem like a small detail, but a well-greased muffin pan is absolutely crucial. It ensures your delicate crescent crusts don’t stick and can be easily removed without tearing or crumbling. Use butter, cooking spray, or even parchment paper muffin liners for extra peace of mind.
- Avoid Overfilling the Cups: Resist the urge to pack too much cheesecake and fruit filling into each muffin cup. Overfilled pies are prone to bubbling over during baking, which can create a messy pan and potentially less appealing aesthetics. A tablespoon or two of filling per pie is usually the ideal amount.
- Allow for Proper Cooling Time: Don’t rush the cooling process! It’s vital to let the mini pies cool in the muffin pan for at least 5-10 minutes after baking. This allows the delicate crescent crust to firm up and the creamy filling to set slightly, making them much easier to extract without breaking or falling apart.
- Embrace Variety for Stunning Presentation: If you’re serving these mini cheesecake pies for a party or special event, consider using a variety of fruit pie fillings (such as blueberry, cherry, apple, and strawberry) to create a visually appealing and colorful dessert tray. The contrasting colors will make your dessert spread even more inviting and impressive.
- Don’t Overwork the Dough: Crescent dough is wonderfully forgiving, but try not to overstretch or overhandle it. Gently press it into the muffin cups to maintain its intended flaky and tender texture.
- Chill the Filling (Optional but Recommended for Homemade): If you’re preparing your own homemade cheesecake filling, chilling it slightly (for about 15-30 minutes) before spooning it into the cups can make it thicker, easier to work with, and prevent it from becoming too runny during assembly.
Recipe FAQs – Your Questions Answered About Mini Cheesecake Pies
Can I make these mini cheesecake pies ahead of time?
Absolutely! These pies are perfect for make-ahead preparation. You can bake them up to 24 hours in advance. Once completely cooled, store them in a single layer in an airtight container in the refrigerator. They taste wonderful both chilled and at room temperature, making them ideal for parties.
Do I have to use store-bought cheesecake filling?
No, not at all! While store-bought filling offers fantastic convenience and consistent results, you can easily whip up a quick homemade version. Simply beat together 8 ounces of softened cream cheese with ½ cup of granulated sugar and 1 teaspoon of pure vanilla extract until the mixture is smooth and creamy. This will yield enough delicious filling for your 12 mini pies.
What fruit topping works best for these pies?
Blueberry and cherry pie fillings are classic choices that consistently turn out delicious and visually appealing. However, feel free to use any canned fruit pie filling you love! Apple, strawberry, peach, or even a mixed berry blend would be absolutely fantastic. Consider using seasonal fruits for an extra special, fresh touch.
Can I freeze these mini cheesecake pies?
Yes, these mini cheesecake pies freeze beautifully! Once baked and completely cooled, arrange them in a single layer on a baking sheet and freeze until they are solid (this usually takes about 1-2 hours). Once frozen, transfer them to an airtight freezer-safe container or bag. They can be stored in the freezer for up to 1 month. To thaw, simply remove the desired number of pies from the freezer and let them sit in the refrigerator overnight or at room temperature for a few hours before serving.
How do I ensure the crescent dough doesn’t get soggy?
The key to a non-soggy crust is to bake the pies until the dough is a beautiful golden brown and cooked through. The fillings are quite thick, so sogginess is rarely a major issue. Additionally, ensuring your oven is at the correct temperature and avoiding overfilling the cups will help maintain a crispier, more delightful crust.
Can I use puff pastry instead of crescent dough?
While crescent dough offers a unique buttery flavor and a slightly chewy, tender texture, puff pastry could indeed be an interesting alternative for a flakier, more delicate crust. If you choose to use puff pastry, you would need to cut it into squares and press it into the muffin tin similarly. Please note that baking times might vary slightly with puff pastry, so keep a close watch on your pies to achieve that perfect golden-brown finish.
If you’re constantly on the hunt for yummy, stress-free desserts that are perfect for any occasion, you simply must try my No-Bake Pineapple Layered Dessert – another guaranteed crowd-pleaser that requires zero oven time!
Creative Serving Suggestions for Your Mini Cheesecake Pies
These mini cheesecake pies are undeniably delightful on their own, but a few simple additions or creative pairings can elevate them even further, turning them into a truly memorable dessert experience:
- Elegant Dessert Platter Extravaganza: Arrange these charming pies beautifully on a large dessert platter alongside other mini treats like our popular Crescent Roll Cinnamon Rolls or small brownies for a truly irresistible and varied sweet spread.
- Fruity Combo Delight: Pair them with our Apple Crescent Donuts to offer a fantastic variety of fruit-based, bite-sized pastries. The combination of flavors and textures will be a delightful surprise for your guests.
- Chocolatey Elegance: For an extra touch of sophistication and indulgence, drizzle a thin stream of melted dark or white chocolate over the cooled pies just before serving. A few delicate chocolate shavings sprinkled on top can also add significant visual appeal.
- Fresh Garnish for Freshness: A sprig of fresh mint or a few fresh berries (ideally corresponding to your pie filling, e.g., fresh blueberries on a blueberry pie) can add a beautiful pop of color, an aromatic touch, and a hint of freshness.
- A Scoop of Ice Cream: For a slightly more decadent presentation, serve each mini pie with a small scoop of vanilla bean ice cream or a dollop of whipped cream on the side.
Make-Ahead, Storage & Reheating Guide for Convenience
Planning ahead for parties or simply want to enjoy these delightful treats throughout the week? Here’s how to properly store and handle your mini cheesecake pies to keep them fresh and delicious:
- Refrigeration: Once your mini cheesecake pies have completely cooled to room temperature, store them in a single layer in an airtight container. They will stay wonderfully fresh and delicious in the refrigerator for up to 3 days, making them perfect for preparing in advance.
- Freezing for Later: These pies are remarkably freezer-friendly! After baking and allowing them to cool completely, arrange them in a single layer on a baking sheet and freeze until they are solid (this typically takes about 1-2 hours). Once frozen firm, transfer the individual pies to an airtight freezer-safe bag or container. They can be safely stored in the freezer for up to 1 month.
- Thawing: To thaw your frozen mini cheesecake pies, simply remove the desired number from the freezer and let them sit in the refrigerator overnight, or at room temperature for a few hours.
- Reheating: Mini cheesecake pies are typically best served chilled directly from the fridge or at room temperature. Reheating is generally not necessary or recommended, as it can potentially alter the delicate texture of both the creamy cheesecake filling and the flaky crescent crust.
Hungry for even more mouthwatering creations? Dive into my extensive collection of Dessert Recipes for endless sweet inspiration and easy-to-follow guides!
More Incredible Crescent Roll Recipes to Try
The versatility of crescent roll dough is truly amazing! If you loved making these Mini Cheesecake Pies, explore these other fantastic recipes that utilize this pantry staple for both sweet and savory delights.
Breakfast
Crescent Roll Sausage Egg Casserole
Dessert
Apple Crescent Donuts
Dessert
Crescent Roll Cinnamon Rolls
Appetizers
Pizza Crescent Pockets
I absolutely love seeing your kitchen triumphs! If you whip up these incredible mini cheesecake pies, please share your creations and tag me @julia.pacheco.cooking on Instagram. Your culinary wins always bring a smile to my face!

Mini Cheesecake Pies Recipe
Julia Pacheco
5 minutes
15 minutes
20 minutes
12 Mini Pies
Add a Comment
Print Recipe
Ingredients
- 2 cans (8 oz each) crescent roll dough (triangle-style)
- 12 tbsp cheesecake filling (store-bought or homemade)
- 1 can (approx. 21 oz) fruit pie filling of your choice (e.g., blueberry, cherry, apple)
- 1 tbsp powdered sugar
Instructions
- Preheat oven to 350°F (175°C). Lightly grease a 12-cup muffin pan.
- Separate crescent dough into triangles. Press one triangle into each muffin cup, allowing ends to slightly hang over.
- Spoon 1-2 tbsp cheesecake filling into each dough-lined cup.
- Add ½ tbsp fruit pie filling on top of the cheesecake layer.
- Gently fold the crescent dough ends inward over a portion of the filling.
- Bake for 12-15 minutes, or until the crust is golden brown and the filling is set.
- Cool slightly in the pan for 5-10 minutes, then transfer to a wire rack to cool completely. Dust with powdered sugar before serving.
Recipe Video
Notes
- Feel free to use different fruit fillings for a delightful variety of flavors and colors.
- Always allow the mini pies to cool slightly in the muffin pan for 5-10 minutes before attempting to remove them to prevent breakage.
- These pies can be frozen for up to 1 month. For best results, thaw them in the refrigerator before serving.
- If making homemade cheesecake filling, combine 8oz softened cream cheese, ½ cup granulated sugar, and 1 tsp vanilla extract until smooth.
Nutrition Information (per mini pie, approximate)
Carbohydrates: 8g |
Protein: 1g |
Fat: 3g |
Saturated Fat: 1g |
Polyunsaturated Fat: 0.4g |
Monounsaturated Fat: 1g |
Cholesterol: 4mg |
Sodium: 93mg |
Potassium: 31mg |
Fiber: 0.3g |
Sugar: 1g |
Vitamin A: 1IU |
Vitamin C: 0.1mg |
Calcium: 3mg |
Iron: 1mg
Nutrition information is automatically calculated and is provided for informational purposes only. It should be used as an approximation, as values can vary based on specific ingredients and preparation methods.
Tried this recipe?
Let us know how it was! We love hearing from you!