
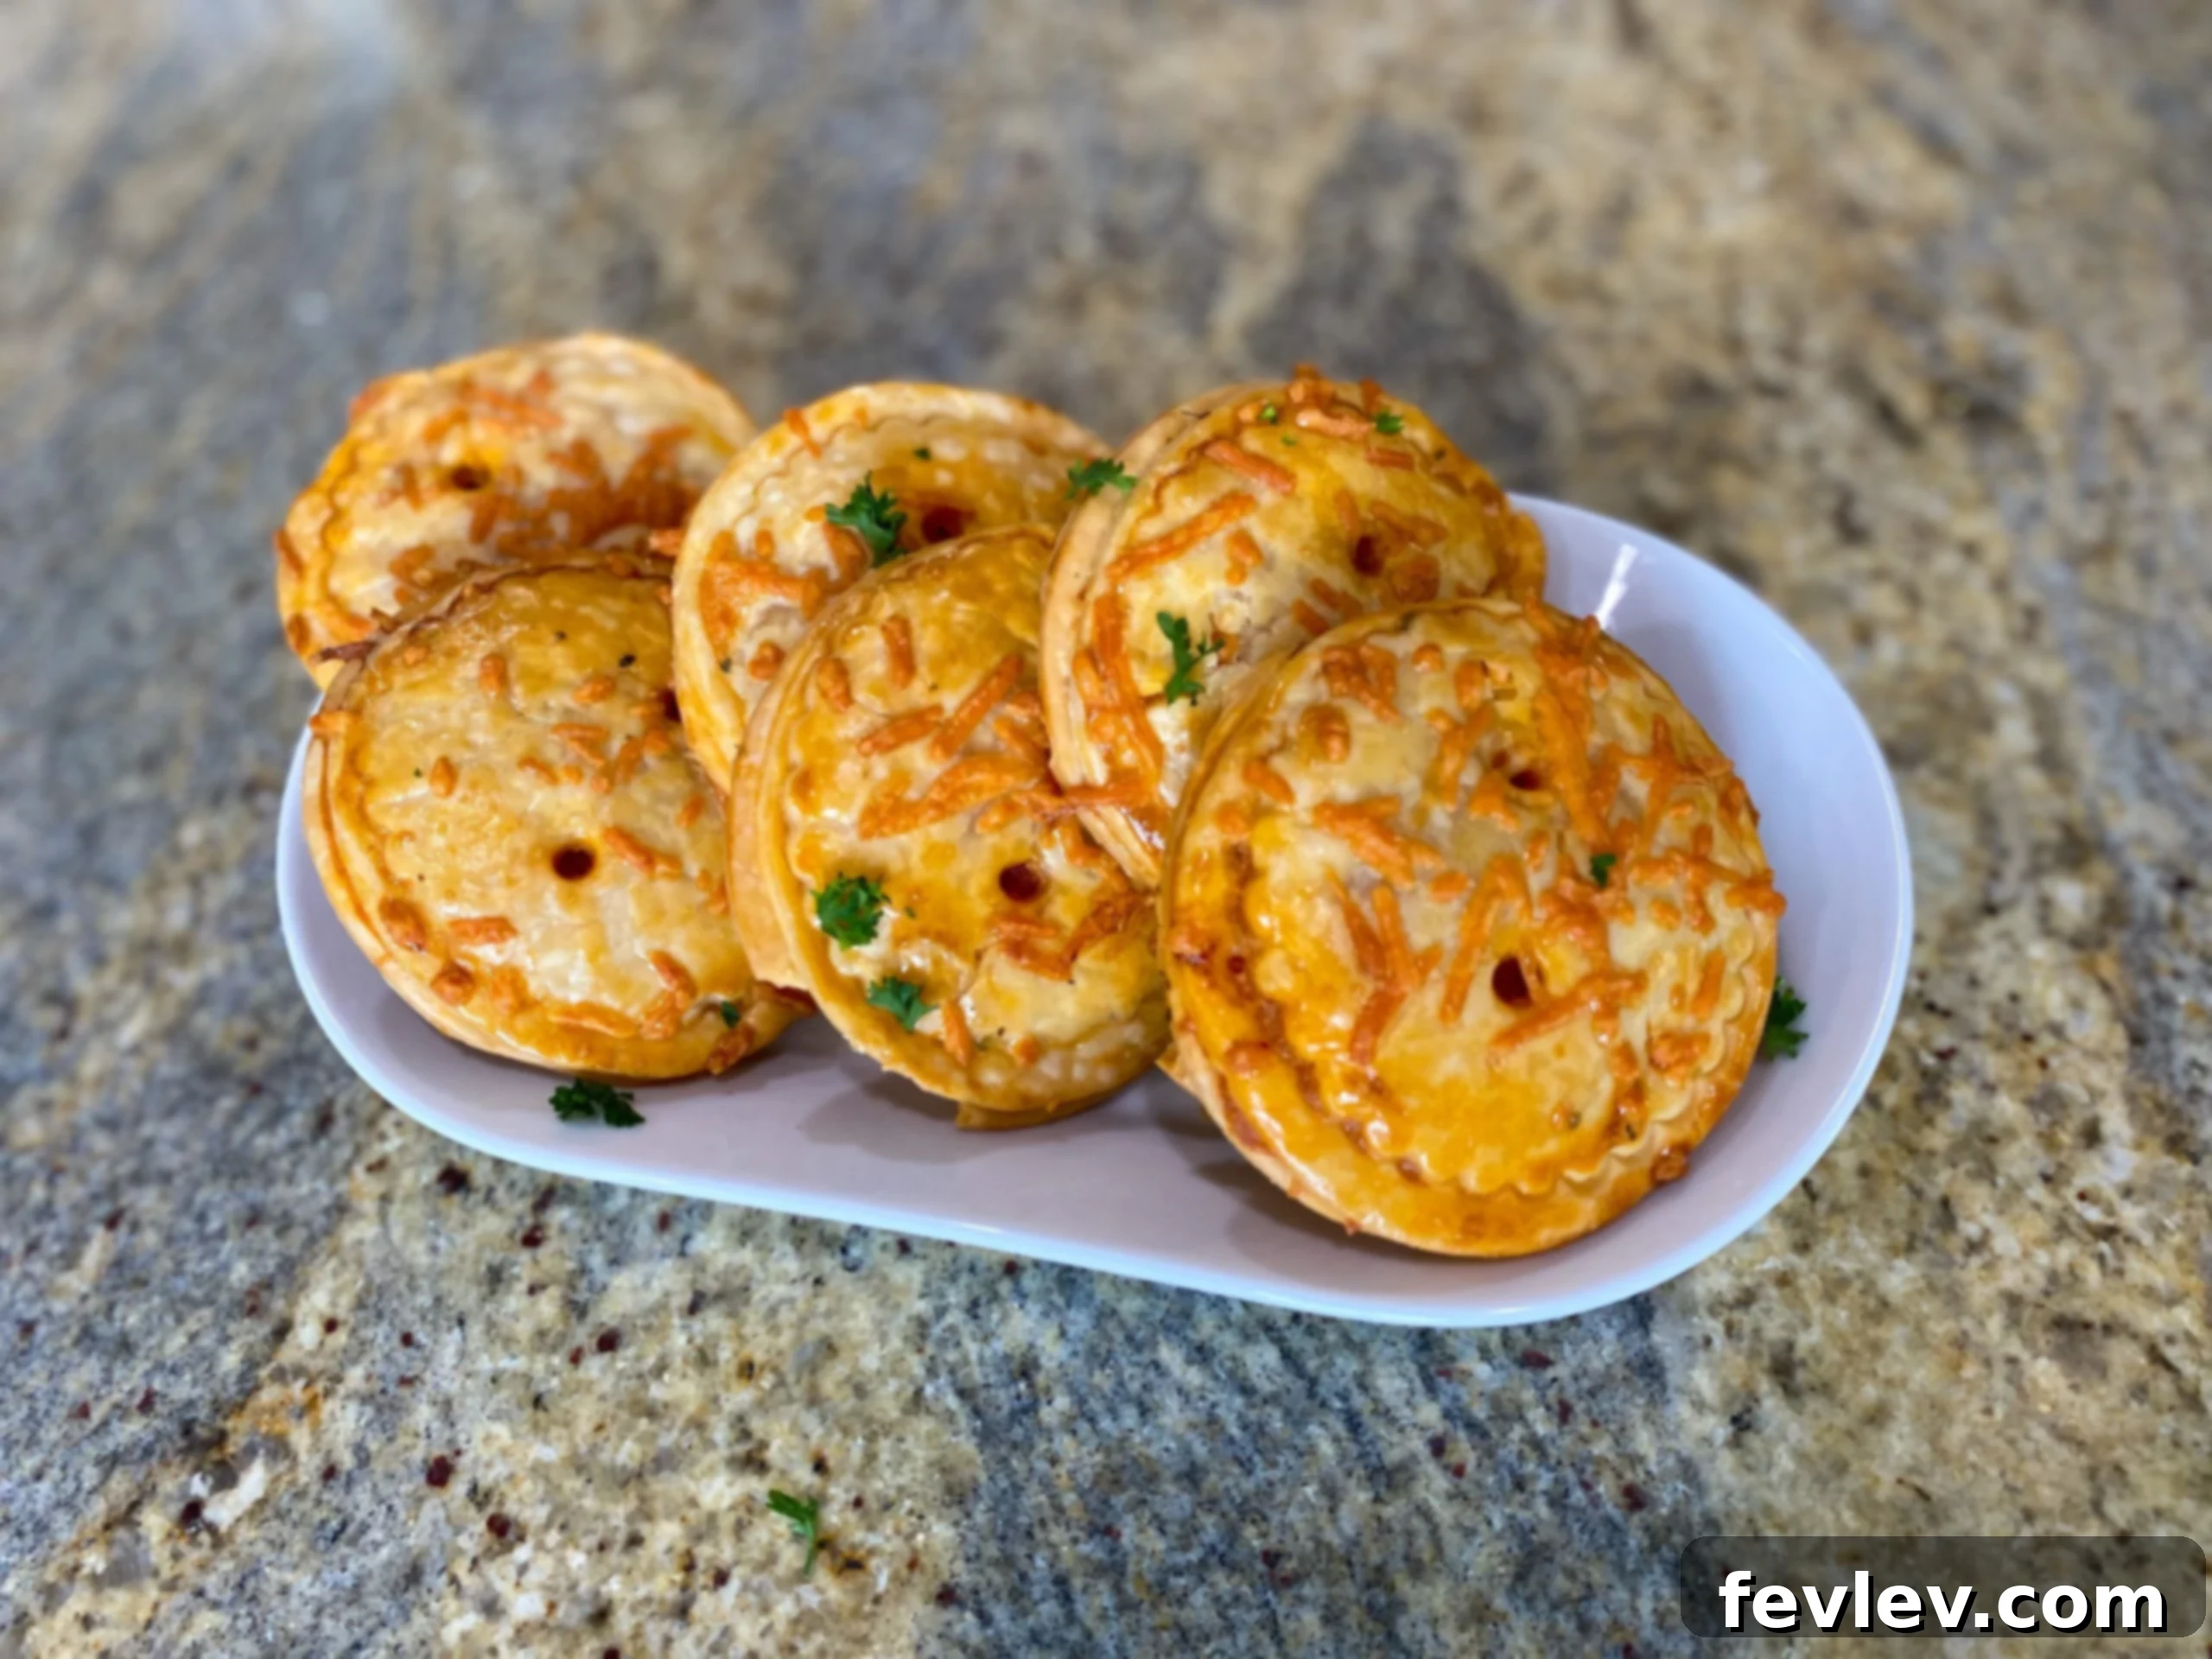

Easy & Delicious Mini Pizzas Using Pillsbury Pie Crust
Julia Pacheco
Unlock the secret to quick and delightful snacks or appetizers with these Mini Pizzas, ingeniously crafted using flaky Pillsbury pie crust. Forget the fuss of traditional pizza dough; this recipe offers an incredibly easy, customizable, and fun approach to creating individual pizza bites that are perfect for parties, kids’ meals, or a satisfying treat. With a golden, buttery base and your favorite toppings, these mini pizzas are guaranteed to be a hit with everyone!
Whether you’re looking for a speedy appetizer, a creative and simple dinner solution, or a resourceful way to utilize leftover pie crusts, this recipe for Mini Pizzas is a true game-changer. The unique texture of the pie crust provides a wonderfully crisp and airy foundation, a delightful contrast to the savory fillings. Unlike traditional pizza crusts that can be heavy, the pie crust offers a lighter, more delicate bite. This recipe is not only incredibly versatile but also quick to prepare, allowing you to transform a simple pantry staple into a crowd-pleasing culinary creation in under an hour. Dive into the world of effortless entertaining and delicious homemade treats with this fantastic recipe!
15
25
40
4 servings
Comment
Print Recipe
Ingredients You’ll Need
- 14 oz package of Pillsbury pie crusts, typically containing 2 rolled-out crusts. These provide the perfect shortcut to a wonderfully flaky base without the effort of making dough from scratch.
- 1 cup marinara sauce. Select your favorite high-quality brand for a rich, flavorful foundation, or use homemade if preferred.
- 20 – 30 pepperoni slices. The classic pizza topping adds a delightful savory and slightly spicy kick. Feel free to substitute with other preferred protein toppings like cooked sausage crumbles or finely diced ham for variety.
- ¾ cups mozzarella, shredded. Low-moisture, part-skim mozzarella is ideal for melting perfectly without making the crust soggy. A blend of mozzarella and provolone also works beautifully for extra depth of flavor.
- 1 large egg, whisked. This essential egg wash creates that beautiful, appetizing golden-brown, shiny crust that makes these mini pizzas irresistible.
Note on Ingredients: The inherent beauty of mini pizzas lies in their incredible versatility. While pepperoni and mozzarella represent the quintessential classic pizza combination, do not hesitate to embrace your inner chef and get creative with your toppings. Consider incorporating finely diced bell peppers, thinly sliced mushrooms, savory black olives, sweet caramelized onions, or even a generous sprinkle of freshly grated Parmesan cheese for an elevated and gourmet taste experience. For a delicious and wholesome vegetarian option, simply omit the pepperoni altogether and generously load up your mini pizzas with an assortment of your favorite vegetables!
Step-by-Step Instructions
-
Step 1: Prepare Your Workspace and Oven. To begin, preheat your oven to a precise 400℉ (200°C). This crucial step ensures that your mini pizzas cook thoroughly and evenly, achieving that coveted perfect golden, crispy crust. While the oven steadily heats to the desired temperature, take a moment to line a large baking sheet with a sheet of parchment paper. This simple yet effective preparation prevents any sticking and significantly simplifies the cleanup process later on, saving you time and effort.
-
Step 2: Create the Pie Crust Rounds. Carefully unroll your Pillsbury pie crusts onto a clean, lightly floured work surface. Utilizing the rim of a medium-sized cup (approximately 3 to 4 inches in diameter) or a dedicated round cookie cutter, cut out approximately 12 to 14 uniform circular shapes from the pie crusts. As you work, gently gather any leftover dough scraps, press them together to form a cohesive mass, and then re-roll them thinly to cut out additional circles if the dough allows, effectively minimizing waste.
-
Step 3: Assemble the Pizza Bases. Strategically place half of the freshly cut pie crust circles onto your prepared baking sheet. On each of these circular bases, spread about 1 to 1.5 teaspoons of your chosen marinara sauce. Begin from the center and gently work your way outwards, being sure to leave approximately a 1/4-inch border around the entire edge of the crust. This deliberate border is essential for effectively sealing the pizzas later and preventing the sauce from overflowing during the baking process. Next, meticulously arrange 2 to 3 pepperoni slices over the sauced area, followed by a generous sprinkle of 1 to 1.5 tablespoons of shredded mozzarella cheese. For an extra layer of robust flavor and moisture, add another tiny dollop of about 1 teaspoon of marinara sauce directly on top of the cheese.
-
Step 4: Seal and Prepare for Baking. With the remaining half of your pie crust circles, use a small, sharp knife or the tines of a fork to carefully slice or poke a few small holes in the center of each round. These strategically placed vents are crucial as they will allow steam to escape during baking, thereby preventing the crust from puffing up excessively or even bursting. Next, lightly brush the exposed edges of the assembled pizza bases (the ones already topped with ingredients) with the whisked egg. Delicately place the vented pie crust rounds over the topped bases, meticulously aligning the edges. Use your fingers, the tines of a fork, or even a slightly smaller cup to press and crimp the edges together firmly, creating a secure and aesthetically pleasing seal. Finally, brush the tops of all the sealed mini pizzas generously with the remaining whisked egg to achieve that beautiful, irresistible golden-brown finish upon baking.
-
Step 5: Bake to Golden Perfection. Carefully arrange the now assembled mini pizzas evenly on the parchment-lined baking sheet, ensuring that they are not touching each other to allow for even cooking. Bake them in your preheated oven for approximately 20 to 23 minutes, or until the crusts have turned a beautifully rich golden brown and the cheese inside is thoroughly melted and delightfully bubbly. Keep in mind that cooking times may exhibit slight variations depending on the specific calibration and quirks of your individual oven, so it’s always wise to keep a watchful eye on them as they approach the end of the baking cycle.
-
Step 6: Serve and Enjoy! Once perfectly baked, carefully remove the mini pizzas from the oven. Allow them to cool for a brief minute or two before serving them hot and fresh. For an enhanced culinary experience, present them alongside the remaining marinara sauce, offering an optional and flavorful extra dipping accompaniment. These delightful mini pizzas are unequivocally best enjoyed immediately after baking, when their crusts are at their crispiest and the fillings are wonderfully warm and gooey!
Tips for Perfect Mini Pizzas Every Time
Achieving outstanding mini pizzas with Pillsbury pie crust is remarkably simple when you follow a few expert tips and tricks. These pointers will help ensure your pizzas are not only delicious but also visually appealing and perfectly cooked:
- Don’t Overfill: While the temptation to load up on your favorite toppings is strong, resist the urge! Overfilling can make the mini pizzas exceedingly difficult to properly seal, leading to messy leaks during baking and potentially a soggy crust. A thin, even layer of sauce and moderate amounts of cheese and toppings will yield the best results – remember, less is often more when it comes to delicate pastries.
- Seal Tightly: Take your time and be meticulous when properly crimping the edges of your mini pizzas. A robust and secure seal is paramount as it effectively prevents the savory filling from leaking out during the baking process and ensures a neat, self-contained pizza pocket. You can use a fork for a decorative crimped edge.
- Ventilation is Key: Under no circumstances should you skip the crucial step of poking holes in the top crust. This vital ventilation allows steam to escape efficiently during baking, which is critical for preventing the crust from puffing up excessively or, worse, bursting open in the oven. It ensures an even bake and a pleasant texture.
- Ensure Even Browning: For perfectly golden, uniformly browned crusts, it is essential to ensure your oven is fully preheated to the specified temperature before placing the pizzas inside. Additionally, if you know your oven tends to have hot spots, consider rotating the baking sheet halfway through the cooking time to promote even browning across all mini pizzas.
- Amplify Flavor: For an extra layer of deliciousness, consider incorporating a sprinkle of garlic powder, onion powder, or a dash of Italian seasoning into your marinara sauce before spreading it. Alternatively, you can lightly brush the top crust with a sprinkle of dried herbs along with the egg wash for a fragrant and aromatic boost to the overall flavor profile.
- Cool Slightly Before Serving: While it’s tempting to dive right in, allowing the mini pizzas to cool for just a minute or two after coming out of the oven will help the cheese set slightly, preventing molten cheese spills and making them easier and safer to handle and enjoy.
Creative Variations and Exciting Topping Ideas
These mini pizzas are incredibly versatile, making them a fantastic canvas for culinary creativity and personalizing flavors. Don’t limit yourself to the classic pepperoni; here are some inspiring ideas to experiment with and personalize your next batch:
- Vegetarian Delight: For a fresh and vibrant twist, replace the pepperoni with an array of finely diced bell peppers (red, yellow, or green for color!), thinly sliced mushrooms, savory black olives, sweet chopped onions, or tender spinach leaves. For firmer vegetables like onions and mushrooms, a quick sauté beforehand can help them release excess moisture and ensure they cook through beautifully in the short baking time.
- Meat Lover’s Dream: Beyond the traditional pepperoni, the possibilities for meat lovers are endless! Try cooked and crumbled Italian sausage for a spicy kick, crispy bacon bits for a smoky crunch, or tiny pieces of cooked, shredded chicken for a lighter protein option. Always ensure any meat toppings are fully cooked and drained of excess fat before adding them to your pizzas.
- Gourmet Cheese Blends: Experimenting with different cheeses can introduce exciting and complex flavor profiles. A delightful mix of mozzarella, provolone, sharp cheddar, or even a hint of creamy goat cheese or smoked gouda can elevate your mini pizzas from simple to sophisticated.
- Adventurous Sauce Swaps: While marinara is a beloved classic, consider venturing out with alternative sauces. Pesto offers a vibrant, garlicky, and herby flavor, perfect for a Mediterranean-inspired mini pizza. A creamy white garlic sauce can create a gourmet touch, while barbecue sauce paired with cooked chicken would create irresistible BBQ chicken mini pizzas.
- Sweet & Savory Combinations: For a truly unique and surprising twist, try adding caramelized onions and a sprinkle of tangy goat cheese. The sweetness of the onions beautifully contrasts with the creaminess of the goat cheese, creating a sophisticated flavor pairing.
- Breakfast Pizzas: Transform these into a delightful breakfast or brunch option by filling them with fluffy scrambled egg, cooked breakfast sausage crumbles, and a generous sprinkle of sharp cheddar cheese. These are perfect for a weekend brunch spread or a hearty start to the day.
- Spicy Kick: If you enjoy a bit of heat, add a pinch of red pepper flakes to your marinara sauce, or top with sliced jalapeños before baking.
Serving Suggestions for Every Occasion
Mini pizzas made with Pillsbury pie crust are incredibly versatile and can be served in a multitude of ways, suiting various occasions and preferences:
- Appetizer Perfection: Their individual, bite-sized nature makes them absolutely ideal as finger foods for almost any event. Think lively parties, cozy game nights, casual family gatherings, or even sophisticated cocktail hours. They are easy for guests to grab and enjoy without the need for utensils.
- Kid-Friendly Meal & Activity: These mini pizzas are a guaranteed hit with children! For a fun, interactive, and engaging mealtime activity, prepare all the ingredients (crust rounds, sauce, cheese, and various pre-cut toppings) and let the kids customize and assemble their very own mini pizzas before baking. It’s a fantastic way to encourage healthy eating habits and spark culinary creativity.
- Quick Lunch or Dinner Solution: For a light yet satisfying meal, pair these delicious mini pizzas with a crisp, fresh green salad tossed with a zesty vinaigrette, or serve them alongside a comforting bowl of your favorite soup. This makes for a wholesome and quick lunch or an easy weeknight dinner.
- Convenient On-the-Go Snack: These mini pizzas are wonderfully portable, making them a superb option for lunchboxes. Pack them for a delightful and more exciting school lunch, a satisfying work snack, or a quick bite during a busy day. They hold up remarkably well and taste great even at room temperature.
- Enhanced Dipping Sauces: While the leftover marinara sauce is a fantastic dipping companion, don’t stop there! Consider serving a variety of dipping sauces to elevate the experience. Creamy ranch dressing, a zesty garlic aioli, a spicy sriracha mayo, or even a sweet and tangy balsamic glaze can offer exciting new flavor dimensions for dipping.
Frequently Asked Questions (FAQs)
- Can I make these mini pizzas ahead of time?
- Yes, you absolutely can! You have a couple of options for making these ahead. You can assemble the mini pizzas completely, but do not bake them. Instead, refrigerate them, covered loosely with plastic wrap, for up to 24 hours. When ready to serve, simply bake as directed. Alternatively, you can bake them ahead of time and reheat them in a preheated oven or an air fryer for the best texture when serving.
- How do I store leftovers?
- Any leftover mini pizzas should be stored in an airtight container in the refrigerator. They will remain fresh and delicious for up to 3-4 days. To reheat, place them on a baking sheet in a preheated oven at 350°F (175°C) for about 10 minutes, or warm them in an air fryer, until they are thoroughly warmed through and the crust has regained its crispiness.
- Can I freeze these mini pizzas?
- Absolutely! Freezing these mini pizzas is an excellent option for meal prep. After you have assembled the mini pizzas but before they are baked, arrange them in a single layer on a baking sheet and place them in the freezer until they are completely solid. Once frozen, transfer the solid mini pizzas to a freezer-safe bag or an airtight container. They can be stored in the freezer for up to 1-2 months. When you’re ready to enjoy them, there’s no need to thaw! Simply place them frozen on a parchment-lined baking sheet and bake at 400°F (200°C) for a slightly extended period, typically 25-30 minutes, or until they are golden brown, hot, and bubbling.
- What if I don’t have a round cookie cutter?
- No problem at all! You don’t necessarily need a specialized tool. The top rim of a drinking glass, a coffee mug, or even a wide-mouth mason jar of an appropriate size works perfectly for cutting the circular shapes from the pie crust. As an alternative, for a different aesthetic, you can also use a knife or pizza cutter to cut the pie crust into squares or triangles.
- Can I use homemade pie crust?
- While this recipe specifically highlights the convenience and ease of using Pillsbury refrigerated pie crust, a homemade pie crust will also work beautifully and can add a delightful, personalized touch. Just ensure that your homemade crust is rolled thinly enough to be easily cut and sealed, replicating the characteristics of the store-bought variety for optimal results.
Watch the Video Tutorial
For a visual guide and additional tips, watch the full video tutorial on how to make these delightful mini pizzas and other creative uses for refrigerated pie crusts. Seeing the steps in action can often clarify any uncertainties and boost your confidence in the kitchen!
Estimated Nutrition Facts (Per Serving)
Calories: 597kcal |
Carbohydrates: 52g |
Protein: 15g |
Fat: 36g |
Saturated Fat: 13g |
Polyunsaturated Fat: 4g |
Monounsaturated Fat: 16g |
Trans Fat: 0.2g |
Cholesterol: 67mg |
Sodium: 1001mg |
Potassium: 337mg |
Fiber: 3g |
Sugar: 2g |
Vitamin A: 468IU |
Vitamin C: 4mg |
Calcium: 142mg |
Iron: 4mg
Please note: Nutrition information provided is automatically calculated and should only be used as an approximation. Actual values may vary significantly based on specific brands of ingredients used, variations in preparation methods, and portion sizes. For precise nutritional data, independent laboratory analysis would be required.
Tried this amazing recipe?
Let us know how it was! Your valuable feedback helps us refine our recipes, inspires other home cooks, and fuels our passion for creating delicious content. Share your successes, your creative twists, or any helpful tips you discovered in the comments section below!
Share Your Thoughts!
We absolutely love hearing from you and seeing your culinary creations! Have you tried making these Easy & Delicious Mini Pizzas Using Pillsbury Pie Crust? We’d be thrilled to know how they turned out for you. Please share your experience, any specific toppings you experimented with, or any unique tips and tricks you discovered along the way in the comments section below. Your insights and enthusiasm are what make our cooking community vibrant and inspiring!