
★
★
★
★
★
No ratings yet
Irresistible Teriyaki Chicken Skewers: Your Guide to a Flavorful Meal
By: Julia Pacheco
Embark on a culinary journey to Japan with these truly irresistible Teriyaki Chicken Skewers. This recipe elevates a simple chicken dish into a vibrant, succulent masterpiece, perfect for any weeknight dinner or weekend gathering. Featuring tender, juicy chunks of chicken, meticulously marinated in a rich, sweet, and savory homemade teriyaki sauce, then grilled to smoky perfection or baked until beautifully glazed. It’s a remarkably simple yet spectacularly flavorful dish that promises to become a family favorite. Serve these delightful skewers alongside fluffy rice and crisp, fresh vegetables for a complete, satisfying, and utterly delicious meal.
Cook Time: 23 mins
Total Time: 33 mins
Servings: 4 servings
Comment
Print Recipe
Love This Recipe? Save It For Later!
Don’t miss out on another delicious meal! Enter your email below to receive this Teriyaki Chicken Skewers recipe directly in your inbox. Plus, get new, exciting recipes from our kitchen delivered weekly, ensuring you always have fresh inspiration for your dinner table.
Essential Ingredients for Homemade Teriyaki Chicken Skewers
Crafting these delectable Teriyaki Chicken Skewers begins with a selection of fresh, high-quality ingredients, forming the backbone of both the succulent chicken and the star of the show – our rich, homemade teriyaki sauce. The beauty of this recipe lies in its simplicity and the readily available components. Here’s a detailed look at what you’ll need to create this culinary delight:
Main Protein:
- 2 lbs boneless, skinless chicken thighs OR chicken breast: While both options work wonderfully, boneless, skinless chicken thighs are often recommended for their superior tenderness and ability to retain moisture, even when subjected to higher grilling or baking temperatures. This ensures your skewers remain juicy and flavorful. If you prefer a leaner cut, chicken breast is an excellent alternative. Whichever you choose, ensure it’s cut into uniform 1-inch cubes. This consistency is crucial for even cooking, preventing some pieces from drying out while others are still undercooked.
For the Flavorful Homemade Teriyaki Sauce:
The secret to truly outstanding teriyaki chicken lies in a well-balanced, homemade sauce. It’s surprisingly easy to whip up and far surpasses the flavor profile of most store-bought varieties, offering a vibrant blend of sweet, salty, and umami notes.
- 1 cup water: This forms the liquid base of our sauce, helping to dissolve the other ingredients and achieve the right consistency.
- 2 tablespoons cornstarch: The essential thickening agent! Cornstarch is what gives teriyaki sauce its signature glossy, thick, and clingy texture, allowing it to beautifully coat each piece of chicken and create that desirable glaze.
- ⅓ cup brown sugar: Provides the fundamental sweetness characteristic of teriyaki. Brown sugar also adds a subtle caramel note and depth, contributing to the rich color of the sauce. Feel free to slightly adjust this amount to match your personal preference for sweetness.
- ⅓ cup low sodium soy sauce: We specifically recommend low sodium soy sauce to give you better control over the saltiness of the dish. This allows the intricate flavors of the ginger, garlic, and honey to shine through without being overwhelmed by excessive salt. If you only have regular soy sauce, consider using a slightly lesser amount.
- 1 tablespoon minced garlic: Freshly minced garlic is indispensable. It infuses the sauce with a pungent, aromatic foundation, adding a crucial layer of savory flavor that complements the chicken perfectly.
- 1 tablespoon minced ginger: The vibrant, zesty, and slightly spicy kick of fresh ginger is a hallmark of authentic Asian cuisine. It brightens the entire sauce and provides a wonderful aromatic contrast to the sweetness.
- 1 tablespoon honey: More than just adding sweetness, honey contributes to the beautiful, sticky glaze and rich golden-brown color of the cooked chicken. It also provides a unique floral note that rounds out the sauce’s flavor.
- 1 tablespoon rice vinegar: A splash of rice vinegar is key to balancing the richness and sweetness of the sauce. Its mild acidity brightens the overall flavor profile, preventing the sauce from becoming cloyingly sweet and adding a subtle tang.
Pro Tip: Using fresh garlic and ginger, as opposed to powdered or jarred versions, makes a remarkable difference in the vibrancy and depth of the homemade teriyaki sauce. Don’t underestimate their impact!
Step-by-Step Guide: Crafting Your Perfect Teriyaki Chicken Skewers
Creating these incredibly flavorful Teriyaki Chicken Skewers is a straightforward process, whether you opt for oven-baking or grilling. Follow these detailed instructions to ensure juicy, perfectly glazed chicken every time.
Part 1: Preparing the Exquisite Homemade Teriyaki Sauce
- Prepare the Cornstarch Slurry: In a medium-sized bowl, combine the 1 cup of water with 2 tablespoons of cornstarch. Whisk vigorously until the cornstarch is completely dissolved and no lumps remain. This slurry is essential for thickening the sauce to its desired consistency.
- Combine Sauce Ingredients: Transfer this cornstarch slurry into a medium saucepan. Add the remaining teriyaki sauce ingredients: brown sugar, low sodium soy sauce, minced garlic, minced ginger, honey, and rice vinegar. Stir well to combine everything.
- Thicken the Sauce to Perfection: Place the saucepan over medium heat on your stovetop. Bring the mixture to a gentle simmer, whisking frequently and continuously. As the sauce heats, the cornstarch will activate, and the mixture will gradually thicken into a beautiful, glossy, and cohesive sauce. This process typically takes about 5-7 minutes. Once the sauce has reached a thick, coating consistency, remove it from the heat. Allow the sauce to cool down completely. This cooling step is vital because adding warm marinade to raw chicken can begin to cook it prematurely, affecting the final texture.
Part 2: Marinating and Assembling the Chicken Skewers
- Prepare the Chicken: Take your boneless, skinless chicken (thighs or breast) and carefully cut it into uniform 1-inch cubes. Uniformity is key here for consistent cooking.
- Reserve Half the Sauce: Once your homemade teriyaki sauce is completely cool, pour approximately half of it into a separate airtight container. Store this reserved portion in the refrigerator. This will be your basting sauce later, adding a fresh layer of glaze and flavor during the final cooking stage.
- Marinate the Chicken: Place the cubed chicken into a large, gallon-sized resealable plastic bag. Pour the remaining half of the teriyaki sauce over the chicken in the bag. Seal the bag, ensuring as much air as possible is squeezed out, and gently massage the bag to ensure every piece of chicken is thoroughly coated in the delicious marinade. Refrigerate the chicken for at least 30 minutes. For an even more profound flavor penetration and tender chicken, we recommend marinating for 2-4 hours, or even overnight (up to 12 hours) in the refrigerator.
- Prepare for Cooking & Skewer the Chicken: When your marinating time is complete and you’re ready to cook, preheat your oven to 425°F (220°C). If you are using wooden skewers, remember to soak them in water for at least 30 minutes prior to threading to prevent them from burning during cooking. Carefully thread the marinated chicken cubes onto your skewers, leaving a small, even space between each piece. This small gap allows for better air circulation and more even cooking and browning.
Part 3: Cooking and Finishing the Skewers
- Oven Baking Method: Arrange the chicken skewers on a baking sheet. For easier cleanup, line your baking sheet with parchment paper or aluminum foil. Place the baking sheet in the preheated oven and bake for 18 minutes.
- Grilling Method (Alternative): If you prefer to grill, preheat your grill to medium-high heat. Lightly brush the grill grates with a high-smoke-point oil to prevent sticking. Place the skewers on the hot grill and cook for approximately 3-4 minutes per side, turning occasionally, until the chicken is cooked through and displays beautiful char marks. Always adjust cooking time based on your specific grill’s heat and your desired level of doneness.
- Baste and Finish Baking (Oven Method): After the initial 18 minutes of baking, carefully remove the skewers from the oven. Using a pastry brush, generously baste each chicken skewer with the reserved teriyaki sauce that you stored in the fridge. Return the skewers to the oven and bake for an additional 5-7 minutes. Continue cooking until the chicken is thoroughly cooked through and reaches an internal temperature of 165°F (74°C). This final basting step is crucial for building incredible flavor and achieving that perfectly sticky, shiny glaze.
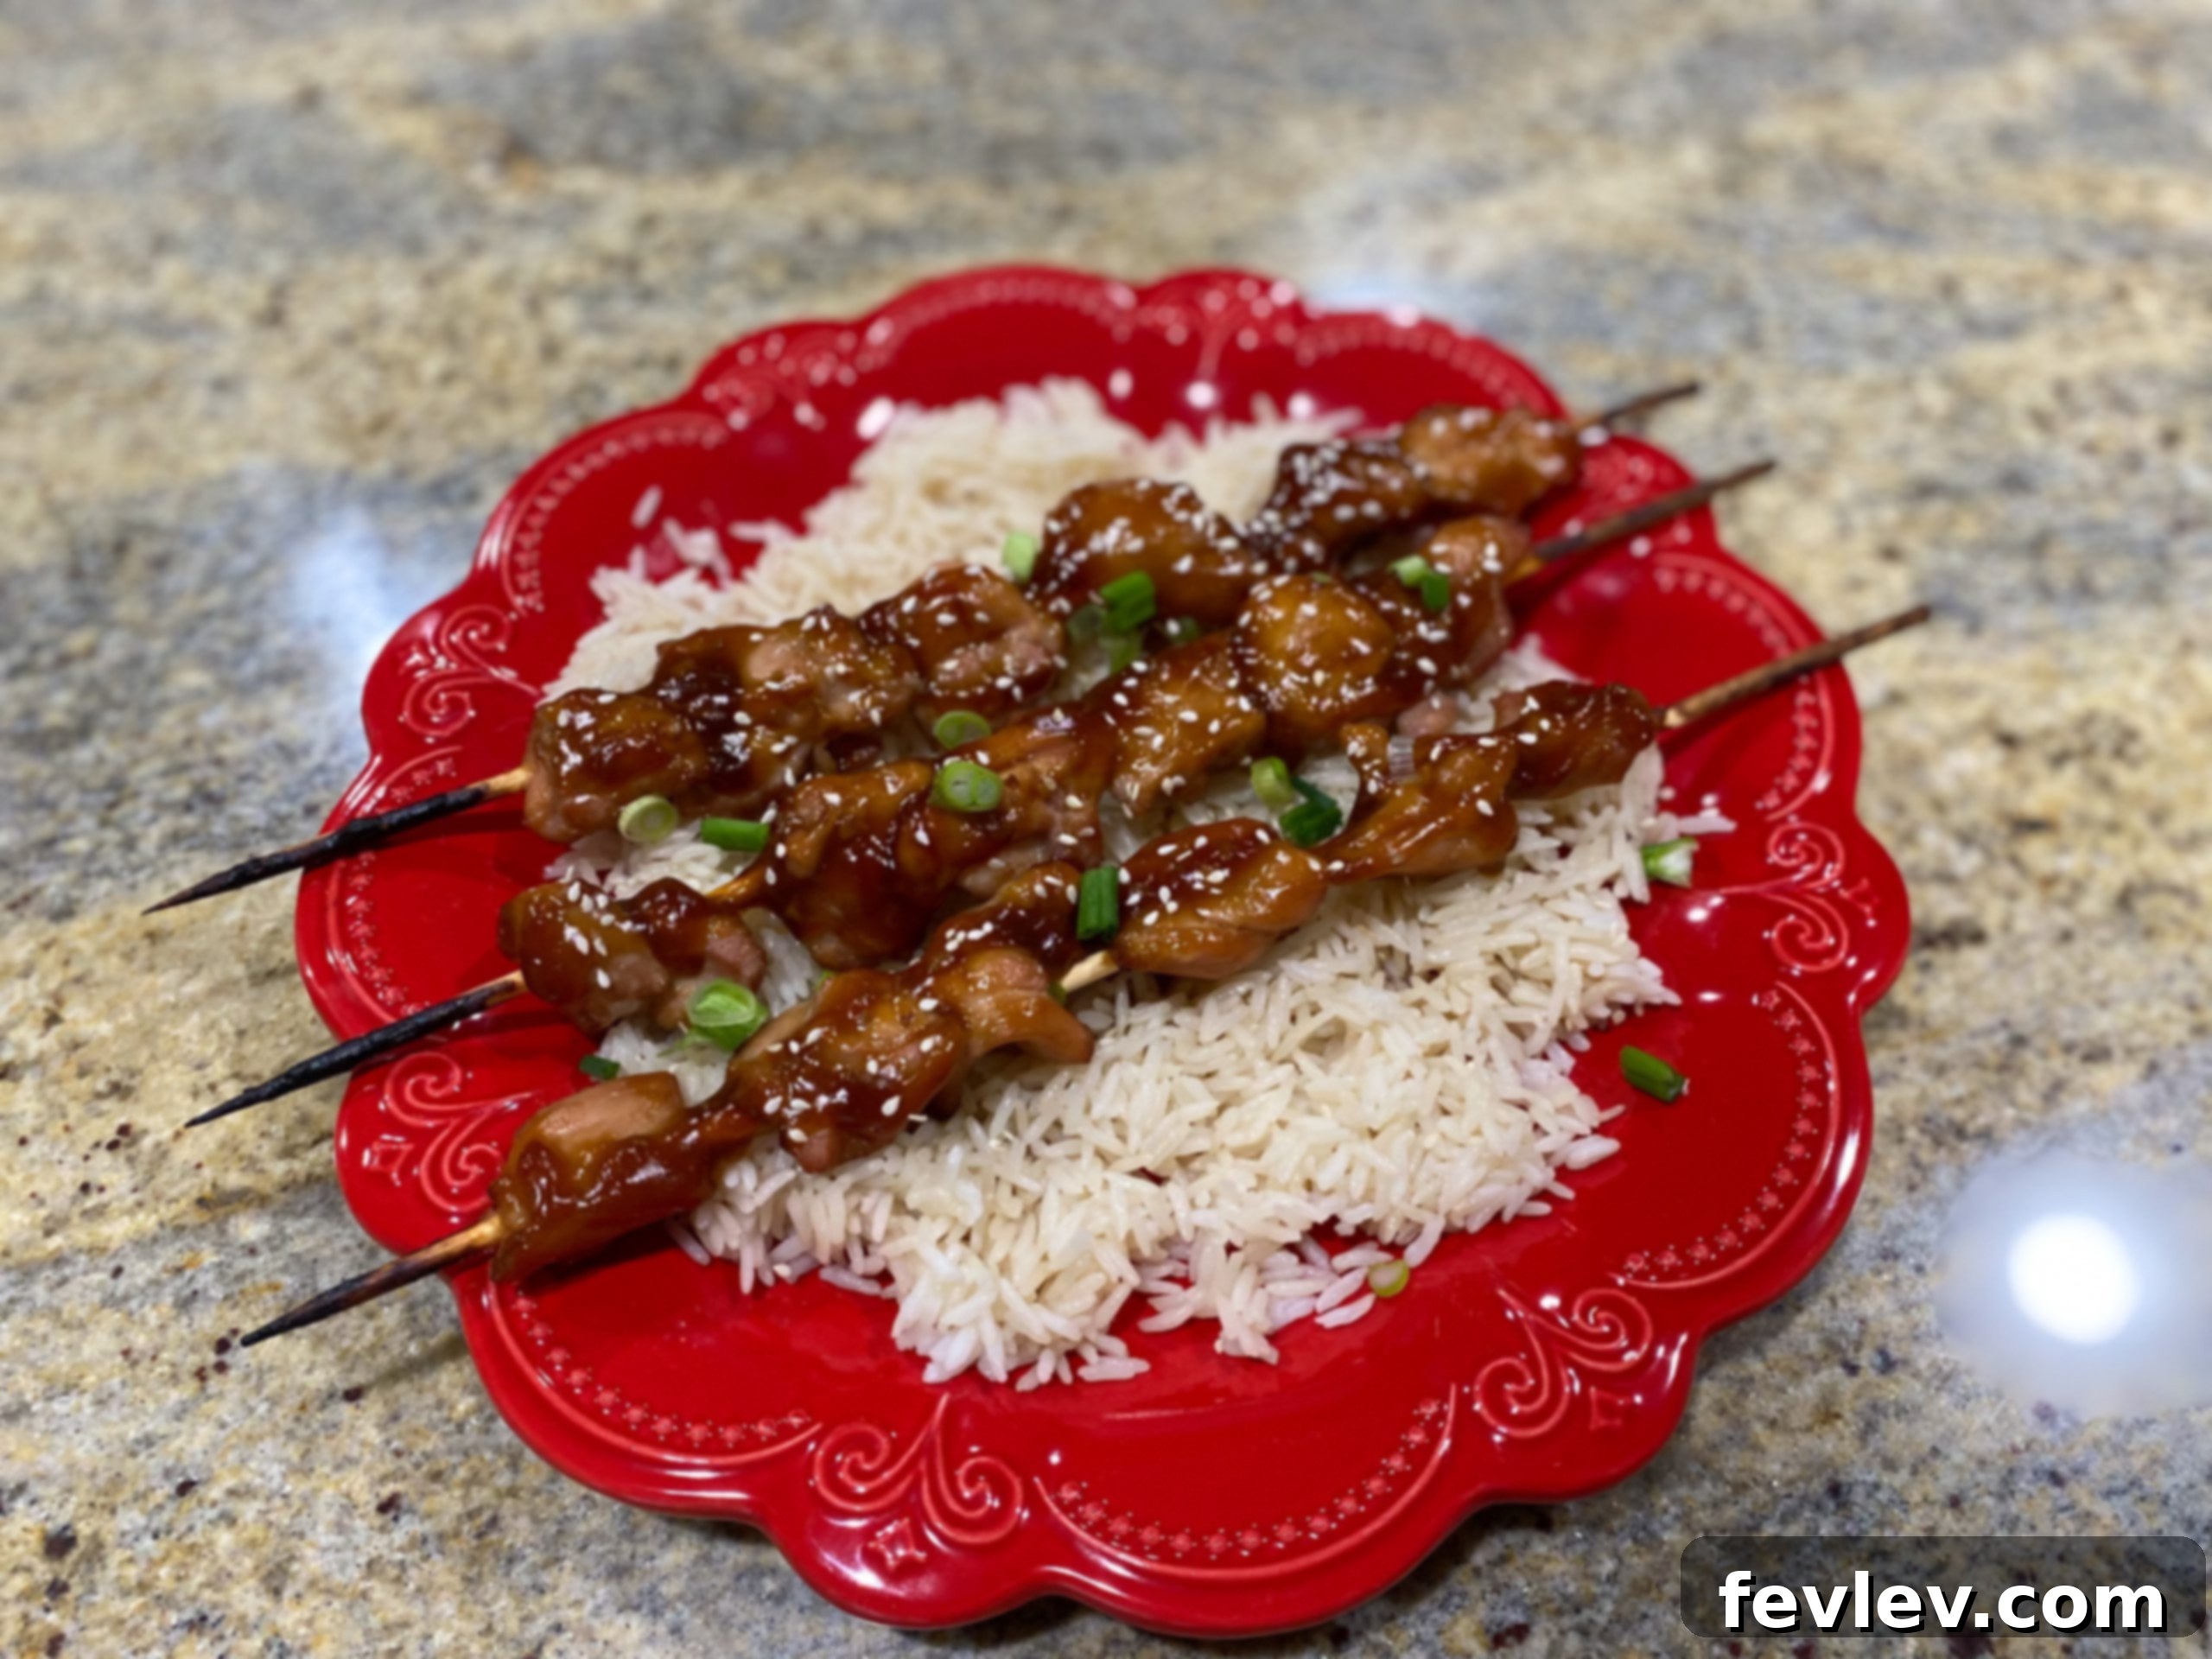
- Serve and Garnish with Flair: Once cooked, carefully remove the skewers from the oven or grill. Allow them to rest for a few minutes before serving. This helps the juices redistribute, ensuring maximum tenderness. Serve these delightful Teriyaki Chicken Skewers immediately over a warm, fluffy bed of rice. For an added burst of flavor and a touch of visual appeal, sprinkle generously with freshly sliced green onions and toasted sesame seeds. Enjoy your homemade masterpiece!
Expert Tips for Perfect Teriyaki Chicken Skewers & Exciting Variations
Elevate your Teriyaki Chicken Skewers from great to absolutely extraordinary with these practical tips and creative variations. Tailor this recipe to your taste and make it uniquely yours!
- Avoid Overcrowding Your Skewers: When threading the chicken onto the skewers, ensure there’s a small gap between each piece. Overcrowding can lead to uneven cooking, preventing proper browning and resulting in some pieces being steamed rather than roasted or grilled.
- Optimal Marinating Time is Crucial: While a minimum of 30 minutes is sufficient for flavor absorption, a longer marination period (ideally 2-4 hours) will yield noticeably more tender and deeply flavorful chicken. However, avoid marinating for more than 12 hours, as the acidity in the sauce, especially from the vinegar, can begin to break down the chicken’s proteins too much, leading to a mushy texture.
- Incorporate Colorful Vegetables: For a complete and visually appealing meal on a stick, consider threading vibrant vegetables onto your skewers alongside the chicken. Bell peppers (red, yellow, green), red onion wedges, pineapple chunks, zucchini slices, or cherry tomatoes are fantastic choices that add freshness, texture, and additional nutrients.
- Add a Spicy Kick: If you appreciate a bit of heat, infuse your teriyaki sauce with a pinch of red pepper flakes or a dash of your favorite chili garlic sauce or Sriracha. Start with a small amount and adjust to your preferred spice level.
- Make it Gluten-Free: It’s simple to adapt this recipe for a gluten-free diet. Just substitute regular soy sauce with tamari, which is a gluten-free alternative that offers a similar savory depth.
- Grilling vs. Baking – Choose Your Adventure: Both cooking methods are excellent, each offering a unique profile. Grilling imparts a wonderful smoky flavor and desirable char marks, while baking provides a consistent, even cook and a beautifully glazed finish. Choose the method that best suits your equipment and the weather!
- Always Check for Doneness: The safest and most accurate way to ensure your chicken is fully cooked and safe to eat is by using a meat thermometer. Chicken is done when it reaches an internal temperature of 165°F (74°C) in the thickest part of the meat.
- Prevent Sticking: Lightly oiling your grill grates or baking sheet (if not using parchment paper) will prevent the chicken and sauce from sticking, ensuring easy removal and presentation.
Delightful Pairings: What to Serve with Your Teriyaki Chicken Skewers
These versatile Teriyaki Chicken Skewers are a fantastic main course that pairs beautifully with a wide array of side dishes. Here are some of our favorite suggestions to create a well-rounded and incredibly satisfying meal:
- Classic Steamed Rice: A timeless choice! Fluffy white or nutritious brown rice acts as the perfect canvas, soaking up every drop of that irresistible teriyaki glaze.
- Healthier Grain Alternatives: For those looking for lighter options, quinoa or cauliflower rice are excellent, low-carb substitutes that still complement the flavors wonderfully.
- Vibrant Steamed or Roasted Vegetables: Enhance your meal with a side of fresh, crisp vegetables. Broccoli florets, tender snap peas, asparagus spears, or a colorful medley of stir-fried vegetables add texture, nutrients, and visual appeal.
- Asian Noodle Salad: A refreshing cold noodle salad, perhaps with a light sesame or ginger vinaigrette, can offer a delightful contrast to the warm, savory chicken.
- Crisp Cucumber Salad: A simple cucumber salad, often dressed with a light vinegar and sesame oil, provides a cool and crisp counterpoint to the rich teriyaki.
- Sweet Pineapple Chunks: The natural sweetness and acidity of fresh pineapple chunks not only enhance the teriyaki flavor but also add a wonderful tropical touch, especially if you’re grilling.
- Green Salad with Asian Dressing: A simple mixed green salad with a light ginger-sesame dressing can round out the meal beautifully.
Storing and Reheating Your Delicious Leftovers
If you’re lucky enough to have any Teriyaki Chicken Skewers left, rest assured that they store and reheat exceptionally well, making them an excellent choice for meal prepping throughout the week.
- Storage: Once cooled, transfer the cooked chicken skewers (you can remove the chicken from the skewers if preferred to save space) into an airtight container. Store them in the refrigerator for up to 3-4 days. This ensures freshness and safety.
- Reheating: To best preserve the flavor and texture, we recommend reheating your chicken using one of these methods:
- Microwave: For a quick reheat, place the chicken on a microwave-safe plate. Heat in 30-second intervals, stirring or flipping if necessary, until warmed through. Be cautious not to overcook, as this can dry out the chicken.
- Oven: For a more even reheat, place the skewers on a baking sheet, cover loosely with aluminum foil to prevent drying, and reheat in a preheated oven at 300°F (150°C) for 10-15 minutes, or until thoroughly heated.
- Stovetop: If the chicken has been removed from the skewers, you can sauté it in a lightly oiled pan over medium heat for a few minutes until warmed through. This method is great for restoring a slight crispness.
Nutrition Information
For those mindful of their dietary intake, here’s an approximate breakdown of the nutritional content per serving for these delightful Teriyaki Chicken Skewers. Please note that these values are automatically calculated and serve as an estimation.
Carbohydrates: 28g
Protein: 46g
Fat: 9g
Saturated Fat: 2g
Polyunsaturated Fat: 2g
Monounsaturated Fat: 3g
Trans Fat: 0.04g
Cholesterol: 215mg
Sodium: 976mg
Potassium: 673mg
Fiber: 0.3g
Sugar: 22g
Vitamin A: 55IU
Vitamin C: 1mg
Calcium: 48mg
Iron: 2mg
Please note: All nutrition information is automatically calculated based on typical ingredient values and should be used as an approximation. Actual values may vary depending on specific brands, preparation methods, and exact ingredient measurements.
Did You Try This Amazing Recipe?
Let us know how your Teriyaki Chicken Skewers turned out! Your invaluable feedback helps us continually improve our recipes and inspires other home cooks in our community. Share your experience, tips, or any creative twists you added below!
Share Your Thoughts & Experiences!
We’d love to hear from you! Whether you have a question, a helpful tip, or simply want to share how much you enjoyed these Teriyaki Chicken Skewers, please leave a comment below. Your culinary adventures are always welcome!