
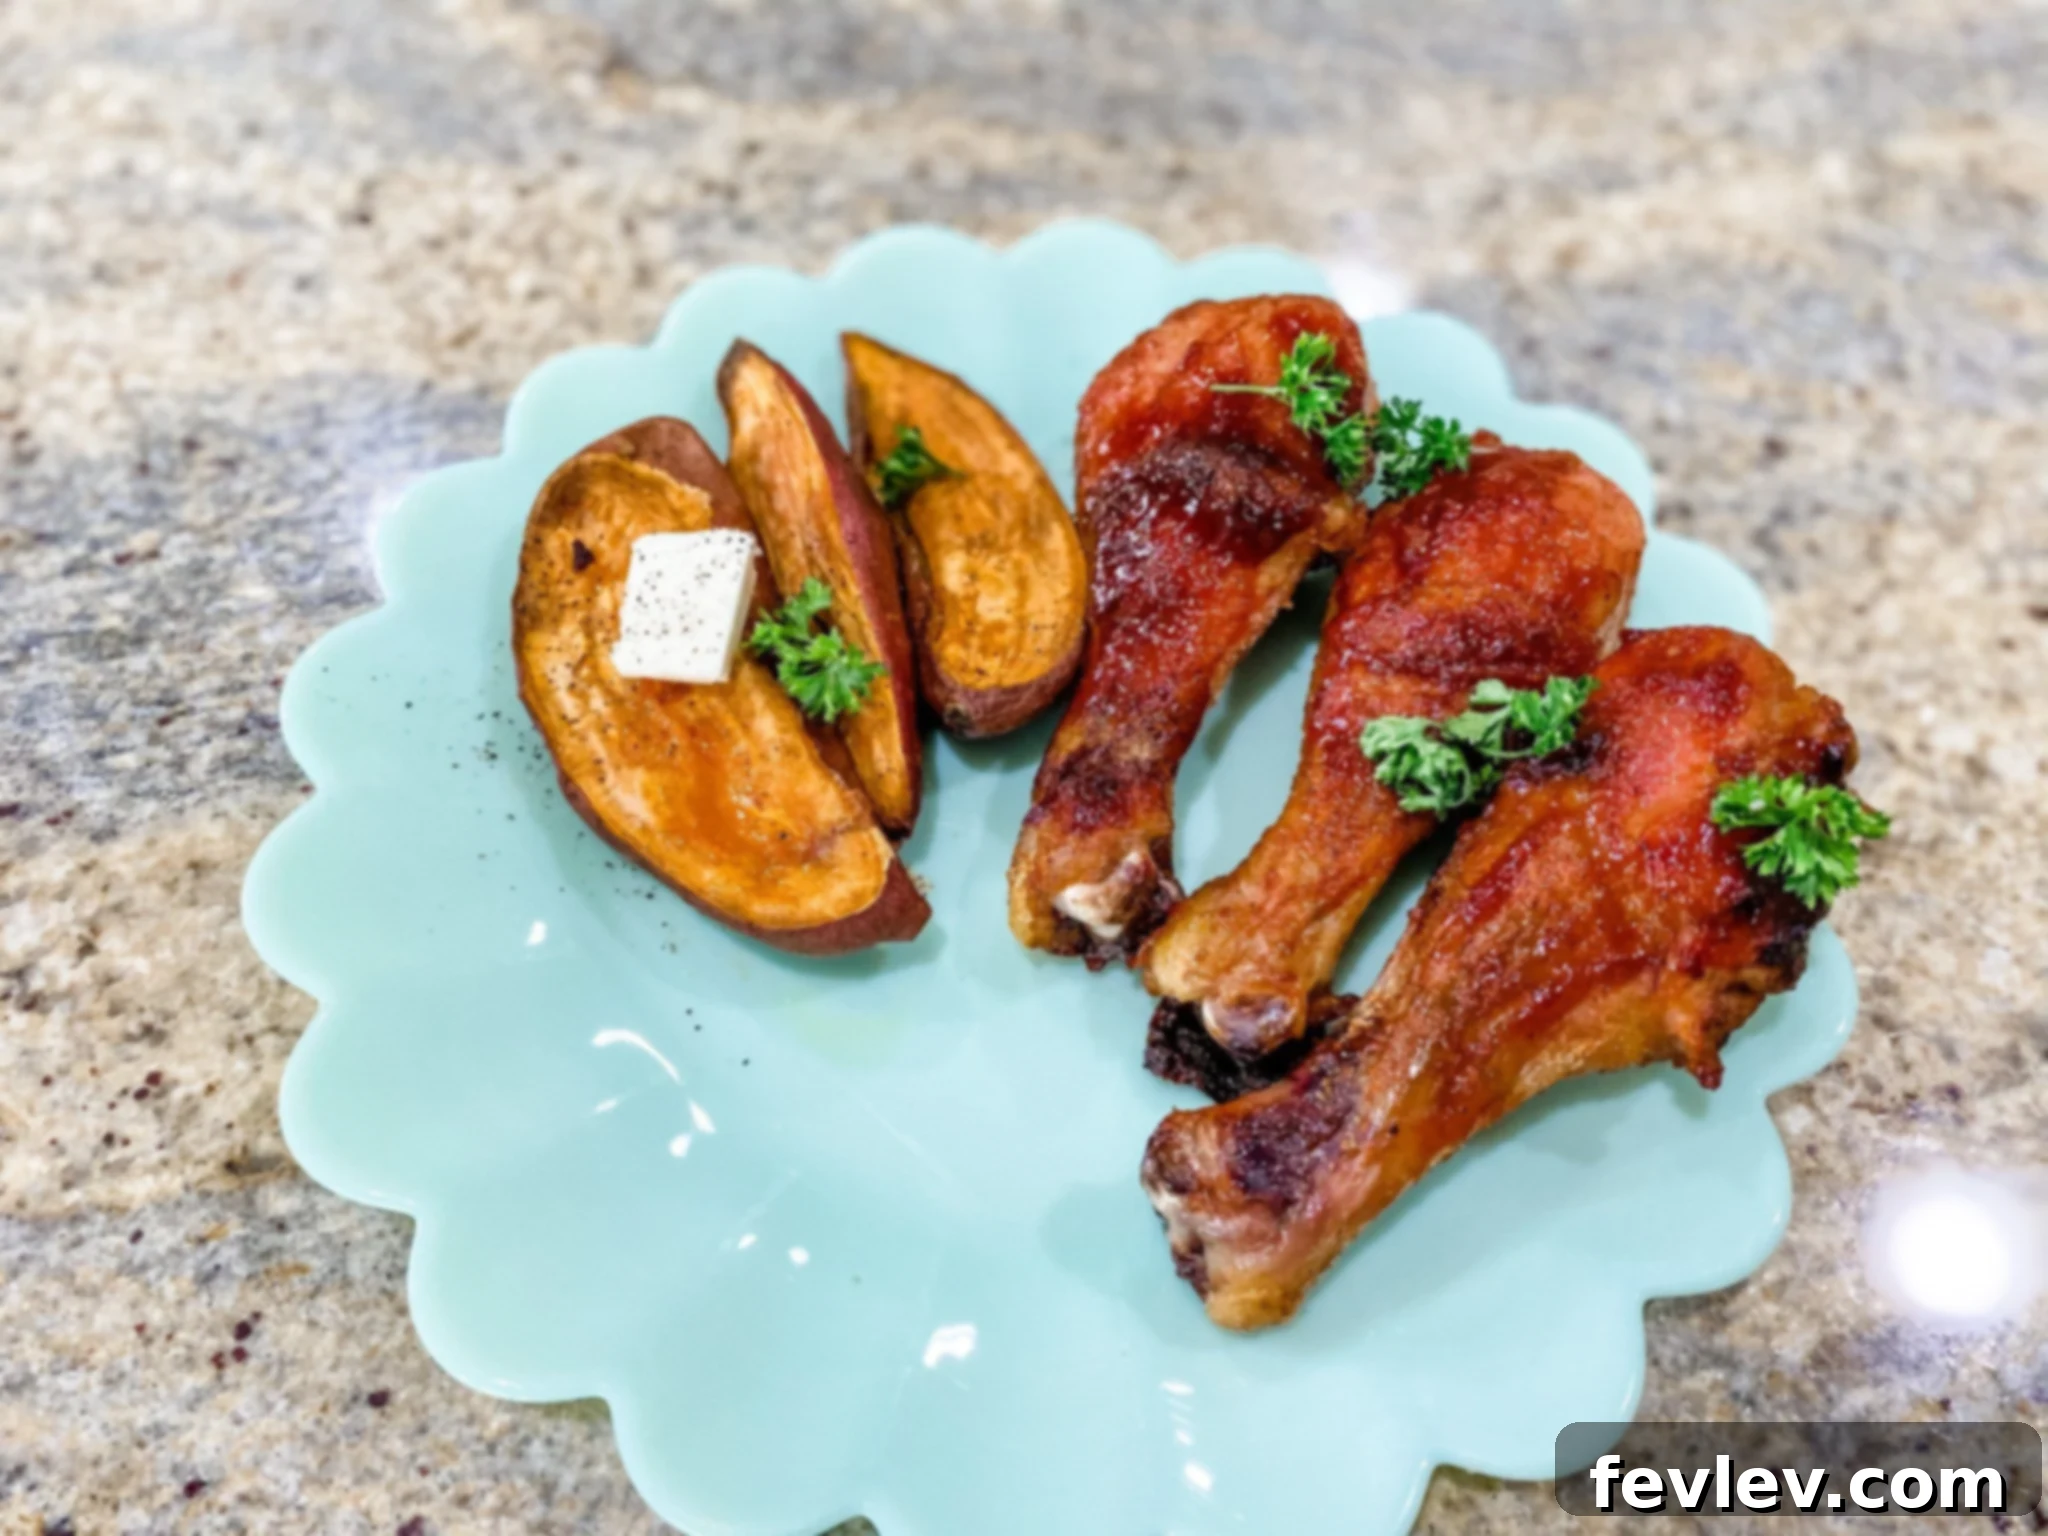
Sheet Pan BBQ Drumsticks: Your Ultimate Guide to Easy Oven-Baked Perfection
Transform your weeknight dinner routine with these incredibly simple yet profoundly flavorful Sheet Pan BBQ Drumsticks. This recipe brings the beloved taste of barbecue chicken right into your kitchen, no outdoor grill required! Each drumstick roasts to tender perfection, developing a mouth-watering, sticky, and smoky glaze that’s guaranteed to be a family favorite. With minimal preparation and even less cleanup, you can achieve a gourmet-level meal that tastes like it took hours, but comes together in just over an hour. Prepare to indulge in juicy chicken, coated in a homemade dry rub and your favorite BBQ sauce, all cooked conveniently on a single sheet pan.
Why These Sheet Pan BBQ Drumsticks Will Be Your New Go-To Recipe
In the culinary world, simplicity often leads to the most satisfying results, and these Sheet Pan BBQ Drumsticks are a perfect testament to that. We all crave delicious, comforting meals that don’t monopolize our time, and this recipe delivers exactly that. It’s designed for busy individuals and families who appreciate rich flavors and effortless execution. By utilizing a single sheet pan, you significantly cut down on cleanup, making weeknight dinners a breeze.
The beauty of oven-baked drumsticks lies in their ability to achieve a beautiful crisp on the skin while keeping the meat incredibly juicy and tender inside. The combination of a carefully crafted dry rub and a luscious BBQ sauce creates layers of flavor – from sweet and savory notes to a smoky finish that will make you forget the grill entirely. This dish is not just easy; it’s an experience. The aromas filling your kitchen as these drumsticks bake are simply irresistible, promising a meal that brings everyone to the table with anticipation. From the first bite of sticky, caramelized skin to the last tender morsel, these BBQ drumsticks are a culinary delight that proves extraordinary meals don’t have to be complicated.
Save This Recipe for Later!
Don’t miss out on your favorite recipes! Enter your email below to have this recipe sent directly to your inbox. Plus, you’ll receive our weekly newsletter packed with new, exciting culinary inspirations and cooking tips!
Essential Ingredients for Your Sticky BBQ Drumsticks
Creating these sensational BBQ drumsticks starts with a few simple, accessible ingredients. The magic happens when these components come together, infusing the chicken with unparalleled flavor. For the best outcome, choose fresh chicken drumsticks and your preferred brand of quality BBQ sauce. This recipe is designed to be flexible, allowing you to tailor the flavors to your family’s preferences.
Main Components
- 8 chicken drumsticks: Opt for drumsticks that are roughly similar in size to ensure even cooking. This usually amounts to about 2 to 3 pounds of chicken. Bone-in and skin-on drumsticks are crucial for that tender, juicy interior and crispy exterior.
- ½ cup BBQ sauce: The star of the show! Feel free to use any BBQ sauce you love. Whether you prefer a sweet honey BBQ, a spicy chipotle, or a tangy Carolina-style sauce, it will work wonderfully. This is where you can truly personalize the flavor profile of your dish.
Flavor-Packed Dry Rub
Our secret to deeply flavored drumsticks begins with this easy-to-make dry rub. It not only seasons the chicken but also helps create a beautiful, caramelized crust. Each spice plays a vital role in building a complex and irresistible taste. Adjust the quantities slightly if you desire more or less sweetness or heat.
- 3 tbs brown sugar: This is essential for the sweet and sticky caramelization on the chicken skin. It also balances the savory notes of the spices.
- 1 dash salt and pepper: Basic seasonings that enhance and bring out the best in all other flavors. A generous pinch of sea salt and freshly ground black pepper will make a noticeable difference.
- 1 tsp onion powder: Adds a subtle, savory depth without the moisture of fresh onions. It’s a foundational aromatic for many barbecue rubs.
- ½ tsp paprika: Contributes a mild, sweet pepper flavor and a lovely reddish hue to the chicken’s crust. For an added layer of smoky depth, consider using smoked paprika.
- 1 tsp garlic powder: A pungent and savory staple in any good rub, complementing the onion powder and adding a classic flavor profile.
Step-by-Step Guide to Oven-Baked BBQ Drumsticks
Preparing these Sheet Pan BBQ Drumsticks is straightforward, promising a delicious meal with minimal fuss. Follow these detailed instructions to achieve perfectly cooked, sticky, and flavorful chicken every time. Don’t rush, and enjoy the process of bringing this fantastic dish to life!
-
Step 1: Create Your Signature Dry Rub
Begin by combining all the dry rub ingredients in a small to medium-sized bowl. This includes the brown sugar, salt, pepper, onion powder, paprika, and garlic powder. Use a whisk or a fork to mix everything thoroughly, ensuring there are no lumps, especially from the brown sugar. A well-mixed rub guarantees that every drumstick receives a consistent burst of flavor, which is key to a truly delicious end product. Set this aromatic mixture aside.
-
Step 2: Prepare and Season the Chicken
Preheat your oven to a robust 400°F (200°C). Line a large, sturdy baking sheet with parchment paper. This step is essential for two reasons: it prevents the chicken from sticking to the pan, and it makes cleanup incredibly easy, especially once the BBQ sauce caramelizes. Pat your chicken drumsticks very dry with paper towels; this helps the skin get crispy and allows the rub to adhere better. Arrange the drumsticks on the prepared sheet pan, ensuring there is adequate space between each piece. Overcrowding the pan can lead to steaming instead of roasting, hindering crispy skin. Generously sprinkle and massage the dry rub over all surfaces of the chicken drumsticks, ensuring an even coating. Don’t be shy – this rub is where a lot of the initial flavor comes from!
-
Step 3: Bake to Perfection and Glaze with BBQ Sauce
Place the seasoned drumsticks in the preheated oven and bake for an initial 40 minutes. During this time, the chicken will begin to cook through, and the dry rub will form a beautiful, flavorful crust. After 40 minutes, carefully remove the sheet pan from the oven. Now, it’s time for the BBQ sauce magic! Using a pastry brush, generously coat the top side of each drumstick with your chosen BBQ sauce. Return the pan to the oven and continue baking for another 15 to 25 minutes. The exact time will depend on your oven and the size of the drumsticks. The chicken is fully cooked when its internal temperature reaches 165°F (74°C) when measured with a meat thermometer inserted into the thickest part, avoiding the bone. The BBQ sauce should be beautifully caramelized, sticky, and slightly bubbly. For an extra thick glaze, you can baste the drumsticks one more time during the final 10 minutes of cooking. Once done, let them rest for a few minutes before serving to allow the juices to redistribute.
Expert Tips for Making the Best BBQ Drumsticks
Achieving perfectly roasted, succulent BBQ drumsticks is easier than you think with these expert tips:
- Crispy Skin Secret: Always pat your chicken drumsticks thoroughly dry with paper towels before applying the rub. Excess moisture hinders crispiness.
- Space is Key: Ensure drumsticks are placed in a single layer with enough space between them on the baking sheet. This allows hot air to circulate, promoting even cooking and crispy skin. If your pan is too small, use two.
- The Power of Parchment Paper: While optional, lining your baking sheet with parchment paper is highly recommended. It prevents the sticky BBQ sauce from fusing to your pan, making cleanup a breeze.
- Doneness with Confidence: Invest in a reliable meat thermometer. Chicken drumsticks are fully cooked and safe to eat when they reach an internal temperature of 165°F (74°C) at their thickest point, away from the bone.
- Flavor Customization: Experiment with different types of BBQ sauce! A sweet honey BBQ, a spicy jalapeño BBQ, or a tangy mustard-based sauce can all dramatically change the flavor profile.
- Rest for Juiciness: After removing the chicken from the oven, let it rest on the sheet pan for 5-10 minutes. This allows the juices to redistribute throughout the meat, resulting in incredibly tender and moist drumsticks.
- Broil for Extra Char (Optional): For an even more caramelized and slightly charred finish, you can briefly broil the drumsticks for 1-2 minutes after the final baking stage. Keep a close eye on them to prevent burning due to the sugar in the BBQ sauce.
Perfect Pairings: What to Serve with BBQ Drumsticks
These flavorful BBQ drumsticks are incredibly versatile and pair beautifully with a wide array of side dishes. Whether you’re planning a casual family dinner or a backyard gathering, here are some ideas to complete your meal:
- Classic Comfort Sides: Coleslaw, creamy potato salad, baked beans, or homemade macaroni and cheese are timeless choices that complement the rich BBQ flavor perfectly.
- Fresh & Healthy Options: A crisp green salad with a light vinaigrette, roasted corn on the cob, steamed broccoli, or a vibrant cucumber and tomato salad offer a refreshing contrast.
- Starchy Staples: Serve alongside fluffy white rice, brown rice, quinoa, or roasted potatoes (such as baby potatoes or sweet potato wedges) for a satisfying and complete meal.
- Bread & Biscuits: Warm cornbread, soft dinner rolls, or garlic bread are excellent for soaking up any leftover delicious BBQ sauce.
- One-Pan Veggies: For ultimate convenience, add quick-cooking vegetables like bell peppers, zucchini, or asparagus to a separate sheet pan (or the same one if space allows, added later in cooking) for a full meal cooked with minimal effort.
Creative Variations to Customize Your Sheet Pan Chicken
While this recipe for Sheet Pan BBQ Drumsticks is a winner on its own, don’t hesitate to unleash your inner chef and experiment with these exciting variations:
- Amp Up the Heat: For those who love a spicy kick, add a pinch of cayenne pepper, a dash of smoked chipotle powder, or even a splash of your favorite hot sauce to the dry rub or directly into the BBQ sauce.
- Herbaceous Aromatics: Introduce dried herbs like thyme, rosemary, or oregano to the dry rub for an elevated aromatic profile. These herbs pair wonderfully with chicken and barbecue flavors.
- Different Chicken Cuts: This method isn’t exclusive to drumsticks! Feel free to use bone-in, skin-on chicken thighs, which have a similar cooking time. If using boneless, skinless chicken breasts or thighs, significantly reduce the initial baking time to prevent drying out; check for doneness around the 20-25 minute mark before saucing.
- Homemade BBQ Sauce: Take your drumsticks to the next level by crafting your own homemade BBQ sauce. This allows for complete control over the sweetness, tanginess, and spice, creating a truly unique culinary experience.
- Veggie Full Sheet Pan Meal: For a complete one-pan dinner, add robust vegetables that can withstand longer cooking times, such as quartered red potatoes, carrot chunks, or thick-cut onions, to the sheet pan during the first 30 minutes of baking. For faster-cooking vegetables like broccoli florets, asparagus spears, or bell pepper strips, add them during the last 20-25 minutes. Toss them lightly with olive oil, salt, and pepper before adding them to the pan.
- Gluten-Free Option: Ensure your chosen BBQ sauce is certified gluten-free, and this recipe remains a fantastic option for those with dietary restrictions.
Watch Julia Pacheco Prepare These Delicious Sheet Pan Dinners
Get a visual guide to making these fantastic sheet pan BBQ drumsticks! Join Julia Pacheco as she demonstrates the simple steps in her “Cheap & Fancy Sheet Pan Dinners” video series. Watching the techniques in action can provide extra confidence to ensure your chicken turns out perfectly golden, sticky, and utterly delicious.
Nutrition Information
Calories: 341kcal | Carbohydrates: 25g | Protein: 27g | Fat: 14g | Saturated Fat: 4g | Polyunsaturated Fat: 3g | Monounsaturated Fat: 6g | Trans Fat: 0.1g | Cholesterol: 139mg | Sodium: 529mg | Potassium: 452mg | Fiber: 1g | Sugar: 21g | Vitamin A: 273IU | Vitamin C: 0.3mg | Calcium: 37mg | Iron: 1mg
Please note: Nutrition information provided is automatically calculated and should be considered an approximation. Actual nutritional values may vary based on specific ingredients, portion sizes, and preparation methods used. This information is intended for general guidance only.
Frequently Asked Questions About Sheet Pan BBQ Drumsticks
Q: Can I use other chicken parts for this sheet pan recipe?
A: Yes, absolutely! This recipe is incredibly adaptable. While drumsticks are fantastic for their juiciness and flavor, you can certainly use other bone-in, skin-on chicken pieces like thighs. The cooking time for thighs will be very similar to drumsticks. If you prefer to use boneless, skinless chicken breasts or thighs, you’ll need to significantly reduce the initial baking time. For boneless cuts, begin with about 20-25 minutes before adding the BBQ sauce, and then continue baking until the chicken is cooked through. Always monitor boneless cuts closely to prevent them from drying out, as they cook much faster.
Q: What are the best tips to ensure my drumsticks have crispy skin?
A: Achieving delightfully crispy skin is one of the most satisfying aspects of this recipe! Here are a few key tips: First, it’s crucial to thoroughly pat the chicken drumsticks dry with paper towels before applying the dry rub. Any surface moisture will hinder the skin from crisping up. Second, ensure that you don’t overcrowd your baking sheet. Give each drumstick enough space for hot air to circulate around it; if they’re too close, they’ll steam rather than roast, resulting in soggy skin. If necessary, use two sheet pans. Lastly, baking at a relatively high temperature of 400°F (200°C) helps to render the fat under the skin and promote that coveted crispy texture. The brown sugar in the rub also contributes to a beautiful, caramelized crust.
Q: How should I store leftover BBQ drumsticks and reheat them?
A: Leftover Sheet Pan BBQ Drumsticks are just as delicious the next day! To store them, allow the chicken to cool completely, then place them in an airtight container in the refrigerator. They will keep well for 3-4 days. For reheating, the best method to retain some of that desirable crispiness is to place the drumsticks on a baking sheet and warm them in an oven preheated to 350°F (175°C) for about 15-20 minutes, or until they are heated through. While microwaving is a quicker option, it tends to make the skin less appealing and the meat can sometimes become a bit dry. A toaster oven can also work well for individual portions!
Q: Can I prepare the chicken ahead of time?
A: Yes, you can definitely do some prep work in advance! You can mix the dry rub ingredients and store them in an airtight container at room temperature for several weeks. You can also apply the dry rub to the chicken drumsticks up to 24 hours before baking. After rubbing, cover the drumsticks and refrigerate them. This actually allows the flavors to penetrate the chicken even more deeply. Just ensure they come to room temperature for about 20-30 minutes before baking for more even cooking.