
Easy Homemade Pizza Rolls: A Family Favorite Recipe with Frozen Dough
By: Julia Pacheco
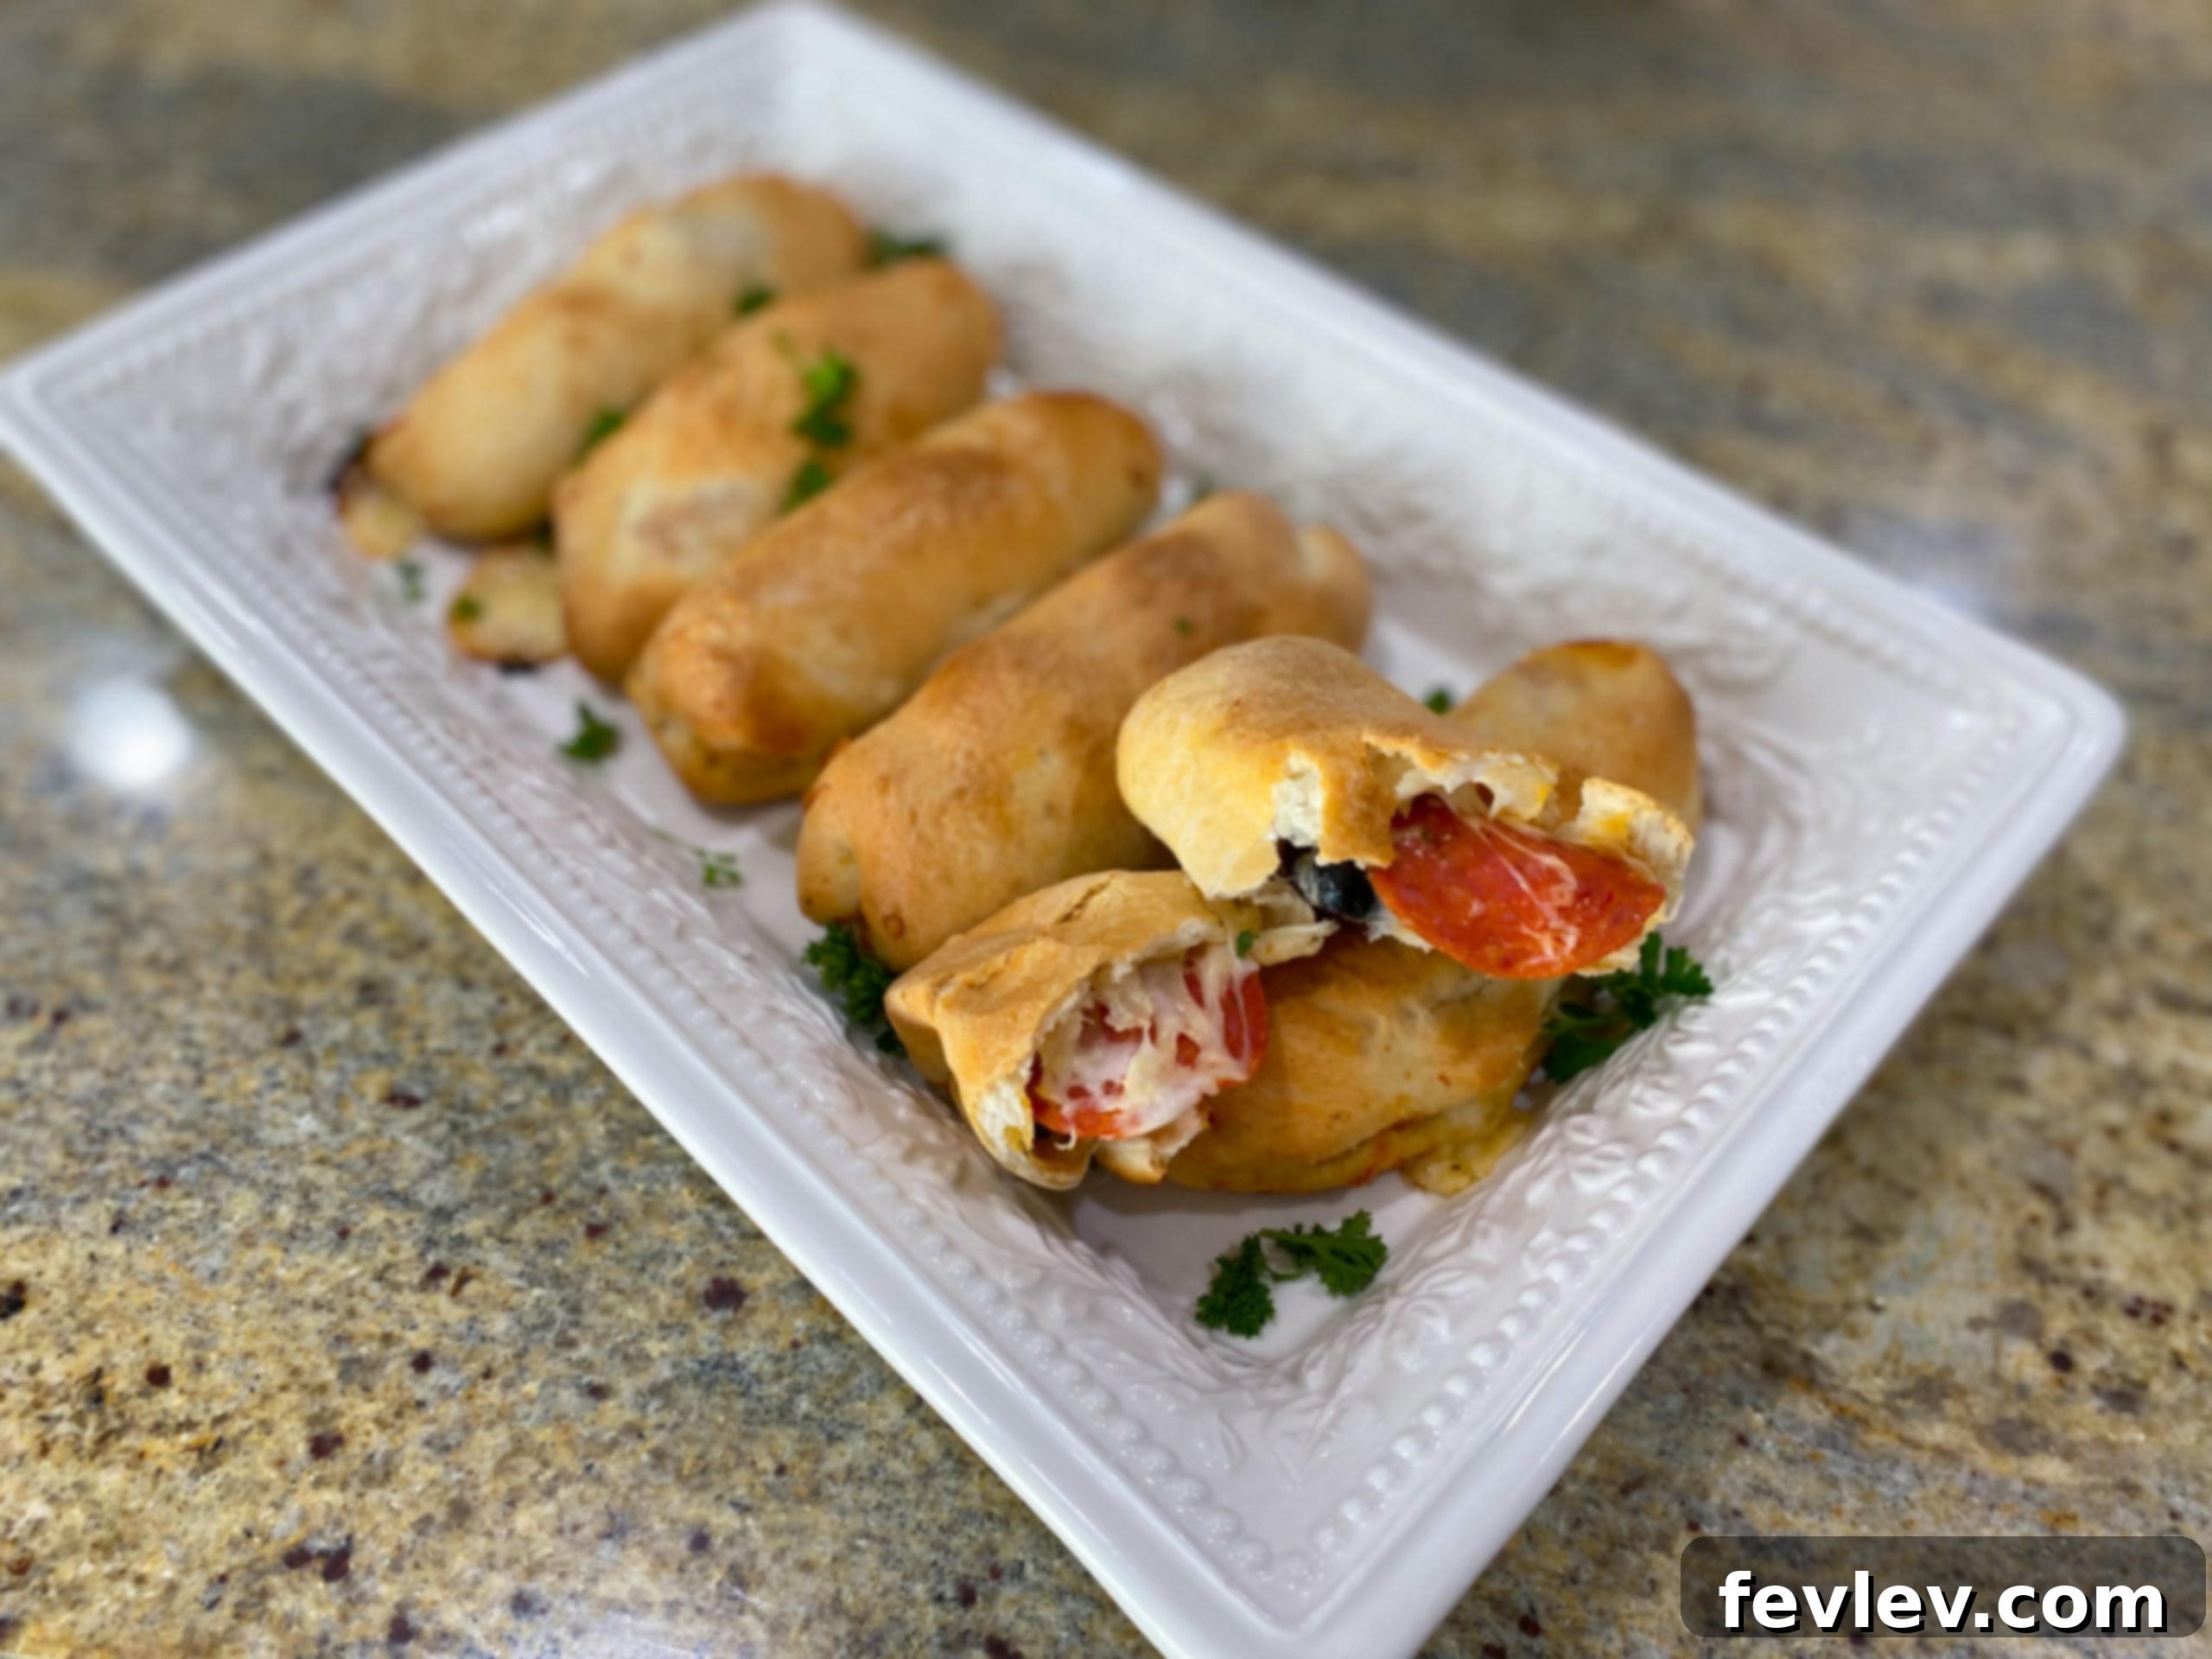
Transform simple frozen dinner rolls into unbelievably delicious homemade pizza rolls! These fluffy dough pockets, filled with gooey cheese and your favorite pizza toppings, are perfect as a snack, appetizer, or a fun dinner. Get ready for a treat that’s easy to make and a guaranteed crowd-pleaser for all ages.
30 mins
40 mins
1 hr 10 mins
6 servings
5 out of 5 stars (based on 2 reviews)
Leave a Comment
Print Recipe
Why You’ll Fall in Love with These Easy Homemade Pizza Rolls
Forget store-bought frozen options – making homemade pizza rolls is not only incredibly satisfying but also surprisingly simple, especially when you start with a clever shortcut like frozen dinner roll dough. This recipe offers a fantastic blend of convenience and deliciousness that will have everyone asking for more. Here’s why these pizza rolls will become a staple in your kitchen:
- Effortlessly Delicious: By utilizing pre-made frozen dough, you completely bypass the time-consuming process of preparing dough from scratch. This makes the recipe ideal for busy weeknights, last-minute cravings, or spontaneous gatherings. The outcome is a wonderfully fluffy, golden crust that perfectly encases all your cherished pizza flavors, delivering maximum taste with minimal effort.
- Customization at Its Best: Whether you’re a devout classic pepperoni enthusiast, a vibrant veggie lover, or someone who enjoys experimenting with unique topping combinations, these pizza rolls are exceptionally adaptable. Each individual roll can be a mini culinary adventure, allowing you to cater to diverse tastes and dietary preferences within your family or friend group.
- Perfect for Any Occasion: These versatile rolls seamlessly fit into almost any scenario. They can serve as a quick, delightful after-school snack, a universally appealing appetizer for game day celebrations, or even a fun, interactive main course for family dinner. Their handheld nature makes them easy to eat and significantly less messy than traditional pizza slices, ensuring they’re always a hit.
- Budget-Friendly & Wholesome: Crafting your own pizza rolls at home often proves to be significantly more economical than resorting to takeout or purchasing pre-packaged frozen snacks. You maintain full control over the ingredients, guaranteeing quality, freshness, and the ability to avoid artificial additives, all while keeping your food budget in check.
- Engaging for All Ages: This recipe presents a fantastic opportunity to involve children in the cooking process. The simple tasks of rolling out the dough, adding their favorite toppings, and carefully sealing the rolls can transform meal preparation into an enjoyable and educational activity for the entire family. It’s a wonderful way to foster a love for cooking and create cherished, lasting memories together.
Ingredients: Simple & Savory Fillings for Your Perfect Pizza Rolls
The true charm of these homemade pizza rolls lies in their straightforwardness and the quality of the ingredients you choose. Here’s a detailed look at what you’ll need to create these irresistible pockets of flavor, ensuring each bite is packed with deliciousness:
For the Rolls:
- 6 Rhodes Yeast Dinner Rolls, thawed to room temperature. These convenient, pre-portioned dough balls are an absolute game-changer, providing a consistently fluffy and delicious foundation for your pizza rolls. It’s crucial that they are completely thawed and pliable; this ensures they can be easily rolled out without tearing or springing back too much. If you can’t find Rhodes, any similar frozen yeast roll dough will work.
For the Classic Pizza Filling:
- 1/2 – 3/4 cup Shredded Mozzarella Cheese. This is the heart of any great pizza, delivering that iconic gooey, stretchy texture when melted. You can adjust the quantity based on how cheesy you like your rolls. For best results, use low-moisture, part-skim mozzarella.
- ¼ cup Grated Parmesan Cheese. Adds a wonderful sharper, saltier dimension that beautifully complements the mildness of the mozzarella, significantly enhancing the overall flavor profile of your pizza rolls. Freshly grated is always best if available.
- 1 tbs Italian Seasoning. Aromatic and essential, this blend typically includes oregano, basil, thyme, and rosemary. It’s what infuses your rolls with that quintessential, authentic pizza aroma and savory taste. Do not skip this; it makes a huge difference!
Optional Toppings: Unleash Your Creativity!
Here’s where you can truly make these pizza rolls your own. Remember to keep toppings finely diced or small to ensure they fit well within the rolls and cook evenly. If using meat, ensure it’s fully cooked and drained before adding.
- Pepperoni: Mini pepperoni slices are ideal for rolls, crisping up delightfully during baking and adding a savory, slightly spicy kick.
- Black Olives: Thinly sliced black olives contribute a distinct briny, salty flavor that pairs wonderfully with cheese.
- Sliced Ham: Finely diced cooked ham provides a satisfyingly savory and slightly smoky element, perfect for a heartier roll.
- Pineapple Chunks: For those who adore the sweet and savory Hawaiian pizza experience, small diced pineapple chunks add a juicy, tangy burst. Be sure to drain them well!
- Cooked Sausage or Ground Beef: Ensure any ground meats are thoroughly cooked, crumbled, and all excess grease is drained before incorporating them into your rolls.
- Diced Bell Peppers or Onions: For a fresh crunch and a touch of sweetness or pungency, finely diced bell peppers (any color) or onions are excellent additions.
- Mushrooms: Either sautéed and finely chopped or well-drained canned mushrooms can add an earthy depth.
- Jalapeños: For a spicy kick, add a few thinly sliced pickled jalapeños.
For Baking & Dipping:
- 1 tbs Olive Oil. This is brushed over the tops of the rolls before baking, which is key to achieving that beautiful golden-brown, slightly crispy crust and adding a subtle richness. An olive oil spray can also be used for convenience and lighter coverage.
- ½ cup Marinara Sauce, for dipping at the end. A warm, robust marinara or a classic pizza sauce makes the perfect, essential accompaniment for dipping your hot, cheesy pizza rolls. It adds another layer of classic pizza flavor.
Step-by-Step Instructions: Crafting Your Delicious Homemade Pizza Rolls
Creating these perfectly golden and incredibly delicious homemade pizza rolls is a straightforward and enjoyable process. Follow these detailed steps to ensure every roll is a success:
-
Step 1: Preheat Oven & Prepare Your Work Surface
Start by preheating your oven to a steady 400 degrees F (200°C). An accurately preheated oven is vital for even baking and achieving that desirable golden-brown, crispy crust. While the oven heats, prepare your workspace. Lightly grease a clean countertop or a large non-stick silicone baking mat with a generous amount of non-stick cooking spray or a thin layer of olive oil. This crucial step prevents the dough from sticking as you work, making the rolling process much smoother and easier to manage.
-
Step 2: Roll Out the Dough
Take each thawed Rhodes yeast dinner roll, one at a time, and place it on your prepared surface. Using a rolling pin, gently roll each dough ball out into a circular shape, aiming for a diameter of approximately 6 inches. Strive for an even thickness across the entire circle; this consistency is important for uniform baking and a pleasant texture in every bite. If the dough resists and springs back frequently, allow it to rest for a minute or two. This relaxation time helps the gluten relax, making it easier to roll without excessive effort.
-
Step 3: Fill and Season Each Roll
Once your dough circles are ready, it’s time for the delicious filling! Carefully spoon your desired fillings into the center of each rolled-out dough circle. Begin with a generous portion of the shredded mozzarella cheese, followed by the grated Parmesan. Then, add your chosen optional toppings, ensuring they are finely diced or small enough to be easily contained within the roll. A key tip here: avoid overfilling! While tempting, too much filling can make sealing the rolls difficult and may lead to cheese oozing out during baking, creating a messy pan. Finish this step by sprinkling a dash of Italian seasoning over the toppings in each roll; this enhances the authentic pizza flavor significantly.
-
Step 4: Securely Seal the Rolls
This step is critical for keeping all that cheesy goodness inside. To form each pizza roll, carefully fold one side of the dough over the fillings to meet the opposite side, creating a neat half-moon shape. Firmly pinch the edges of the dough together to seal them completely. For a more robust and secure seal, you can lightly dampen the edges of the dough with a tiny bit of water before pinching them together. Alternatively, you can roll them up more like a miniature burrito or a cinnamon roll, gently tucking in the ends before sealing. Whichever method you choose, ensure there are no visible gaps for the precious cheese to escape during baking.
-
Step 5: Prepare for Baking
Line a large baking sheet with parchment paper for effortless cleanup, or generously grease it with non-stick cooking spray. Arrange the sealed pizza rolls on the prepared sheet pan, making sure to leave a little space between each roll. This allows them to expand slightly during baking and ensures even heat circulation, leading to a beautifully golden crust all around. Next, lightly brush the tops of each pizza roll with olive oil. This step is indispensable for achieving that appealing golden-brown color and a wonderfully crisp exterior. If you prefer, an olive oil spray works just as effectively for this purpose.
-
Step 6: Bake to Golden Perfection
Carefully transfer the sheet pan with your prepared pizza rolls into your preheated oven. Bake them for approximately 11-13 minutes. During this time, the rolls will puff up, and their tops will turn a rich, inviting golden brown. It’s important to note that baking times can vary slightly depending on the nuances of your specific oven, so it’s a good practice to keep a watchful eye on them, especially during the final few minutes of baking. Once they reach that perfect golden hue, remove them promptly from the oven.
-
Step 7: Serve and Enjoy Your Masterpiece!
Although the aroma will be incredibly tempting, it’s vital to allow the pizza rolls to cool for a few minutes after they come out of the oven. The cheese inside will be molten hot and can cause burns if you bite in too soon. Once slightly cooled, serve them warm with a small bowl of your favorite marinara sauce for dipping. Get ready to enjoy your incredibly delicious, homemade pizza rolls that are sure to be a hit!
Expert Tips for Perfect Homemade Pizza Rolls Every Time
While this recipe is designed to be easy, a few expert tips can elevate your homemade pizza rolls from great to absolutely extraordinary. Follow these pointers for consistently perfect results:
- Optimal Dough Thawing: The key to working with frozen dinner roll dough is proper thawing. Ensure your rolls are fully thawed to room temperature but still cool enough to handle without becoming overly sticky or difficult to manage. If they become too warm, they can be harder to shape and roll effectively.
- Avoid Overfilling: This is a common mistake. While it’s tempting to pack in as much filling as possible, excessive toppings or cheese can make it incredibly challenging to seal the rolls securely. Overfilled rolls are also more prone to leakage during baking, leading to a messy pan and lost cheesy goodness. Stick to a moderate amount for each roll.
- Master the Seal: A secure seal is paramount to prevent any delicious fillings from escaping. After folding the dough, firmly pinch the edges together. For an extra layer of security, you can slightly dampen the edges of the dough with a tiny bit of water before pinching, which helps create a stronger bond. Using the tines of a fork to crimp the edges also provides an attractive, tight seal.
- Embrace Topping Variety: Don’t limit yourself to the basic suggestions! Feel free to get creative with your fillings. Experiment with different combinations like finely chopped cooked sausage, diced cooked ham, a mix of colorful bell peppers, or even a hint of red pepper flakes for a subtle heat. Always remember to pre-cook any meat toppings and drain any excess fat or moisture to prevent soggy rolls.
- Achieve Even Rolling: Strive to roll each dough circle to a consistent thickness. This attention to detail ensures that all your pizza rolls bake uniformly, resulting in a consistent texture and perfectly cooked dough in every single bite.
- The Magic of Olive Oil: Never skip brushing the tops of your rolls with olive oil before they go into the oven. This step is not just for flavor; it’s crucial for developing that irresistible golden-brown color and a delightfully crisp, slightly chewy exterior that makes homemade pizza rolls so appealing. An olive oil spray is a convenient alternative.
- Patience is a Virtue (Post-Bake): As tempting as it is to devour these hot, cheesy delights immediately, exercise a little patience. Allow the pizza rolls to cool for at least 5-10 minutes after removing them from the oven. The molten cheese inside will be extremely hot and can cause serious burns. A brief cooling period also allows the fillings to set slightly, making them easier and safer to enjoy.
Delicious Variations & Creative Customizations for Your Pizza Rolls
The true brilliance of homemade pizza rolls lies in their incredible versatility. They are a blank canvas for your culinary imagination, allowing you to tailor them to any taste preference or dietary need. Don’t hesitate to experiment with these exciting variations:
- The Ultimate Meat Lover’s Rolls: For those who crave hearty flavors, combine mini pepperoni, pre-cooked and crumbled Italian sausage, and finely diced cooked ham. A sprinkle of crispy bacon bits wouldn’t hurt either!
- Vibrant Veggie Supreme: Load up your rolls with finely diced bell peppers (red, green, and yellow for color), sautéed and finely chopped mushrooms, sliced black olives, and a touch of minced garlic or onion powder for extra depth.
- Tropical Hawaiian Twist: A delightfully sweet and savory combination of finely diced cooked ham and small, well-drained pineapple chunks. The key here is to ensure the pineapple is thoroughly drained to prevent excess moisture from making the dough soggy.
- Zesty Buffalo Chicken Rolls: Mix shredded cooked chicken (rotisserie chicken works perfectly) with a generous spoonful of your favorite buffalo sauce and a small amount of cream cheese to bind it. This creates a creamy, spicy, and incredibly flavorful filling.
- Mediterranean Spinach & Feta: For a more gourmet touch, combine sautéed and well-drained spinach with crumbled feta cheese and a hint of fresh garlic. A pinch of oregano will complete the Mediterranean profile.
- Spicy Jalapeño Popper Rolls: Mix softened cream cheese with chopped pickled jalapeños, a sprinkle of cheddar cheese, and some crispy bacon bits. This creates a wonderfully creamy, spicy, and smoky roll.
- Breakfast Pizza Rolls: A fantastic idea for brunch! Fill with scrambled eggs, cooked crumbled sausage or bacon, and cheddar cheese. Serve with a side of hot sauce or ketchup.
- Sweet Dessert Rolls (A Fun Spin!): While not traditionally “pizza,” this dough is excellent for sweet treats too. Fill with Nutella and mini marshmallows, or a dollop of apple pie filling mixed with cinnamon sugar for a delightful dessert.
Serving Suggestions: Elevating Your Pizza Roll Experience
These homemade pizza rolls are incredibly versatile and can grace your table in various enjoyable ways, transcending the simple snack category:
- The Quintessential Appetizer: Arrange your freshly baked pizza rolls artfully on a large platter. Provide small, separate bowls of warm marinara sauce, creamy ranch dressing, a zesty garlic Parmesan dip, or even a spicy arrabiata sauce for dipping. This presentation makes them an irresistible starter for any party or casual get-together.
- A Fun & Engaging Family Dinner: Transform these rolls into a complete, light, and interactive family dinner by pairing them with a vibrant, crisp green salad. The lightness of the salad balances the richness of the pizza rolls, creating a satisfying and enjoyable meal for everyone.
- The Ultimate Game Day Essential: When it comes to football Sundays, movie nights, or any informal gathering, pizza rolls are an absolute must-have. Their convenient, handheld nature makes them easy to snack on while socializing, and their universal appeal ensures they are always a resounding hit with guests of all ages.
- A Delightful Lunchbox Treat: Once cooled, these pizza rolls make a fantastic addition to school or work lunchboxes. They hold up well and offer a savory, satisfying alternative to traditional sandwiches, bringing a touch of excitement to midday meals.
- Party Platter Star: Consider serving them alongside other finger foods like mini quiches, bruschetta, or chicken wings for a diverse and exciting party spread.
Storage and Reheating Homemade Pizza Rolls: Enjoy Them Later!
One of the best things about homemade pizza rolls is that they can be prepared ahead of time or enjoyed as leftovers. Here’s how to properly store and reheat them to maintain their deliciousness:
- Refrigeration for Cooked Rolls: If you have any cooked pizza rolls remaining, allow them to cool completely to room temperature. Then, place them in an airtight container or a resealable bag and store them in the refrigerator for up to 3-4 days. This ensures they remain fresh and safe to eat.
- Freezing Cooked Rolls for Longer Storage: For extended storage, first ensure your cooked rolls have cooled down entirely. Arrange them in a single layer on a baking sheet and place the sheet in the freezer until the rolls are completely solid. This flash-freezing technique prevents them from sticking together. Once frozen solid, transfer the rolls to a freezer-safe bag or an airtight container. They can be stored in the freezer for up to 1-2 months.
- Freezing Unbaked Rolls (Meal Prep Friendly): You can also prepare the rolls up to the point where they are filled and sealed, but before baking. Brush them with olive oil as you normally would. Then, arrange them on a baking sheet and freeze until they are completely solid. Once frozen, transfer these unbaked rolls to a freezer-safe bag. When you’re ready to bake, there’s no need to thaw! Simply place the frozen rolls on a greased baking sheet and bake them in a preheated oven at 400°F (200°C) for approximately 15-20 minutes, or until they are golden brown and heated through. This is an excellent method for quick, fresh-baked snacks.
- Reheating Cooked Pizza Rolls:
- Oven (Recommended for Best Results): For the crispiest and best results, reheat frozen pizza rolls in a preheated oven at 350°F (175°C) for about 10-15 minutes. If reheating refrigerated rolls, about 5-8 minutes will suffice. This method helps restore their original crispiness.
- Air Fryer (Excellent for Crispiness): An air fryer is a fantastic tool for reheating pizza rolls and bringing back their crisp texture. Reheat them in an air fryer at 350°F (175°C) for 5-7 minutes, shaking the basket halfway through, until they are hot and crispy.
- Microwave (Quick but Softer): While the microwave is the fastest option, it generally results in a softer crust rather than a crispy one. Heat refrigerated rolls for 30-60 seconds, or until they are warm throughout. Add a few seconds for frozen rolls.
Watch the Recipe Video!
For visual guidance and more ingenious ways to utilize frozen dinner roll dough, watch Julia Pacheco’s comprehensive video. You’ll see exactly how to prepare these amazing pizza rolls and discover other creative applications for this versatile ingredient!
Nutrition Information (per serving)
- Calories: 189 kcal
- Carbohydrates: 22g
- Protein: 8g
- Fat: 8g
- Saturated Fat: 3g
- Polyunsaturated Fat: 1g
- Monounsaturated Fat: 4g
- Cholesterol: 10mg
- Sodium: 448mg
- Potassium: 132mg
- Fiber: 2g
- Sugar: 2g
- Vitamin A: 198 IU
- Vitamin C: 1mg
- Calcium: 188mg
- Iron: 2mg
Please note: Nutrition information is an estimate calculated automatically and is provided for informational purposes only. Actual values may vary significantly based on specific brands of ingredients used, portion sizes, and preparation methods. It should not be considered professional dietary advice.
We’d Love to Hear From You!
Have you tried this incredibly easy homemade pizza roll recipe? We encourage you to share your experience! Let us know how they turned out, what amazing toppings you chose, and any personal tips or customizations you discovered in the comments section below. Your feedback and creativity inspire us and our community of home cooks!
Don’t forget to Pin this recipe to save it for later and share it with your friends and family!